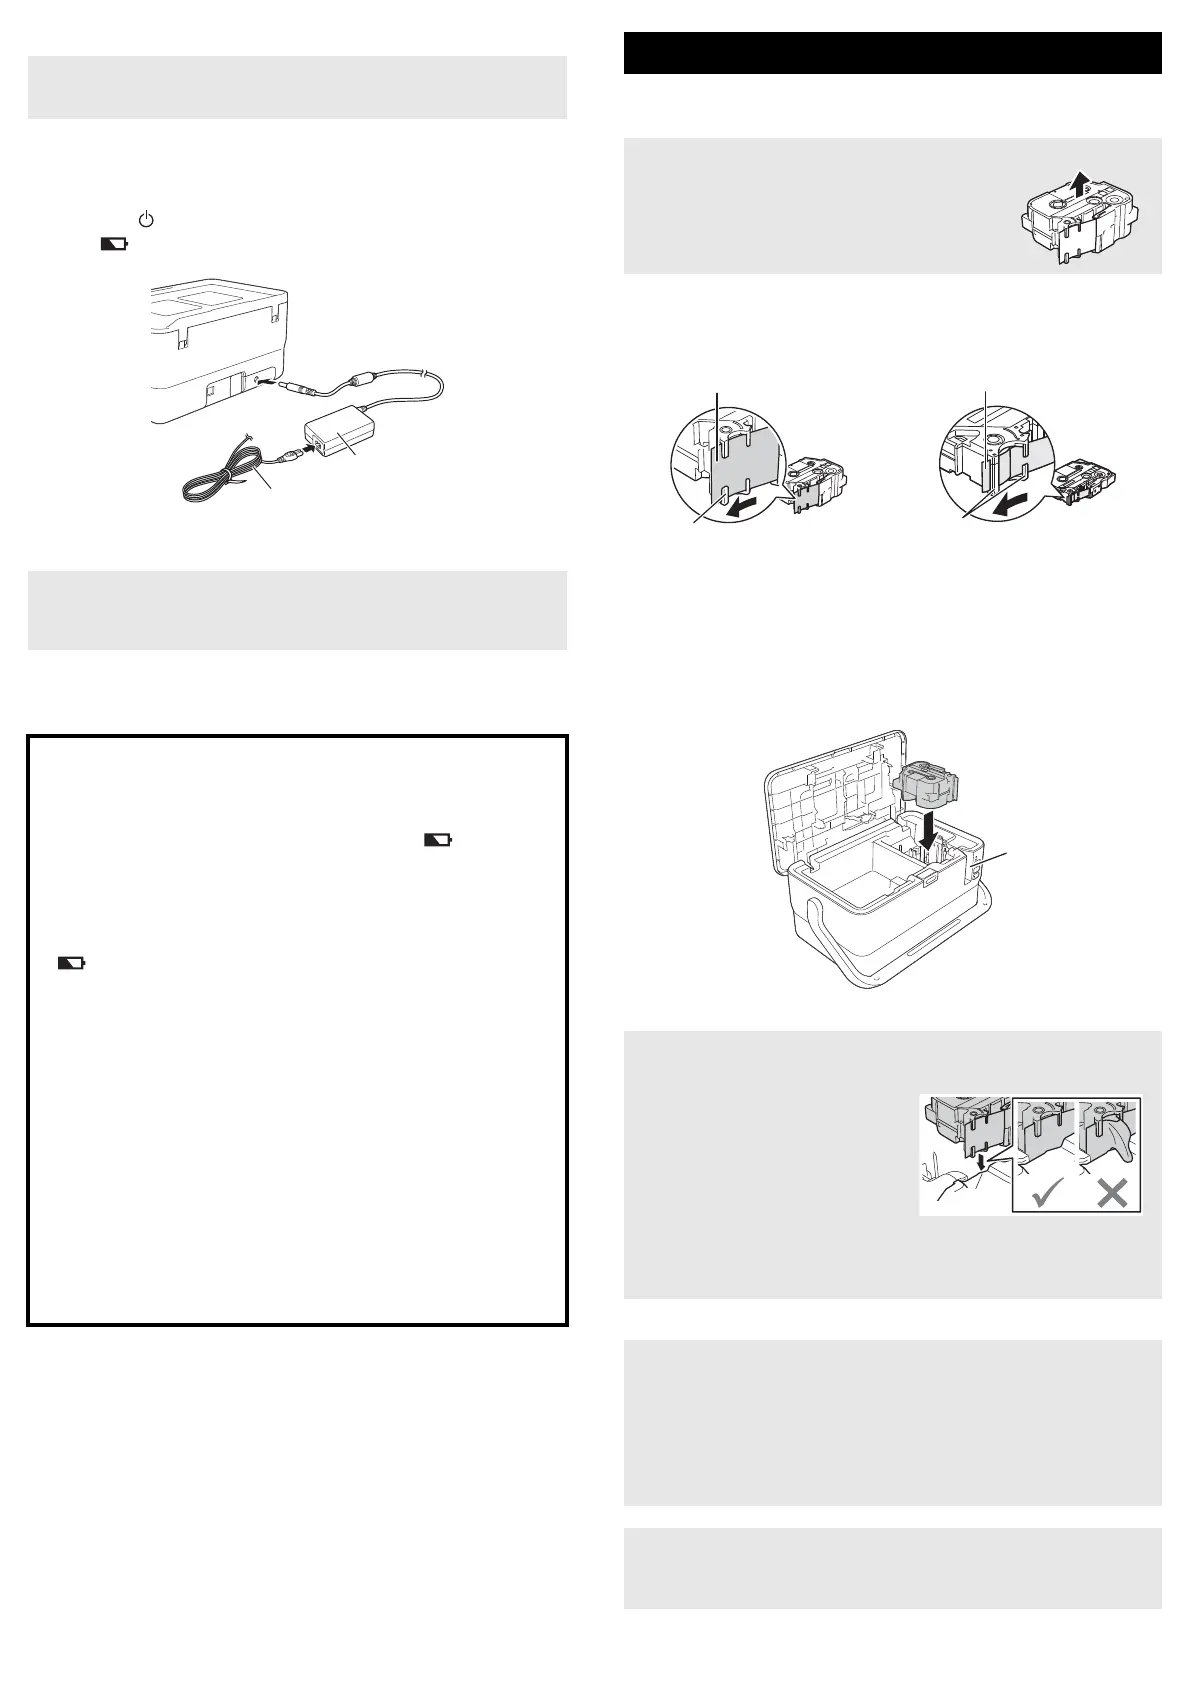
Charging the Rechargeable Li-ion Battery
1. Make sure the battery is installed in the machine.
2. Use the AC adapter and power supply cord to connect the machine to
an electrical socket.
Press the (Power) button to turn the machine on if it is not on already.
The (Battery) indicator lights in orange during charging, and it goes
off when the battery is fully charged.
Stopping Rechargeable Li-ion Battery Charging
To stop the battery charging, disconnect the AC adapter.
The TZe tape, FLe label and HSe tube cassettes can be used in your P-touch
labelling machine.
1. Check that the end of the tape is not bent and that it passes through the
tape guide. If it does not, pass it through the tape guide as shown in the
illustration.
2. Press the cover open button to open the top cover.
3. Insert the tape cassette into the tape cassette compartment with the end
of the tape facing the machine’s tape exit slot, then push down evenly
until the tape cassette is installed correctly.
4. Close the top cover.
• Before use, fully charge the battery.
• Up to three hours may be needed to fully charge the battery.
1 AC adapter
2 Power supply cord
Although the charging stops if the machine is used to print, feed, or
perform another operation, the charging will start again automatically
after the operation is finished if the charging is not completed.
Notes on Using the Rechargeable Li-ion Battery
Before use, fully charge the battery. Do not use it before it is fully
charged.
The battery charging must take place in environments between 0°C and
40°C, otherwise the battery will not charge, and the (Battery)
indicator will remain lit. If the charging stops because the environment
temperature is too low or too high, place the machine with a temperature
between 0°C and 40°C and try charging again.
If the machine is used to print, feed, or perform another operation when
both the battery is installed and the AC adapter is connected, the
(Battery) indicator may turn off and charging may stop even if the
battery is not fully charged.
Rechargeable Li-ion Battery Characteristics
To ensure the highest performance and longest life from the battery:
Do not use or store the battery in a location exposed to extreme high or
low temperatures as it may discharge more quickly. This may happen
when using a rechargeable Li-ion battery with a high charge (90%
charged or more) in a location exposed to high temperatures.
Remove the battery when storing the machine for long periods of time.
Store a battery with less than a 50% charge in a cool dry place out of
direct sunlight.
Recharge the battery every six months if it is stored for long periods of
time.
If you touch a part of the machine while the Li-ion battery is charging,
that part of the machine may feel warm. This is normal, and the machine
may be used safely. However, if the machine becomes extremely hot,
discontinue use.
Inserting a Tape Cassette
If the new tape cassette has a cardboard stopper,
be sure to remove the stopper before inserting the
cassette.
1 End of tape
2 Tape guides (The actual shape may be different depending on
the tape width.)
1 Tape exit slot
• When inserting the tape cassette, make sure that the tape and ink
ribbon do not catch on the print head.
• Make sure that there is no slack in
the tape, and then carefully insert
the tape cassette. If there is slack
in the tape, the tape will catch on
the protrusion (2) when the
cassette is inserted and become
bent or wrinkled, causing the tape
to jam.
To fix the slack in the tape, refer to
the illustration in step 1 and pull the tape outside of the tape guide.
• When removing the tape cassette, make sure that the tape does not
catch on the protrusion (2).
• Do not pull the label when the machine is ejecting it from the
tape exit slot. Doing so will cause the ink ribbon to be discharged
with the tape. The tape may no longer be functional after the ink
ribbon discharges.
• Store tape cassettes in a cool dark location, away from direct sunlight
and high temperature, high humidity, or dusty locations. After
opening the sealed package, use the tape cassette as quickly as
possible.
Extra Strength Adhesive Tape:
• For rough and textured surfaces, we recommend using Extra
Strength Adhesive Tape.
2
1
2
 Loading...