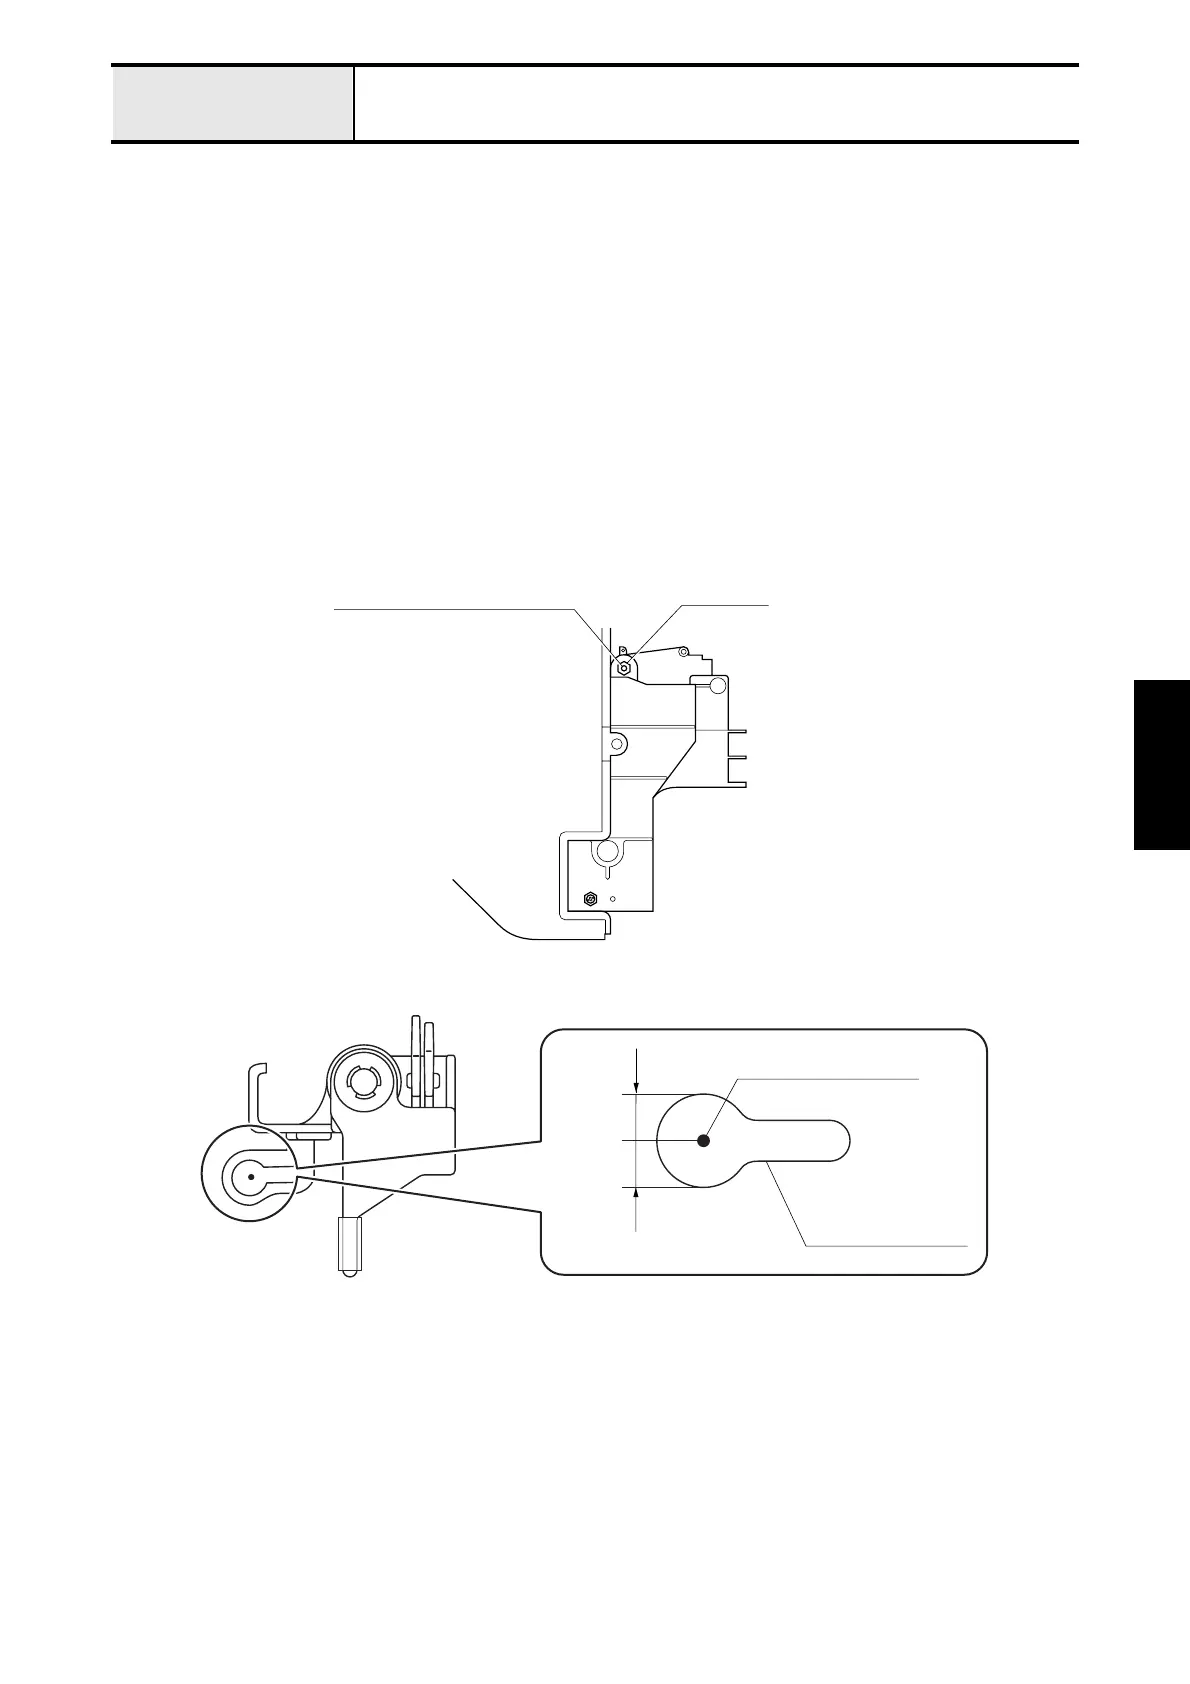
EasyManuals Logo

Brother PE770 User Manual

Brother PE770
234 pages
To Next Page IconTo Next Page
To Previous Page IconTo Previous Page
Page #178 background imageLoading...
Page #178 background image
4 - 17
Adjustment
Adjustment
Needle and presser foot front/back position
[Adjustment standard]
The needle top drops in the center position (front/back) of the presser foot hole.
[Adjustment procedure]
1. Remove the face plate assy..
2. Attach the J presser foot, and then lower the presser foot lever.
3. Turn the pulley by hand, and drop the needle top into the presser foot hole.
4. Loosen the lock nut.
5. Adjust the needle top to the center position (front/back) of the presser foot hole using the socket screw (CP,
M4x12).
6. Tighten the lock nut. (tightening torque: 0.39 to 0.49N·m)
*Key point
Need to adjust “4-13 Clearance between needle and rotary hook point” after this adjustment.
Lock nut
Rear of main unit
Socket screw (CP, M4x12)
Presser foot hole
a
a = b
b
Needle top position

Table of Contents

Other manuals for Brother PE770

Questions and Answers:

Question and Answer IconNeed help?

Do you have a question about the Brother PE770 and is the answer not in the manual?

Brother PE770 Specifications

General IconGeneral
AC input voltage110 V
Power supply typeElectric
DisplayLCD
InterfaceUSB
Control typeSensor
Sewing speed650
Product colorViolet, White
Buttonhole type-
Number of fonts6
Wire cutter includedYes
Sewing machine functionsEmbroidery
Automatic needle threaderNo
Number of illumination LEDs2
Number of embroidery designs136
Weight and Dimensions IconWeight and Dimensions
Depth438.9 mm
Width540 mm
Height425.9 mm

Related product manuals