G
gregorylaneSep 5, 2025
What to do if my Brother S-7250A thread breaks during backtack sewing?
- DDalton FinleySep 5, 2025
If the thread breaks during backtack sewing, use the panel to reduce the backtack sewing speed.
What to do if my Brother S-7250A thread breaks during backtack sewing?
If the thread breaks during backtack sewing, use the panel to reduce the backtack sewing speed.
Why is the thread tightening around X-over seam areas on my Brother S-7250A Sewing Machine?
If the thread is tightening around X-over seam areas, try increasing the feed dog height.
What to do if my Brother Sewing Machine is forming large bird's nests at the sewing start?
If large bird's nests are forming when you start sewing, try increasing the tension of the pre-tension.
What to do if my Brother S-7250A has loops appear in seam?
To resolve loops appearing in the seam, polish the thread path smooth with a fine grain file or sandpaper. Also, check the lower thread for slackness and replace the bobbin or bobbin case if needed. You might also try pressing the special locus key and selecting No. 1.
What to do if my Brother Sewing Machine has a large degree of puckering (Thread is too tight)?
To address excessive puckering due to tight thread, try these adjustments: Weaken both the upper and lower thread tension as much as possible. Replace the needle if it is blunt, using the thinnest needle possible. Reduce the thread take-up spring tension and lower its position. Adjust the presser foot pressure. Gradually reduce the sewing speed and slightly tilt the front of the feed dog down.
What to do if my Brother S-7250A Sewing Machine has uneven seam?
To fix an uneven seam, you can adjust the presser foot pressure or the feed dog height. Also, smooth the bobbin with an oiled grindstone or replace it.
What to do if my Brother S-7250A Sewing Machine lower thread is tangled at the sewing start?
If the lower thread is tangling when you start sewing, try these solutions: ensure the bobbin turns in the opposite direction to the rotary hook. The bobbin winding amount should not be more than 80 %. Attach the anti-spin spring. If the bobbin is not turning smoothly, replace it. Use only bobbins which are specified by Brother.
What to do if my Brother S-7250A shows error code?
If an error code displays, make a note of the error code and then turn off the power.
Why is my Brother S-7250A upper thread not tight?
If the upper thread isn't tight, adjust the lower or upper thread tension. You can also try pressing the special locus key and selecting No. 1.
Why is my Brother S-7250A lower thread not tight?
If the lower thread isn't tight, try adjusting either the lower thread tension or the upper thread tension.
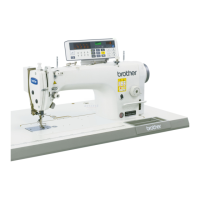
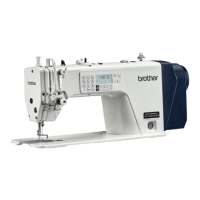
| Type | Industrial Sewing Machine |
|---|---|
| Model | S-7250A |
| Stitch Type | Lockstitch |
| Max Sewing Speed | 5, 000 stitches per minute |
| Stitch Length | 5 mm |
| Needle Bar Stroke | 30.7 mm |
| Lubrication | Automatic |
| Motor Type | Direct Drive |
Explains DANGER, WARNING, CAUTION levels and symbols used for safety.
Covers environmental and installation safety precautions for machine use.
Safety tips for sewing, cleaning, and maintenance tasks.
Details the various warning labels found on the sewing machine.
Lists key technical specifications of the sewing machine.
Covers machine placement, carrying, and head tilting procedures.
Provides diagrams for table modification and initial setup components.
Instructions for installing rubber cushions and the machine head.
Step-by-step guide for adjusting the knee lifter mechanism.
Guide on how to properly lubricate the sewing machine.
Details on connecting various machine cords and ensuring proper grounding.
Identifies operation panel components and their basic functions.
Explains functions of specific keys like thread trimming and slow start.
Instructions for performing start, end, and continuous backtack stitches.
How to set sewing pitch, switch display modes, and adjust sewing speeds.
Procedures for setting counters, locus, and memory switch parameters.
Overview of setting basic functions like needle stop, thread trimming, slow start.
How to create, set up, and sew custom design stitches.
Guide on USB data transfer and resetting all settings to defaults.
Details on hand switch functions, including correction sewing.
Recommended daily cleaning tasks for machine maintenance.
How to adjust the position of the arm thread guide R.
Steps to adjust the presser foot height.
Procedure for adjusting the feed dog height.
How to adjust the angle of the feed dog.
Steps to adjust the needle bar height.
Procedures for setting needle, feed, and rotary hook timing.
How to adjust the amount of oil for rotary hook lubrication.
Steps for adjusting thread trimming mechanisms.
Thread trimming adjustment for short trailing specifications.
Common sewing issues and their remedies, categorized by problem.
Explains error codes and their troubleshooting steps.
Shows the characters displayed on the 7-segment display.