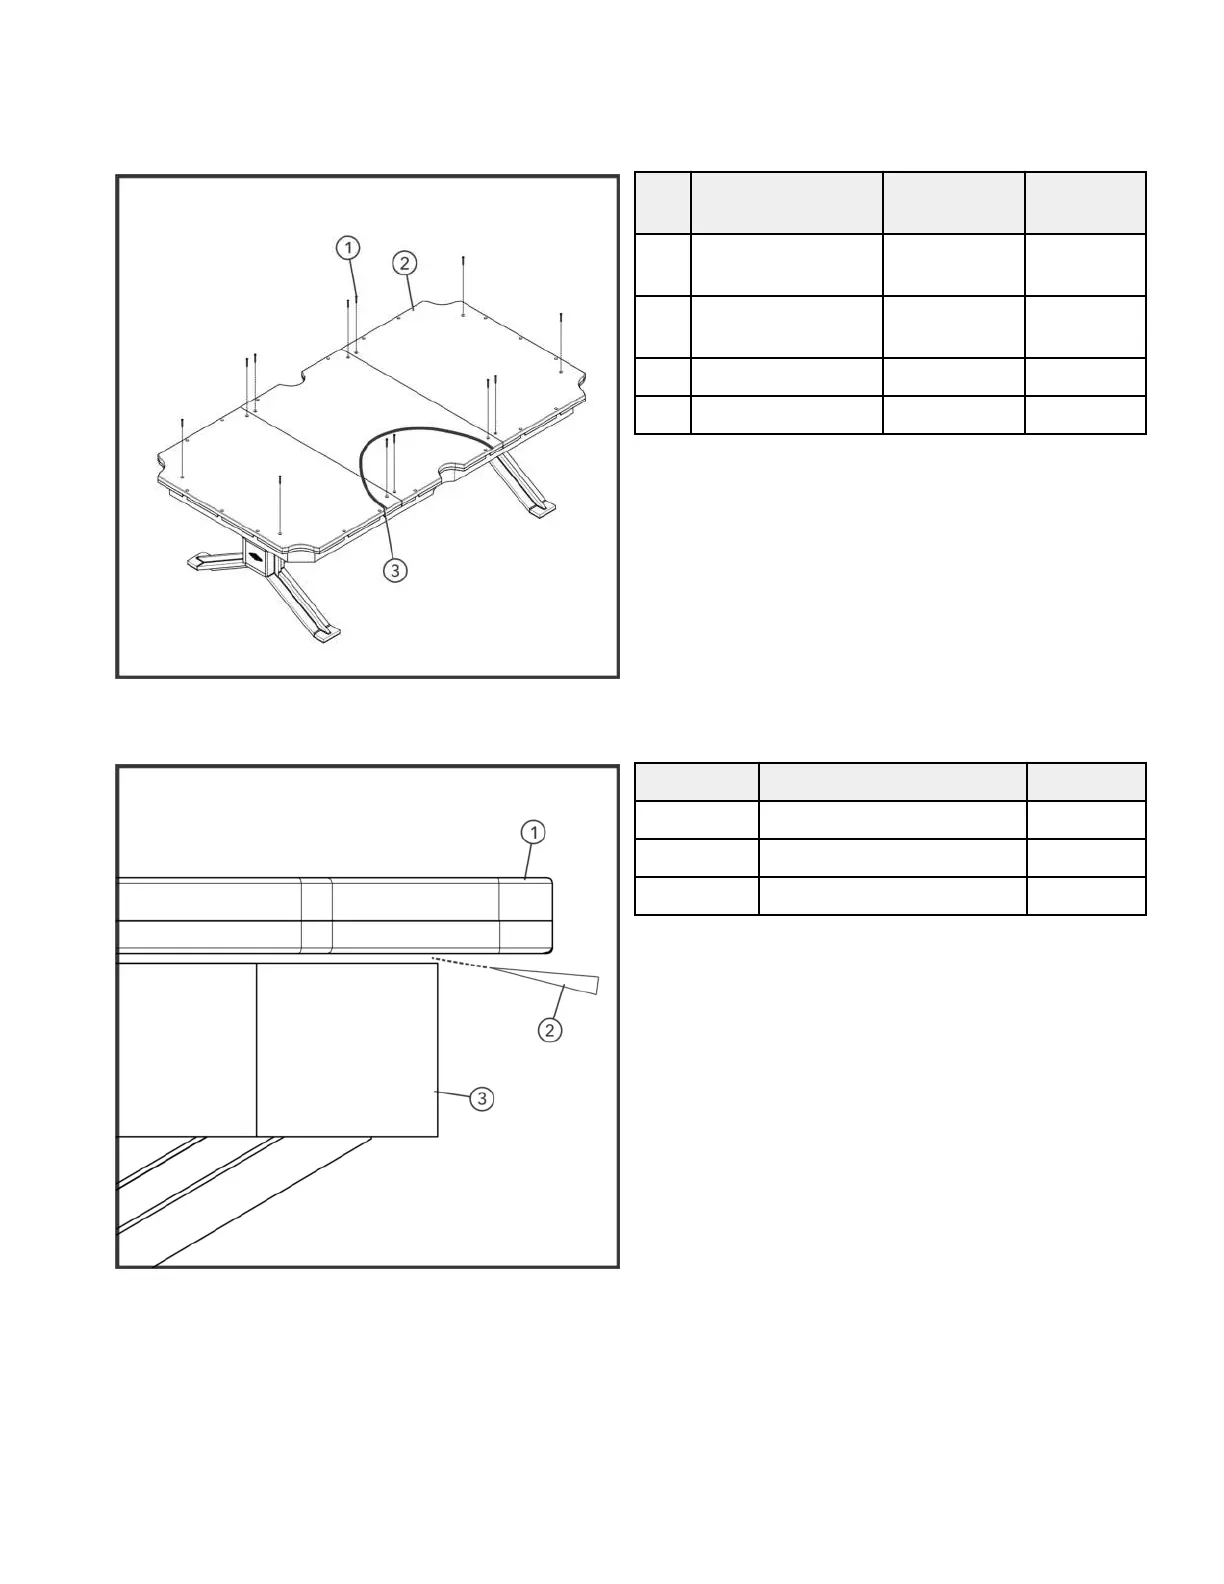
3. Position the two end slate sections on the base frame as shown. Be sure that the penciled arc forms a radius as
shown.. Recheck to be sure the slate has an equal amount of overhang around the base frame. Using the twelve
countersunk holes in the slate as a template, pilot drill 5/32” diameter holes into the mounting cleats. Securely
fasten the end slate sections at both ends of the table with 1/4 x 1-3/4 flat head screws for UNFRAMED slate or
#1/4 X 2-1/2” flat head screws for FRAMED slate.
Item Description Unframed
Slate Qty.
Framed
Slate Qty.
1 1/4 x 1-3/4 Flat
Head Screws
12 0
1 1/4 X 2-1/2” Flat
Head Screws
0 12
2 Slate Assembly 1 1
3 Arc Line 1 1
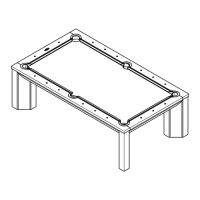
4. With a precision tool, level each end slate section by driving wooden slate wedges (provided) between the top of
the base frame and bottom of the slate as shown. Keep the wedges as close to the countersink holes as possible.
Item Description Qty.
1 Slate 1
2 Wedge 1
3 Sill 1
5. With both end slates perfectly level, continue fastening the end slates at the joints. Recheck for levelness and, if
necessary, back the screws out and adjust the shim position. Then, re-tighten the slate attaching screws.
6. When satisfied that both end slates are level, shim the center slate section as required to obtain a flush fit at both
joints, then screw the center slate down.
7. Slate joints can now be filled with Rock Hard putty or wax. Lightly sand or scrape across the joints after grouting.
Page 9 of 24