Cancels: II 580F-180-2 II 580F-180-3
3/15/06
installation, start-up and
service instructions
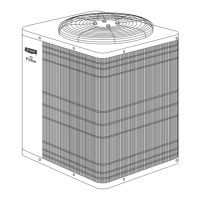
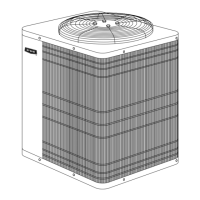
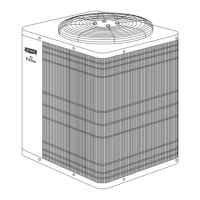
SINGLE PACKAGE ROOFTOP
GAS HEATING/ELECTRIC COOLING UNITS
580F
Dura
Pac
Series
Sizes 180-300
15 to 25 Tons
CONTENTS
Page
SAFETY CONSIDERATIONS . . . . . . . . . . . . . . . . . . . . . . . . . 1
INSTALLATION . . . . . . . . . . . . . . . . . . . . . . . . . . . . . . . . . .1-25
I. Step 1 — Provide Unit Support. . . . . . . . . . . . . . . . . 1
II. Step 2 — Rig and Place Unit. . . . . . . . . . . . . . . . . . . 4
III. Step 3 — Field Fabricate Ductwork . . . . . . . . . . . . 11
IV. Step 4 — Make Unit Duct Connections . . . . . . . . . 11
V. Step 5 — Install Flue Hood and Wind Baffle . . . . . 11
VI. Step 6 — Trap Condensate Drain . . . . . . . . . . . . . . 11
VII. Step 7 — Orifice Change. . . . . . . . . . . . . . . . . . . . . 12
VIII. Step 8 — Install Gas Piping . . . . . . . . . . . . . . . . . . 13
IX. Step 9 — Make Electrical Connections . . . . . . . . . 13
X. Step 10 — Make Outdoor-Air Inlet Adjustments . . 15
XI. Step 11 — Install Outdoor-Air Hood. . . . . . . . . . . . 15
XII. Step 12 — Install All Accessories . . . . . . . . . . . . . 16
XIII. Step 13 — Adjust Factory-Installed Options . . . . . 18
XIV. Step 14 — Install Control Accessory for Optional
Perfect Humidity™ Dehumidification Package . . 24
START-UP . . . . . . . . . . . . . . . . . . . . . . . . . . . . . . . . . . . . .26-34
SERVICE . . . . . . . . . . . . . . . . . . . . . . . . . . . . . . . . . . . . . .34-42
TROUBLESHOOTING. . . . . . . . . . . . . . . . . . . . . . . . . . . .43-47
INDEX . . . . . . . . . . . . . . . . . . . . . . . . . . . . . . . . . . . . . . . . . . 48
START-UP CHECKLIST . . . . . . . . . . . . . . . . . . . . . . . . . . CL-1
SAFETY CONSIDERATIONS
Installation and servicing of air-conditioning equipment can
be hazardous due to system pressure and electrical compo-
nents. Only trained and qualified service personnel should
install, repair, or service air-conditioning equipment.
Untrained personnel can perform basic maintenance func-
tions of cleaning coils and filters and replacing filters. All
other operations should be performed by trained service per-
sonnel. When working on air-conditioning equipment, observe
precautions in the literature, tags and labels attached to the
unit, and other safety precautions that may apply.
Follow all safety codes. Wear safety glasses and work gloves.
Use quenching cloth for unbrazing operations. Have fire extin-
guishers available for all brazing operations.
IMPORTANT: Units have high ambient operating limits. If
limits are exceeded, the units will automatically lock the com-
pressor out of operation. Manual reset will be required to
restart the compressor.
INSTALLATION
I. STEP 1 — PROVIDE UNIT SUPPORT
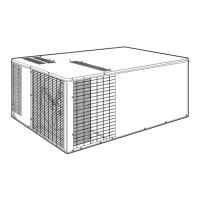
A. Roof Curb
Assemble or install accessory roof curb or horizontal adapter
roof curb in accordance with instructions shipped with this
accessory. See Fig. 1A, 1B, and 2. Install insulation, cant
strips, roofing, and counter flashing as shown. Ductwork can
be installed to roof curb or horizontal adapter roof curb before
unit is set in place. Curb or adapter roof curb should be level.
This is necessary to permit unit drain to function properly.
Unit leveling tolerance is ±
1
/
16
in. per linear ft in any direc-
tion. Refer to Accessory Roof Curb or Horizontal Adapter Roof
Curb Installation Instructions for additional information as
required. When accessory roof curb or horizontal adapter roof
curb is used, unit may be installed on class A, B, or C roof cov-
ering material.
Instructions continued on page 4.
WARNING: Before performing service or mainte-
nance operations on unit, turn off main power switch to
unit and install lockout tag to disconnect switch. Elec-
trical shock could cause personal injury.
WARNING:
1. Improper installation, adjustment, alteration, ser-
vice, or maintenance can cause property damage,
personal injury, or loss of life. Refer to the User’s
Information Manual provided with this unit for
more details.
2. Do not store or use gasoline or other flammable
vapors and liquids in the vicinity of this or any
other appliance.
What to do if you smell gas:
1. DO NOT try to light any appliance.
2. DO NOT touch any electrical switch, or use any
phone in your building.
3. IMMEDIATELY call your gas supplier from
a neighbor’s phone. Follow the gas supplier’s
instructions.
4. If you cannot reach your gas supplier, call the fire
department.
WARNING: Disconnect gas piping from unit when
pressure testing at pressure greater than 0.5 psig. Pres-
sures greater than 0.5 psig will cause gas valve damage
resulting in hazardous condition. If gas valve is subjected
to pressure greater than 0.5 psig, it must be replaced
before use. When pressure testing field-supplied gas pip-
ing at pressures of 0.5 psig or less, a unit connected to
such piping must be isolated by closing the manual gas
valve(s).