6
Operating the appliance
Logamatic TC100 – 6720889234 (2018/10)
6
▶ Swipe vertically to find the WLAN network.
▶ Select the desired WLAN network by tapping.
If the WLAN network is secured with a password:
▶ Enter the WLAN network password ( section 5.5).
If the desired WLAN network is not found:
▶ Press the Cancel key [1] to set the controller to the Offline mode.
The temperature can now only be set in manual operation on the
touch screen. Connection to the app or Buderus site is not possible.
Possible connection difficulties, section 6.8, page 8 and
chapter 7, page 8.
When all the connections have been established, the data is
synchronised. The start screen appears on the touch screen.
5.5 Entering the WLAN network password
Logamatic TC100 uses the standard WLAN protocol.
▶ Do not therefore use any $ characters in the WLAN network
password.
Fig. 11 Entering the WLAN network password
Using the Return key [8], one can return to the previous display. An input
error can be corrected with the “Back” key [3]. An input is confirmed
with the Enter key [1]. The password can be entered into the input line
[2] using the keys [4]. Use the shift key [5] to enter capital letters. Using
key [6], special characters can be entered. The lock key [7] shows, that
the WLAN network is secured.
▶ Enter the WLAN network password.
▶ Confirm the password with the Enter key [1].
Now the start screen appears ( section 6.1).
5.6 MyMode app
The MyMode app contains functions, which are not included in
Logamatic TC100.
▶ Download the MyMode app from Buderus.
▶ Install the MyMode app from Buderus.
▶ Register the app with Logamatic TC100.
▶ Enter the one-off access code or scan the QR code ( sticker on the
Quick Install Guide).
▶Establish a connection with Logamatic TC100.
▶ Enter the personalised password.
On www.buderus-logamaticTC100.com you can find an overview of the
compatible smart devices.
5.7 Electronic thermostatically controlled radiator valve
Logamatic TC100 can establish a wireless connection with up to 19
Bosch electronic thermostatically controlled radiator valves
(accessories).
In this way different temperatures can be set in different rooms.
▶ Connect the electronic controller valves via the MyMode app (pair).
See the manual of the electronic thermostatically controlled radiator
valves or use the steps in the MyMode app.
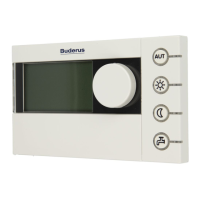
6 Operating the appliance
6.1 Start screen
Fig. 12 Start screen
[1] Current room temperature
[2] Space for notification symbols
[3] Display for heat source modulation level
[4] Set temperature
[5] Space for operational and warning symbols
[6] Tab pages
[7] Display for economical heating
[8] Eco symbol
If the touch screen is not used for some time, the device returns
automatically to the start screen and the touch screen switches itself off.
The current room temperature is in the middle [1], and the set
temperature is beside it [4]. The modulation level of the heat source is
depicted with a display [3]. The Eco symbol [8] with the display for
economical heating [7] shows, how energy-efficient the heating of the
room is.
Notification symbols
The space for notification symbols [2] may contain the following
symbols:
play
ANDROID APP ON
•Away
•No EMS
0010018159-001
3
1
5
4
8
7
6
2
 Loading...