3
Converting the heating system to propane
Logano G234X – 6 720 805 917 (2012/12)6
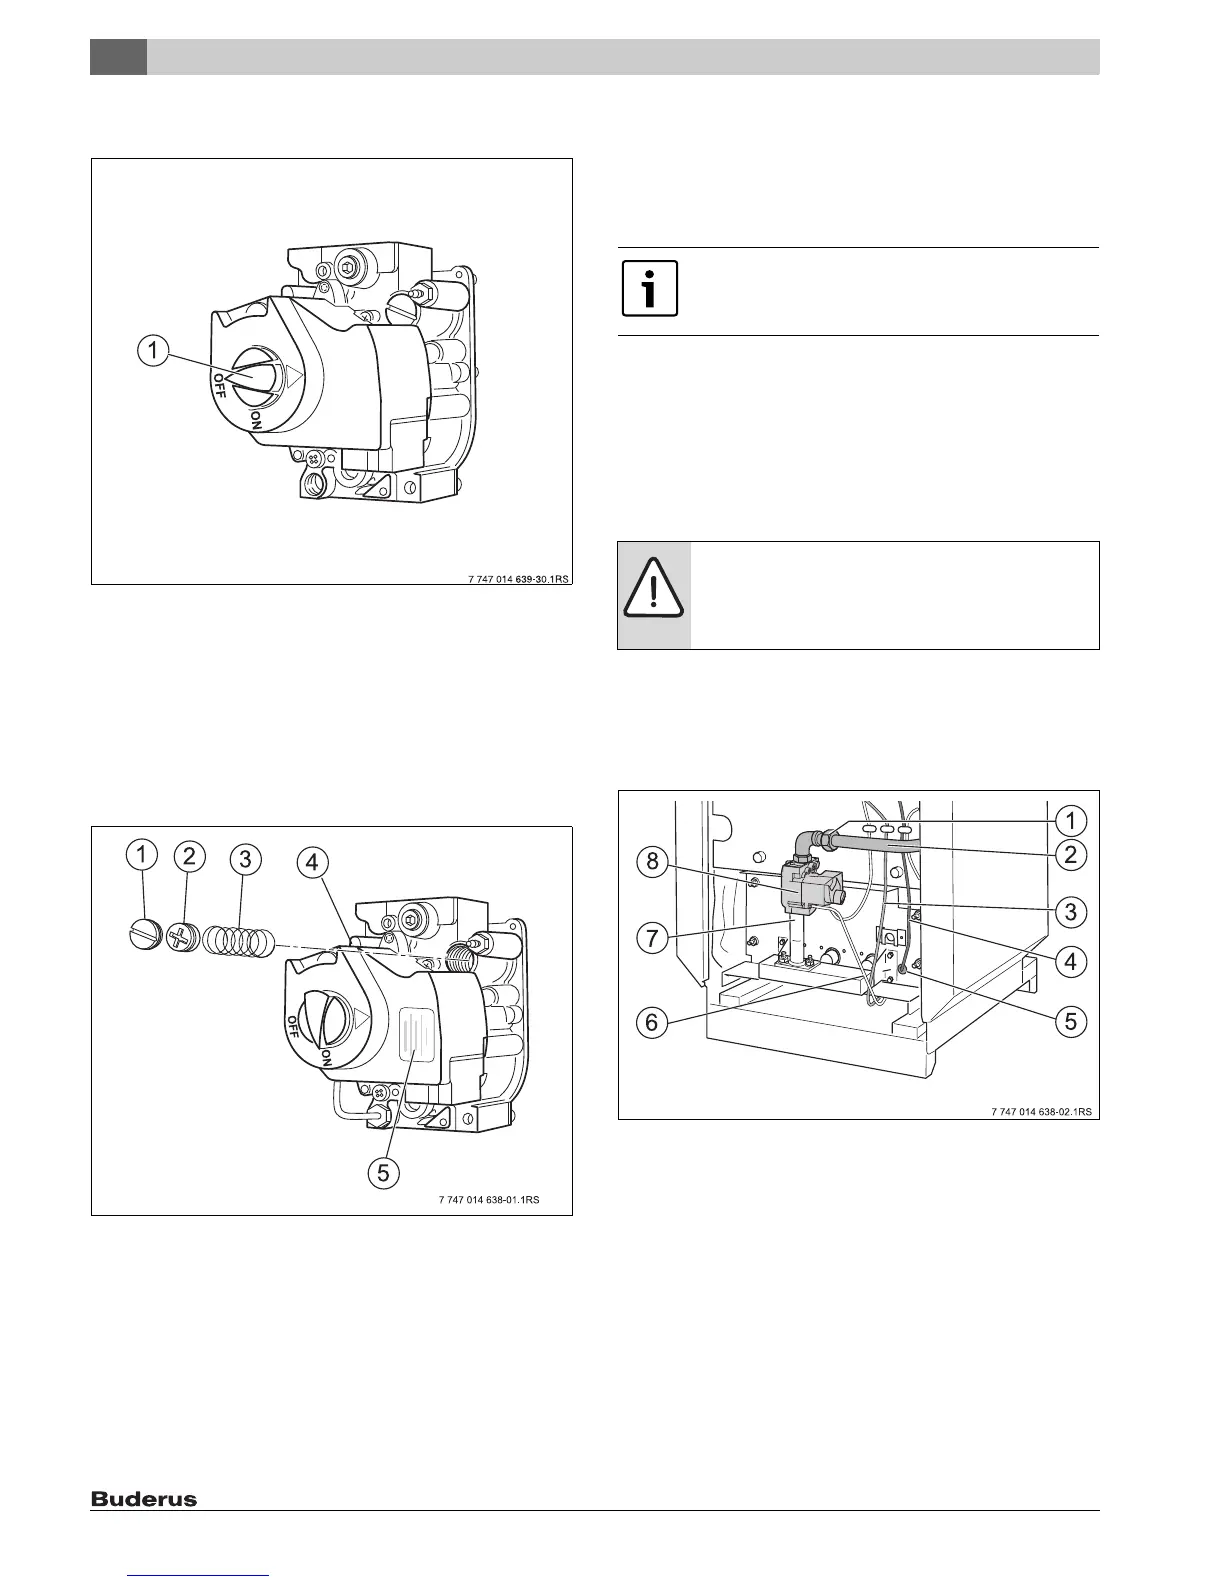
▶ Turn the gas valve ON/OFF knob [1] clockwise to the OFF position.
Do not use force.
Fig. 2 Gas valve
[1] ON/OFF knob (in OFF position)
3.3 Converting the burner
3.3.1 Prepare the gas valve
▶ Remove the safety screw for the orifice pressure adjustment [1] from
the gas valve.
▶ Remove orifice pressure adjustment screw [2].
▶ Remove the stainless steel spiral spring [3].
Fig. 3 Gas valve
[1] Safety screw
[2] Orifice pressure adjustment screw
[3] Stainless steel spiral spring
[4] Gas valve
[5] Yellow label
▶ Install the red spring from the Honeywell LP conversion kit in the gas
valve.
▶ Screw in the new orifice pressure adjustment screw from the
Honeywell LP conversion kit until it is flush with the top of the gas
valve.
▶ Then turn the orifice pressure adjustment screw six full revolutions
clockwise. This corresponds to a pressure preset of approx. 10.0 inch
W.C. (25 mbar).
▶ Install new black safety screw from the Honeywell LP conversion kit.
▶ Clean the gas valve casing.
▶ Apply yellow label ( Fig. 3, [5]) from the Honeywell LP conversion
kit In a readily visible location.
3.3.2 Removing the burner
▶ Disconnect pilot gas pipe [6] from the gas valve [7].
▶ Disconnect ignition cable [3] from burner control unit.
▶ Label wires of flame roll out switch [4] and disconnect from the switch
[5].
▶ Disconnect connection lines to the gas valve [8].
▶ Tie gas line [2] with wire or cord (secure).
▶ Unscrew retaining screws [1] on gas feed line and on burner.
Fig. 4 Remove the burner
[1] Retaining screw on the gas feed line
[2] Gas supply line
[3] Ignition cable
[4] Connection lines to the flame baffle
[5] Roll-out switch
[6] Pilot gas line
[7] Connection cables to the gas valve
[8] Gas valve
▶ Check the gasket on the gas supply line for damage.
▶ Replace damaged gasket.
▶ Keep the gasket in a safe place.
This setting must be checked with a pressure gauge on
completion of the conversion.
DANGER: Risk of fatal injury from electrical shock in the
event of incorrectly connected wiring!
▶ Label all connection cables before disconnecting
them.
 Loading...