4-22 2004 Buell P3: Fuel System
HOME
REMOVAL
NOTE
For electrical diagnostics and troubleshooting, please refer to
7.7 AUTO-ENRICHENER.
1. Remove seat. Depress latch at bottom and pull seat up
and back to remove.
11WARNING1WARNING
To protect against shock and accidental start-up of vehi-
cle, disconnect the negative battery cable before pro-
ceeding. Inadequate safety precautions could result in
death or serious injury.
2. Unthread bolt and remove battery negative cable (black)
from battery negative (-) terminal.
3. Remove air cleaner assembly. See 1.18 AIR CLEANER.
4. Remove carburetor. See 4.4 CARBURETOR.
5. Locate 6-place Deutsch connector in front of ignition coil
and depress external latch to separate pin and socket
halves. Remove pin terminals from chambers 1 and 2.
6. See Figure 4-19. Remove Phillips screw (with lock-
washer) to release stay plate on auto-enrichener from
carburetor housing. Pull enrichener from carburetor bore.
INSTALLATION
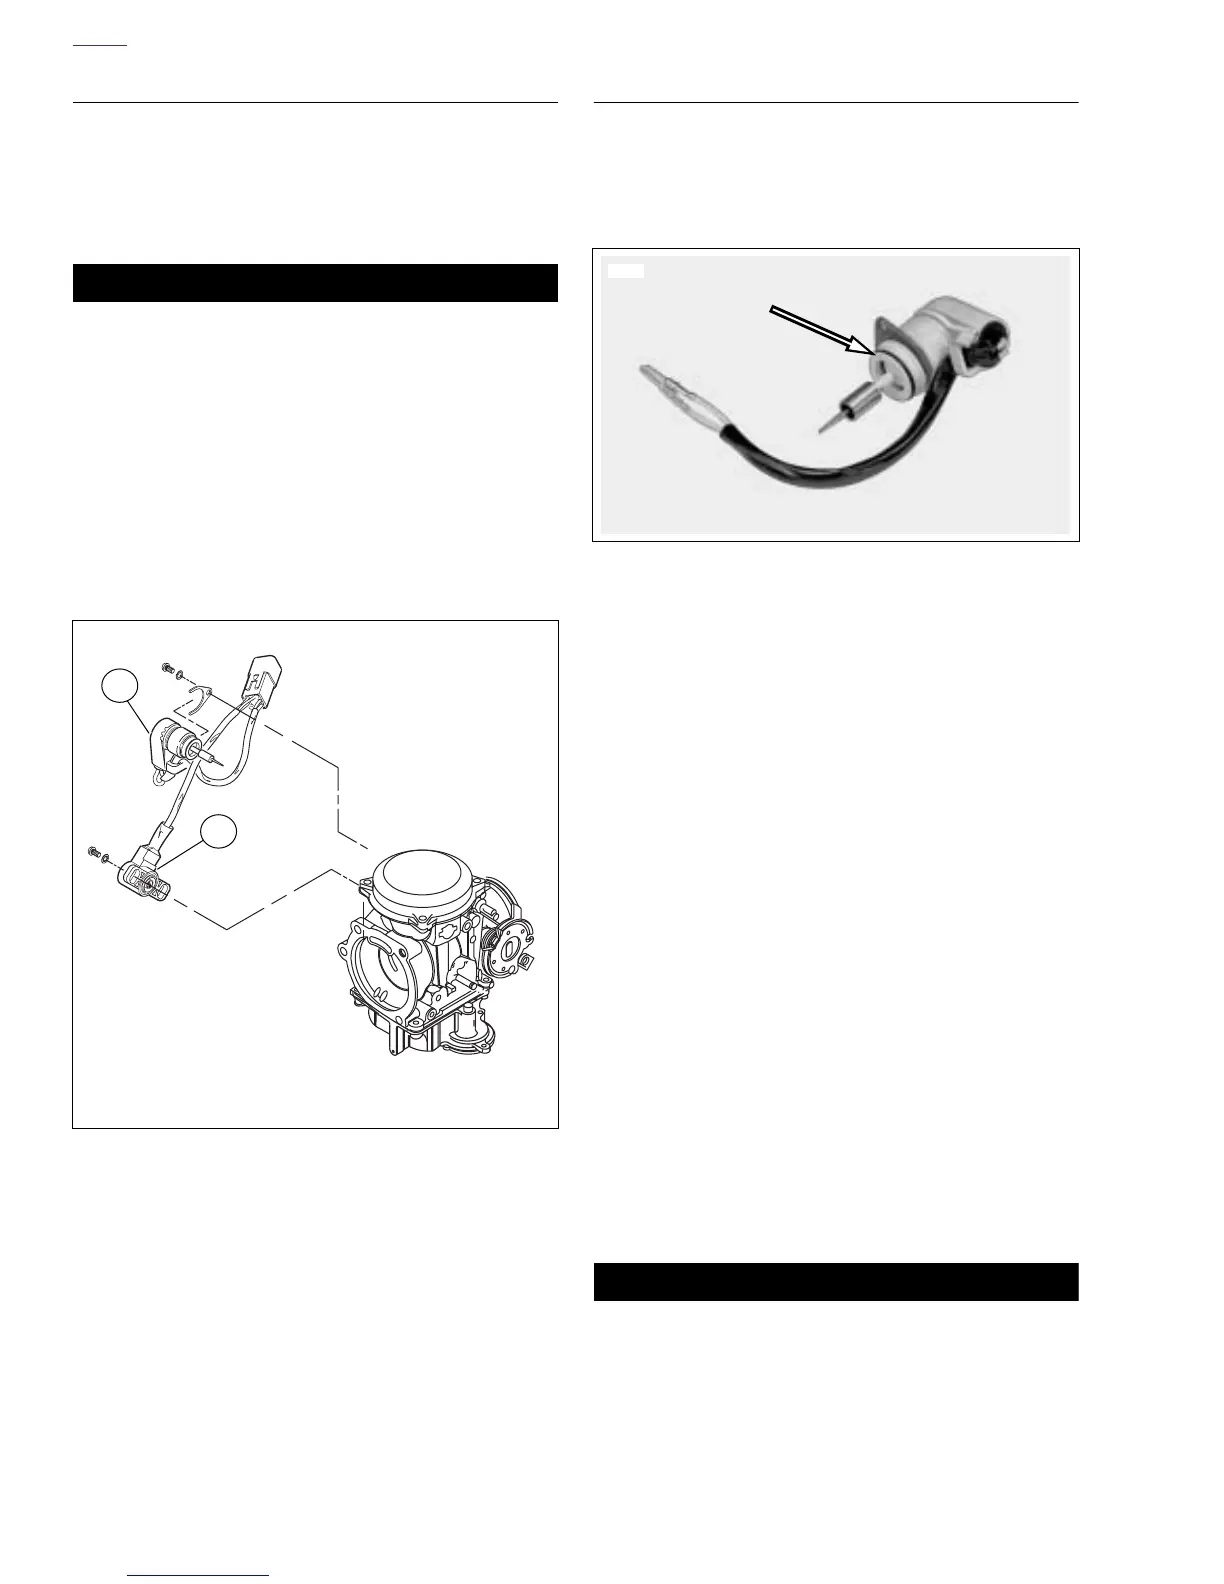
1. See Figure 4-20. Obtain new auto-enrichener assembly.
If old enrichener is used, inspect o-ring for cuts, tears or
signs of deterioration. Replace o-ring if necessary.
2. Carefully insert auto-enrichener into carburetor bore.
Install Phillips screw (with lockwasher) to secure stay
plate on enrichener to carburetor housing. Tighten screw
to 13-23 in-lbs (2-3 Nm).
3. Locate 6-place Deutsch connector and install pin termi-
nals in chambers 1 and 2. Mate pin and socket halves of
connector.
4. Standing on the right side of the vehicle, start air box into
opening. When partially installed, push PCV outlet hose
onto middle fitting of 3-way connector, and loosely install
carburetor onto manifold-carburetor coupler.
5. Moving to opposite side of vehicle, apply a small dab of
Loctite 222 (Purple) to threads of two flange bolts. Slide
bolts through top two holes of triangular bracket and
install into left side of air box. Alternately tighten screws
to 36-60 in-lbs (4-7 Nm).
6. Install carburetor. See 4.4 CARBURETOR.
7. Finish installing the air cleaner assembly. See 1.18 AIR
CLEANER.
8. Insert bolt through battery negative cable (black) into
threaded hole of battery negative (-) terminal. Tighten
bolt to 60-96 in-lbs (7-11 Nm).
11WARNING1WARNING
Pull up on seat to verify that it is properly secured, front
and rear. A loose seat may shift during vehicle operation
and startle the rider, possibly causing loss of vehicle
control that could result in death or serious injury.
9. Position seat on frame backbone, so that tongue at bot-
tom engages slot in frame weldment. Push down on rear
of seat until spring-loaded latch fully engages groove of
seat pin.
Figure 4-19. Location of Auto-Enrichener and Throttle
Position Sensor
a0483x4x
2
1. Auto-enrichener
2. Throttle position sensor
1
Figure 4-20. Auto-Enrichener with O-ring
7756
 Loading...


