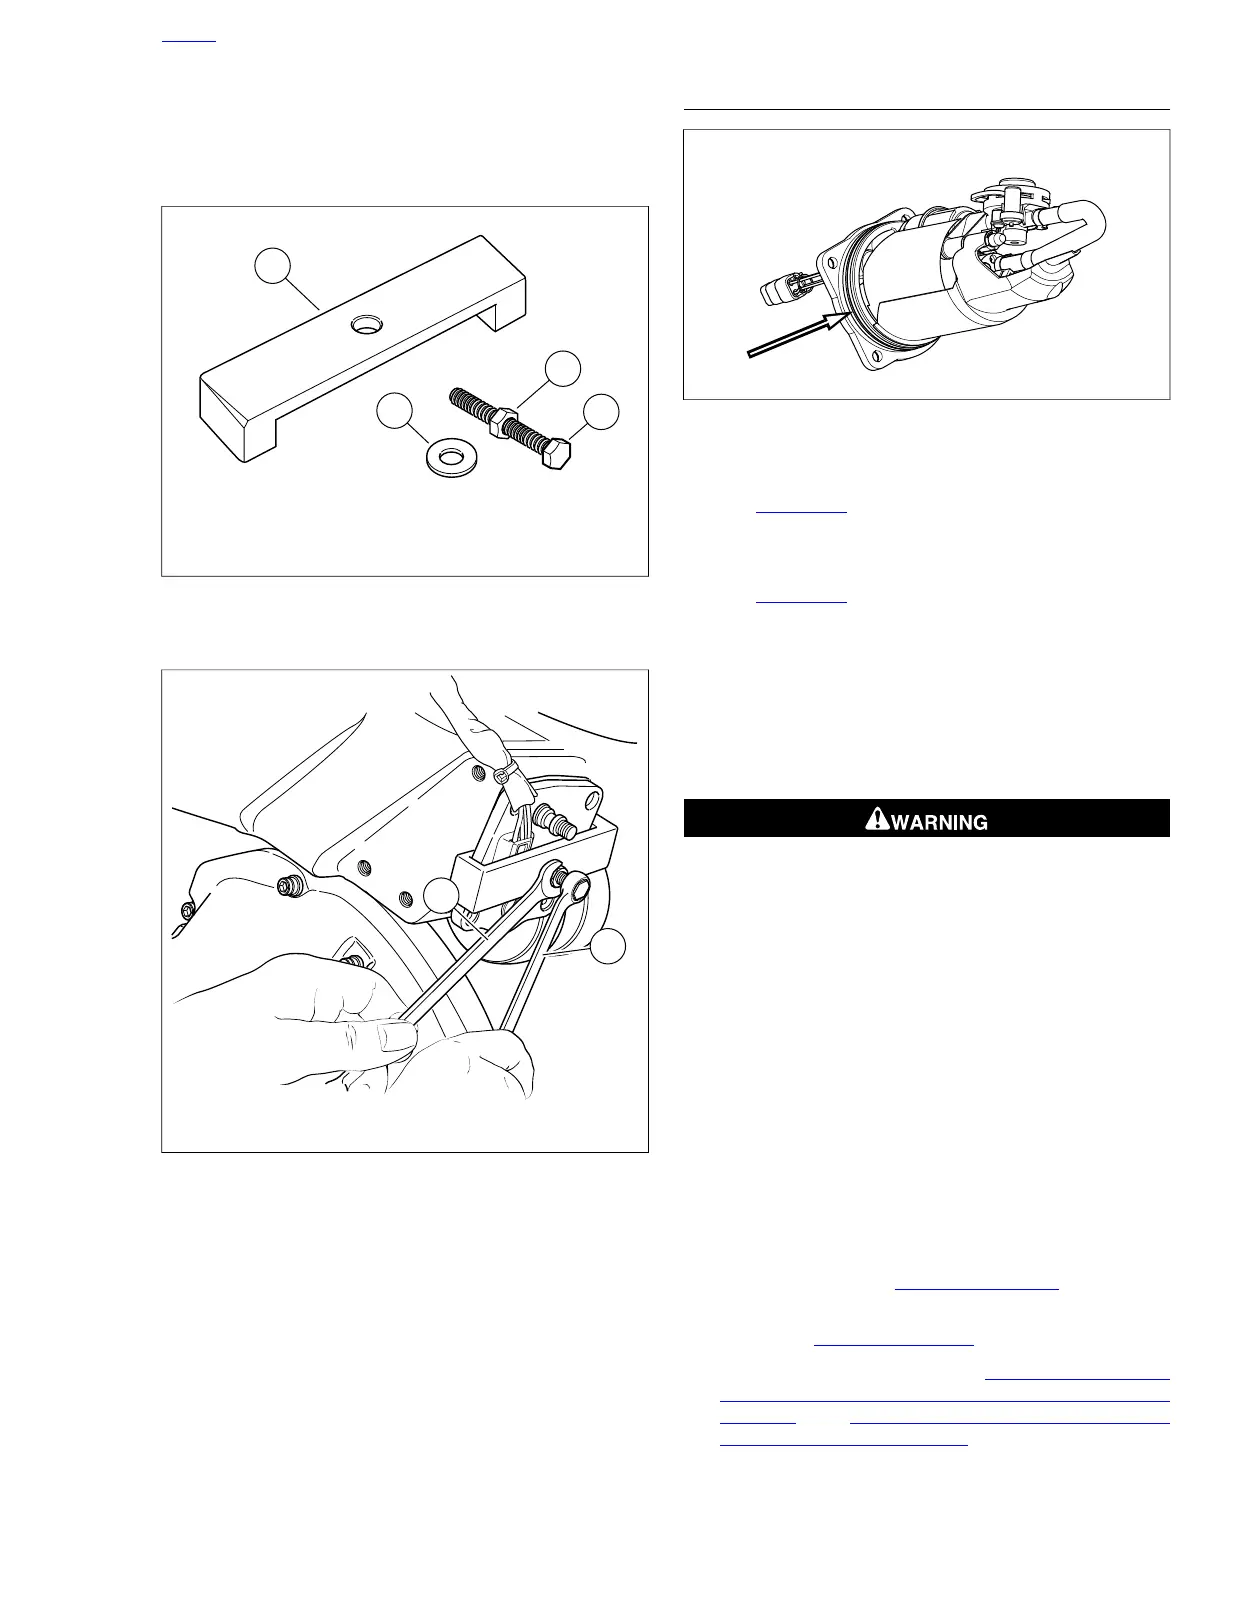
12. Place wrench onto nut and another wrench onto the bolt.
Hold the bolt stationary and turn nut clockwise until fuel
pump is pulled free from frame.
13. Remove tool from fuel pump.
1. Main body
2. Washer
3. Nut
4. Bolt
Figure 4-32. Fuel Pump Puller
1. Turn clockwise
2. Hold stationary
Figure 4-33. Fuel Pump Removal
INSTALLATION
Figure 4-34. Fuel Pump Assembly/XB/All Models with
Orings
1. See Figure 4-34. Replace O-rings. Lubricate new O-rings
with clean engine oil.
2. Insert fuel pump into frame until resistance is felt.
3. See Figure 4-35. Insert four screws (5) through fuel pump
and into frame.
NOTE
Use all four screws to draw fuel pump into frame. Using less
than four screws will damage fuel pump O-rings.
4. Using crosswise pattern, draw fuel pump into frame by
tightening screws. Final tighten screws to 48-51 in-lbs
(5.4-5.8 Nm).
Do not over-tighten fuel fitting nuts. Over-tightening can
result in fuel leakage. Gasoline is extremely flammable
and highly explosive which could result in death or serious
injury. (00519b)
5. Install new O-rings on fuel supply stud (2). Larger O-ring
is located in groove closer to fuel pump.
NOTE
Install fuel line onto fitting on fuel pump so that the fuel line is
at approximately the one o-clock position. verify that the
sheathing on the fuel line comes down to the bend as shown.
6. Install fuel supply line banjo fitting (2) over fuel supply stud
(3). Install new fastener. Tighten to 84-108 in-lbs (9.5-
12.2 Nm).
7. Fill tank with a small amount of fuel. Check for leaks.
8. Connect fuel pump connector [86] (1) and push cable strap
tab into hole in frame.
9. Install swingarm. See 2.37 BELT GUARDS.
10. Install chin fairing after vehicle has been removed from
the lift. See 2.50 CHIN FAIRING.
11. Install rider footpeg mounts. See 2.34 FOOTPEG, HEEL
GUARD AND MOUNT: FIREBOLT AND LIGHTNING
MODELS and 2.35 HEEL GUARD AND FOOTPEG
MOUNTS: ULYSSES MODELS.
HOME
2010 XB Service: Fuel System 4-25








 To Next Page