17
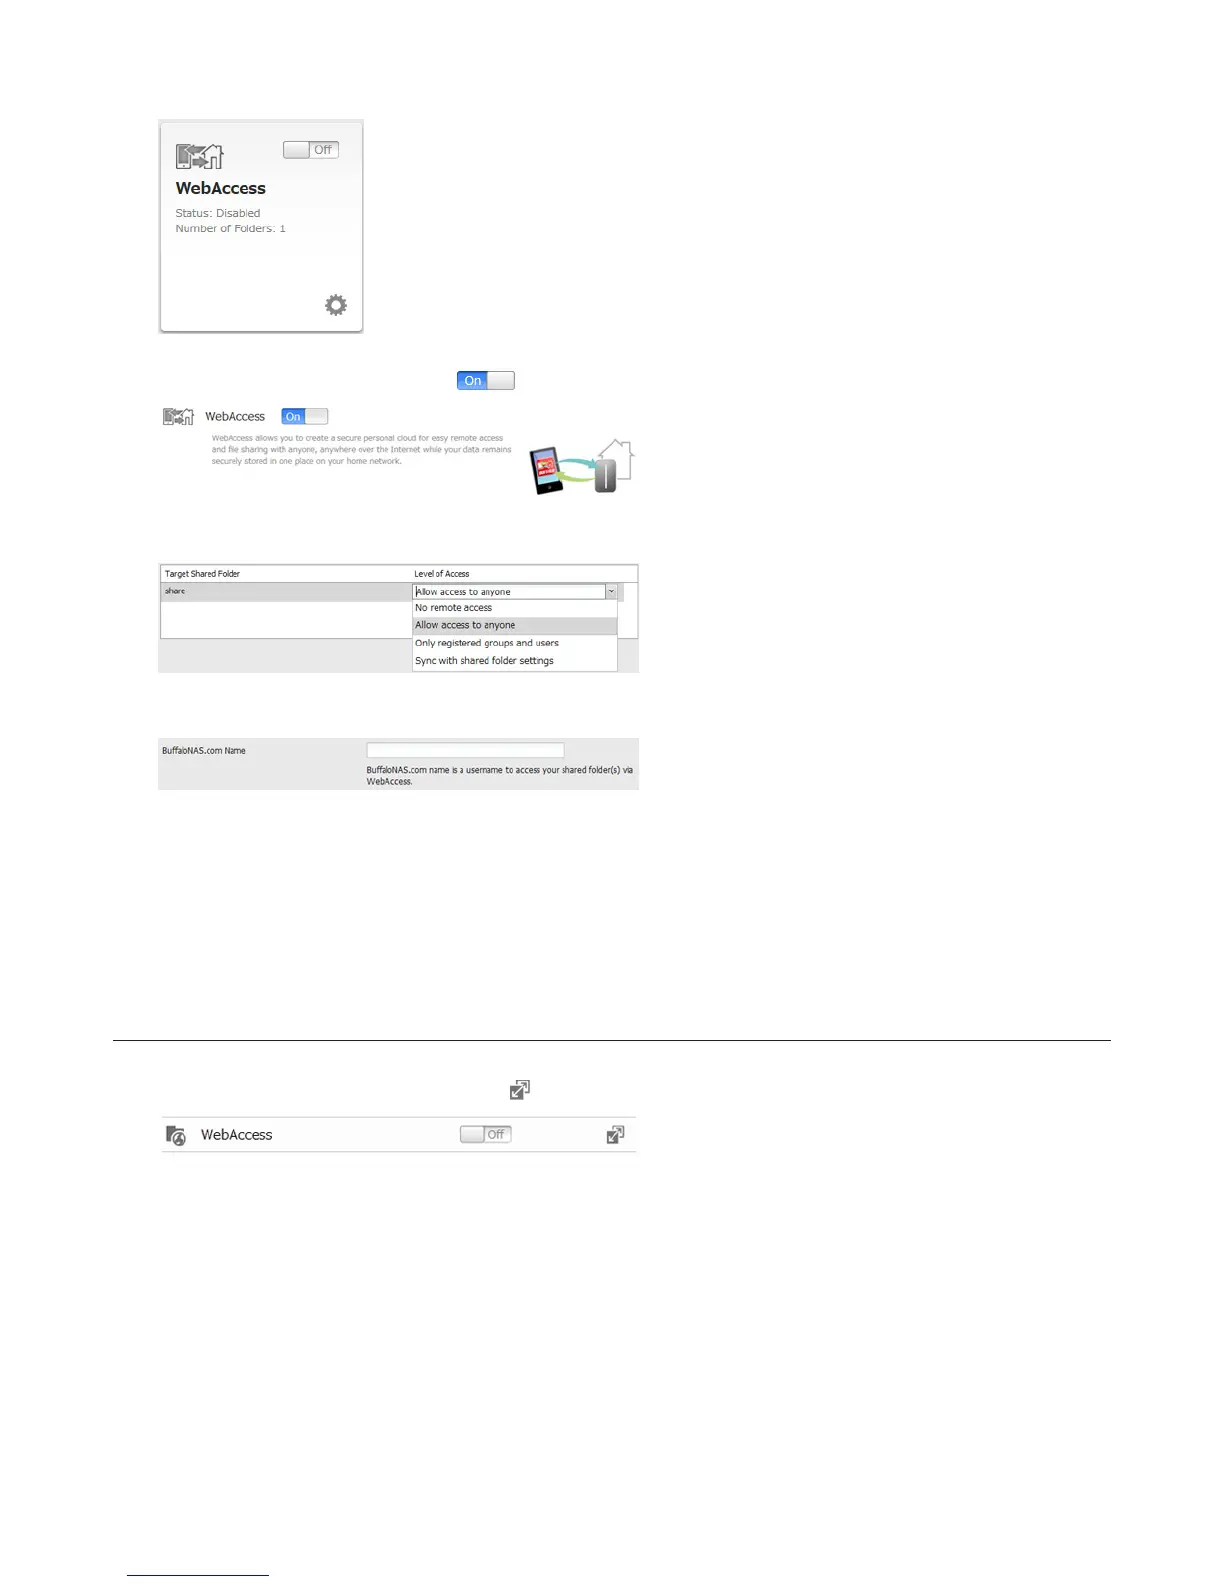
2 Move the WebAccess switch to the position to enable WebAccess.
3 Select the level of access for each shared folder from the drop-down list.
4 Enter a BuffaloNAS.com name for your BuffaloNAS account.
Note: The BuffaloNAS.com name may contain between 3 to 20 alphanumeric characters, underscores (_), and
hyphens (-). The BuffaloNAS.com name is case-sensitive.
5 Click Apply.
6 Continue with the procedure at http://buffalonas.com/manual/setup/en/.
Configuration from Advanced Settings
1 Navigate to File Sharing - WebAccess. Click to the right of “WebAccess”.
2 Click Edit.