Contents
Required
AA
AA
AA
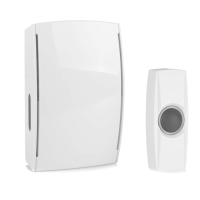
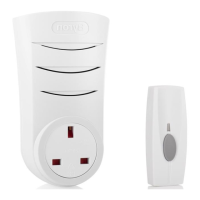
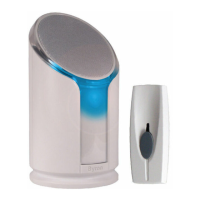
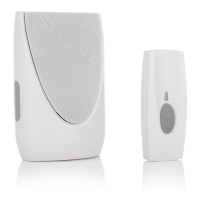
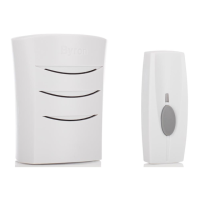
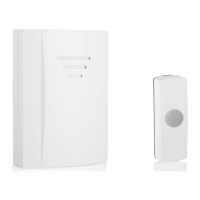
BY501 Wirefree Portable door bell
1
2
3
4
5
6
EN
FR
DE
NL
SP
3x AA Batteries (not included)
3 piles AA (non incluses)
3x AA Batterie (nicht enthalten)
3x AA batterijen ( Niet inbegrepen )
3x AA pilas (no incluidas)
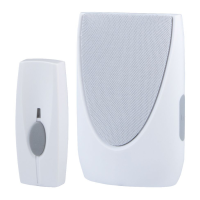
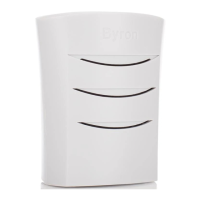
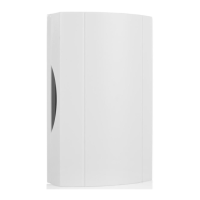
1. Portable bell
2. Speaker
3. Volume control
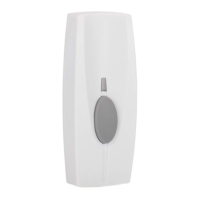
4. Bell push
5. Push button
6. Back plate
1. Carillon portatif sans fil
2. Haut parleur
3. Contrôle du volume
4. Bouton de sonnette
5. Bouton poussoir
6. Support de fixation
1. Tragbare Türklingel
2. Lautsprecher
3. Lautstärkeregelung
4. Klingeldrücker
5. Druckknopf
6. Rückseite
1. Draagbare deurbel
2. Luidspreker
3. Volumeregeling
4. Drukknop
5. Drukknop
6. achterplaat
1. Timbre portátil
2. altavoz
3. Control de volumen
4. pulsador
5. Pulsar el botón
6. Placa trasera
EN FR
DE NL
SP
7
EN
FR
DE
NL
SP
Mounting the bell push
Fixation du bouton de sonnette
Befestigung des Türdrückers
Montage van de drukknop
Montaje del pulsador
EN
FR
DE
NL
SP
Optional
Autre solution
Möglichkeit
Optie
Opción
10s
3
EN
FR
DE
NL
SP
Syncing the bell push to the door bell (X6)
Association du bouton de sonnette au carillon (X6)
Synchronisation des Türöffners mit der Türklingel (X6)
Synchroniseren drukknop op deurbel (X6)
Sincronizar el pulsador al timbre (X6)
HOLD
PRESS
DING
DONG
BEEP
BEEP
4
EN
FR
DE
NL
SP
Changing the door bell melody
Changement de la mélodie du carillon
Änderung der Melodie Ihrer Türklingel
Belmelodie veranderen
Cambiar la melodía del timbre
PRESS
5
EN
FR
DE
NL
SP
Setting the volume
Contrôle du volume
Lautstärkeeinstellung
Volume aanpassen
Ajustar el volumen
PRESS
80-95%
WOOD
90-100%
OPEN AIR
125m
60-80%
0-20%
METAL
BRICK
6
EN
FR
DE
NL
SP
Operating distance. Please test the chime in the location
before installing the bell push
Portée en champ libre. Merci de tester le carillon en
conditions réelles Avant installation du bouton de sonnette.
Betriebsentfernung. Testen Sie die Klingel bevor Sie diese
fest installieren.
Werkafstand. Bel tesen op locatie Voor het instellen van de
drukknop.
Distancia de funcionamiento. Por favor, prueba el timbre en
la que vaya a ser su localización final antes de instalar el
pulsador
RESET
10s
HOLD
BEEP
BEEP
10s
HOLD
BEEP
EN
FR
DE
NL
SP
Once the door bell is reset, follow step 3 onwards
une fois la remise à niveau du carillon effectué, suivez les instructions de l’étape 3
bitte die Einstellungen für die Türklingel zurücksetzen und mit Schritt 3 fortfahren
Zodra de deurbel gereset is ga verder met stap 3.
Una vez haya reiniciado el timbre, vaya al paso 3.
Jason Anderson
Quality Assurance Manager
34, Sherwood Rd
Bromsgrove
B60 3DR. UK
www.chbyron.eu
smartwares
safety & lighting Ltd
433.92MHz
+
EN
FR
DE
NL
SP
Installing the push batteries
Insertion des piles du bouton de sonnette
Einsetzen der Batterien in den Türdrücker
bel knop batterijen installeren
Instalación de las pilas del pulsador
1
AA
AA
AA
EN
FR
DE
NL
SP
Installing the door bell batteries
Insertion des piles du carillon
Einsetzen der Batterien on die Türklingel
Deurbel batterijen installeren
Instalación de las pilas del timbre
BEEP
2
C
M
Y
CM
MY
CY
CMY
K
BY501 A3 IM 13112013.pdf 1 13/11/2013 10:47
Contents
Required
AA
AA
AA
BY501 Wirefree Portable door bell
1
2
3
4
5
6
EN
FR
DE
NL
SP
3x AA Batteries (not included)
3 piles AA (non incluses)
3x AA Batterie (nicht enthalten)
3x AA batterijen ( Niet inbegrepen )
3x AA pilas (no incluidas)
1. Portable bell
2. Speaker
3. Volume control
4. Bell push
5. Push button
6. Back plate
1. Carillon portatif sans fil
2. Haut parleur
3. Contrôle du volume
4. Bouton de sonnette
5. Bouton poussoir
6. Support de fixation
1. Tragbare Türklingel
2. Lautsprecher
3. Lautstärkeregelung
4. Klingeldrücker
5. Druckknopf
6. Rückseite
1. Draagbare deurbel
2. Luidspreker
3. Volumeregeling
4. Drukknop
5. Drukknop
6. achterplaat
1. Timbre portátil
2. altavoz
3. Control de volumen
4. pulsador
5. Pulsar el botón
6. Placa trasera
EN FR
DE NL
SP
7
EN
FR
DE
NL
SP
Mounting the bell push
Fixation du bouton de sonnette
Befestigung des Türdrückers
Montage van de drukknop
Montaje del pulsador
EN
FR
DE
NL
SP
Optional
Autre solution
Möglichkeit
Optie
Opción
10s
3
EN
FR
DE
NL
SP
Syncing the bell push to the door bell (X6)
Association du bouton de sonnette au carillon (X6)
Synchronisation des Türöffners mit der Türklingel (X6)
Synchroniseren drukknop op deurbel (X6)
Sincronizar el pulsador al timbre (X6)
HOLD
PRESS
DING
DONG
BEEP
BEEP
4
EN
FR
DE
NL
SP
Changing the door bell melody
Changement de la mélodie du carillon
Änderung der Melodie Ihrer Türklingel
Belmelodie veranderen
Cambiar la melodía del timbre
PRESS
5
EN
FR
DE
NL
SP
Setting the volume
Contrôle du volume
Lautstärkeeinstellung
Volume aanpassen
Ajustar el volumen
PRESS
80-95%
WOOD
90-100%
OPEN AIR
125m
60-80%
0-20%
METAL
BRICK
6
EN
FR
DE
NL
SP
Operating distance. Please test the chime in the location
before installing the bell push
Portée en champ libre. Merci de tester le carillon en
conditions réelles Avant installation du bouton de sonnette.
Betriebsentfernung. Testen Sie die Klingel bevor Sie diese
fest installieren.
Werkafstand. Bel tesen op locatie Voor het instellen van de
drukknop.
Distancia de funcionamiento. Por favor, prueba el timbre en
la que vaya a ser su localización final antes de instalar el
pulsador
RESET
10s
HOLD
BEEP
BEEP
10s
HOLD
BEEP
EN
FR
DE
NL
SP
Once the door bell is reset, follow step 3 onwards
une fois la remise à niveau du carillon effectué, suivez les instructions de l’étape 3
bitte die Einstellungen für die Türklingel zurücksetzen und mit Schritt 3 fortfahren
Zodra de deurbel gereset is ga verder met stap 3.
Una vez haya reiniciado el timbre, vaya al paso 3.
Jason Anderson
Quality Assurance Manager
34, Sherwood Rd
Bromsgrove
B60 3DR. UK
www.chbyron.eu
smartwares
safety & lighting Ltd
433.92MHz
+
EN
FR
DE
NL
SP
Installing the push batteries
Insertion des piles du bouton de sonnette
Einsetzen der Batterien in den Türdrücker
bel knop batterijen installeren
Instalación de las pilas del pulsador
1
AA
AA
AA
EN
FR
DE
NL
SP
Installing the door bell batteries
Insertion des piles du carillon
Einsetzen der Batterien on die Türklingel
Deurbel batterijen installeren
Instalación de las pilas del timbre
BEEP
2
C
M
Y
CM
MY
CY
CMY
K
BY501 A3 IM 13112013.pdf 1 13/11/2013 10:47