support@swiftlane.com
| 505-657-9438
19
Installation Steps
Step 1: Wall-mounting Box or Flush-mounting Box Installation
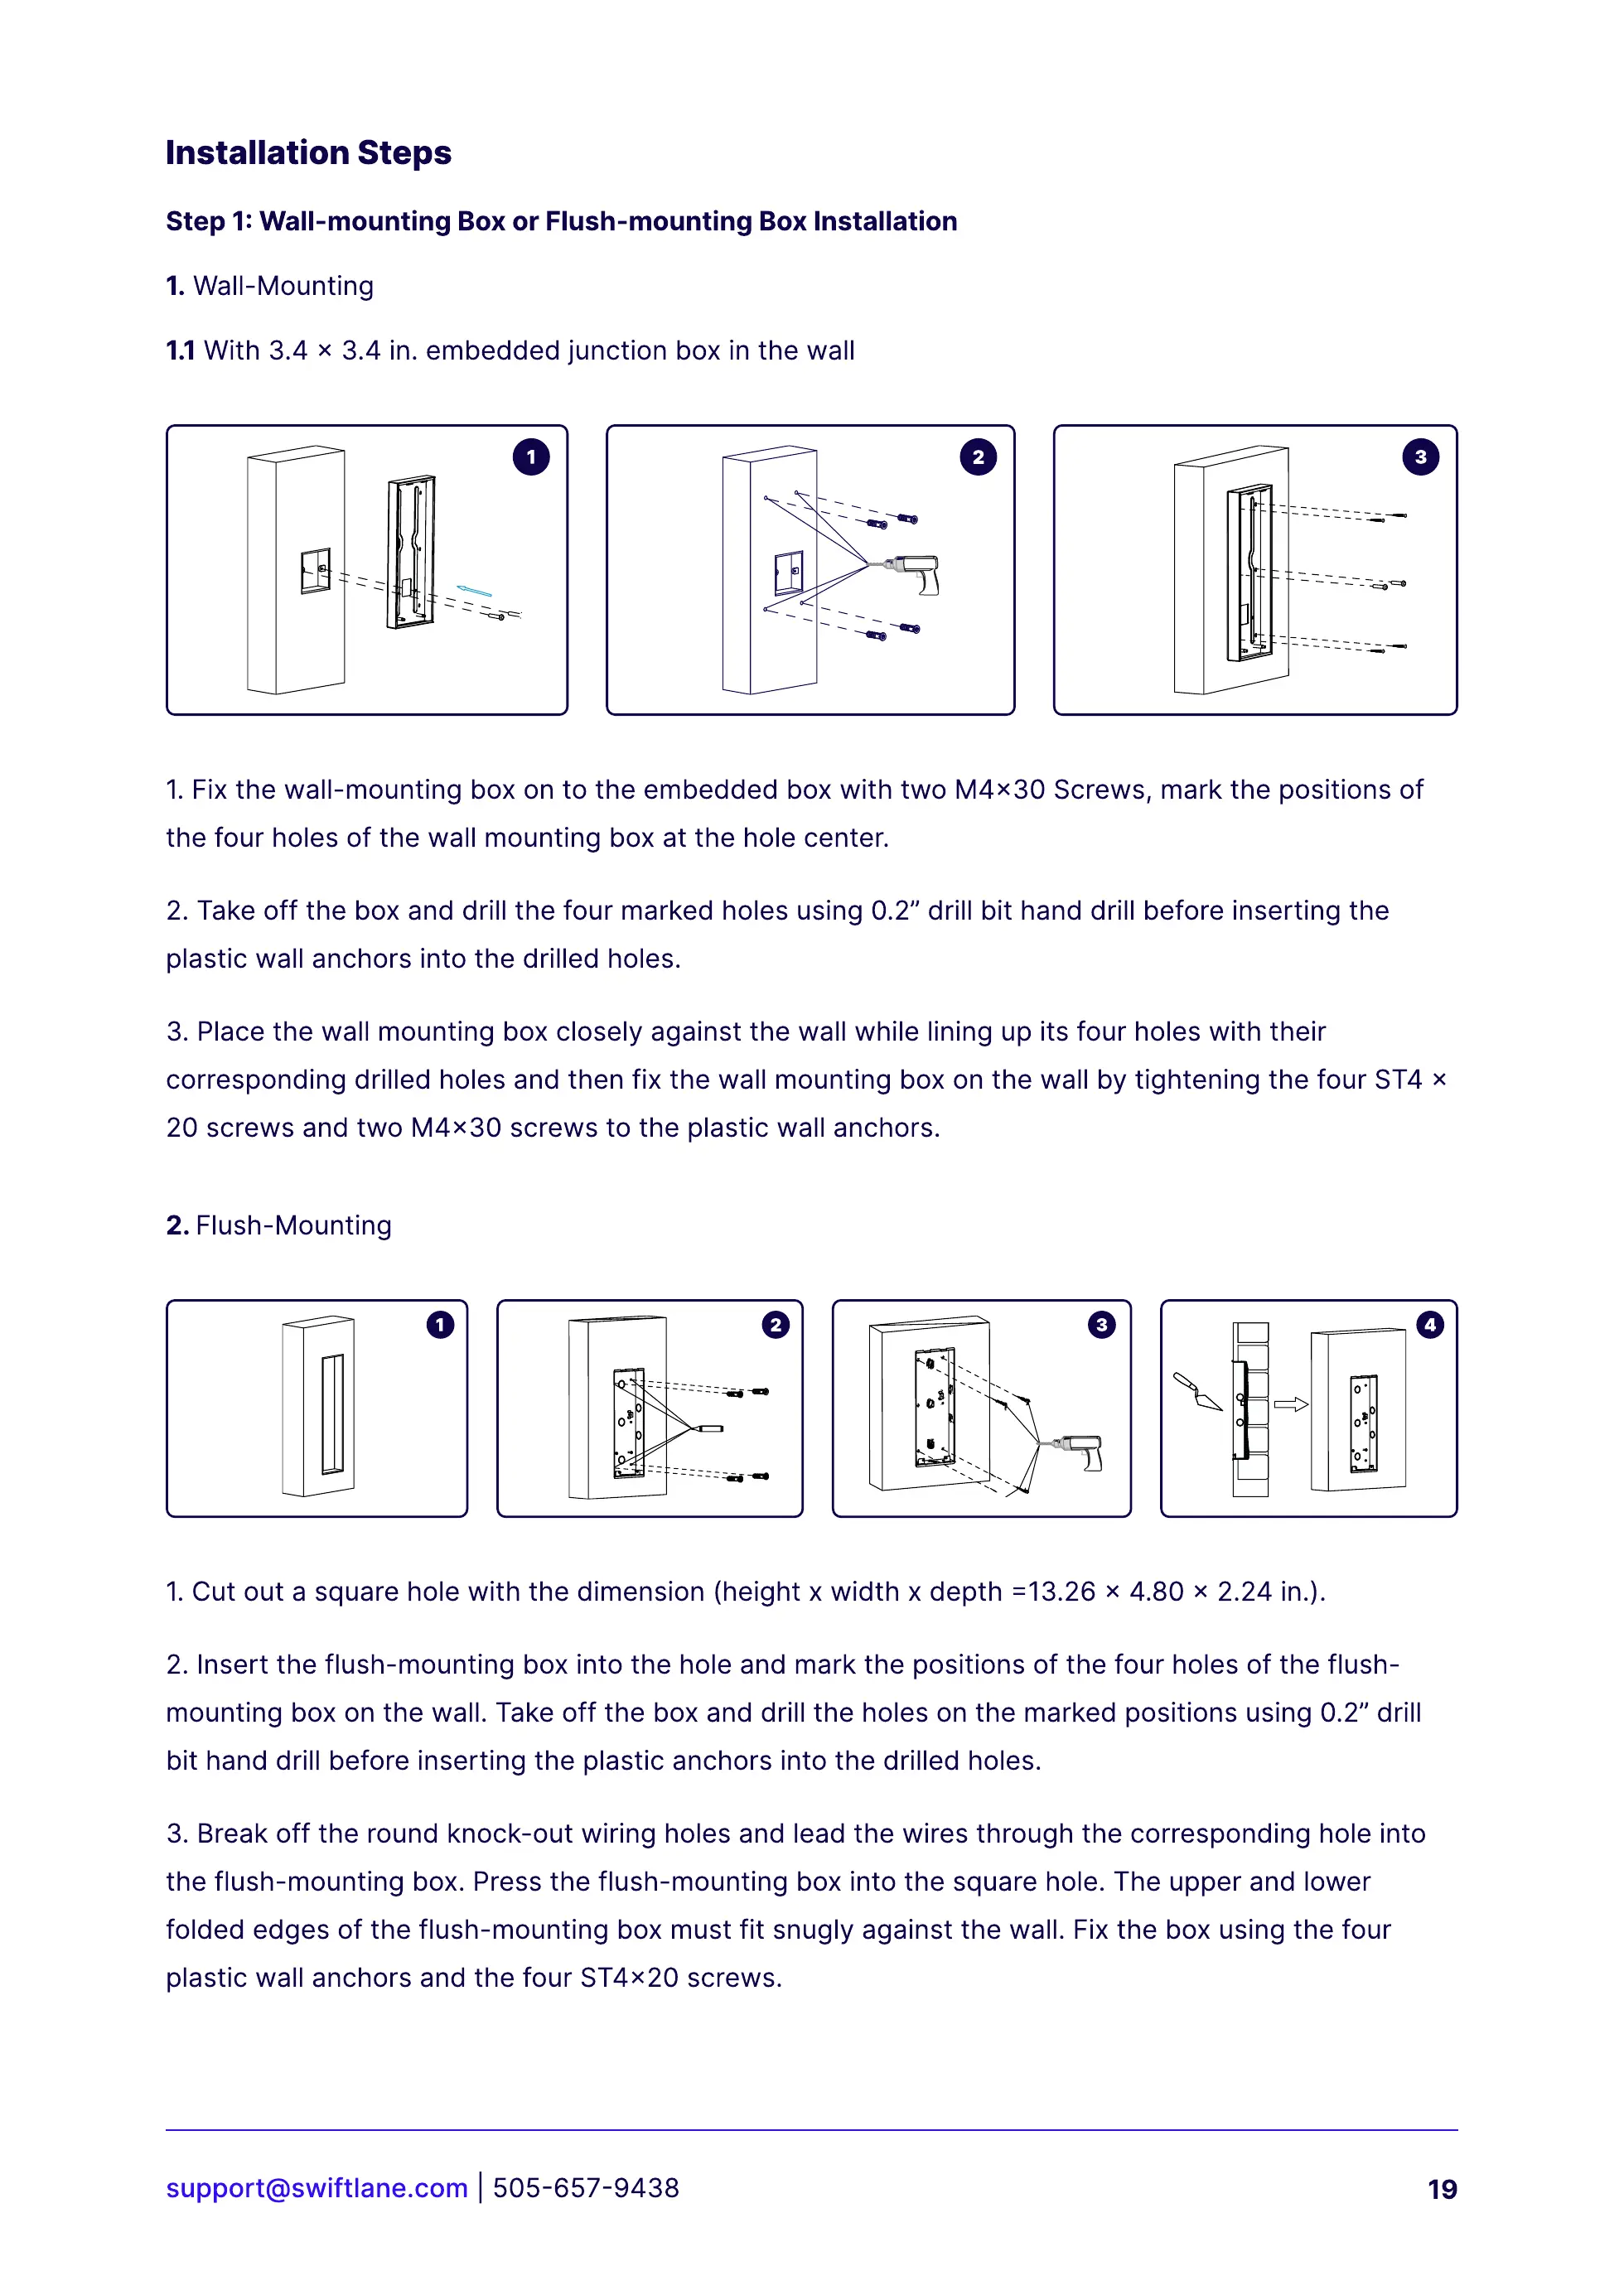
1.Wall-Mounting
2. Flush-Mounting
1.1 With 3.4 x 3.4 in. embedded junction box in the wall
1. Fix the wall-mounting box on to the embedded box with two M4x30 Screws, mark the positions of
the four holes of the wall mounting box at the hole center.
2. Take off the box and drill the four marked holes using 0.2” drill bit hand drill before inserting the
plastic wall anchors into the drilled holes.
3. Place the wall mounting box closely against the wall while lining up its four holes with their
corresponding drilled holes and then fix the wall mounting box on the wall by tightening the four ST4 x
20 screws and two M4x30 screws to the plastic wall anchors.
1. Cut out a square hole with the dimension (height x width x depth =13.26 x 4.80 x 2.24 in.).
2.
I
nsert the flush-mounting box into the hole and mark the positions of the four holes of the flush-
mounting box on the wall. Take off the box and drill the holes on the marked positions using 0.2” drill
bit hand drill before inserting the plastic anchors into the drilled holes.
3.
B
reak off the round knock-out wiring holes and lead the wires through the corresponding hole into
the flush-mounting box. Press the flush-mounting box into the square hole. The upper and lower
folded edges of the flush-mounting box must fit snugly against the wall. Fix the box using the four
plastic wall anchors and the four ST4x20 screws.