support@swiftlane.com
| 505-657-9438
20
4. Make sure that the flush-mounting box are well tightened and its upper and lower folded edges are
fit snugly against the wall, fill in the gap between the wall and the flush-mounting box using cement or
non-corrosive structural adhesive and wait until the cement is hardened before proceeding to the next
step.
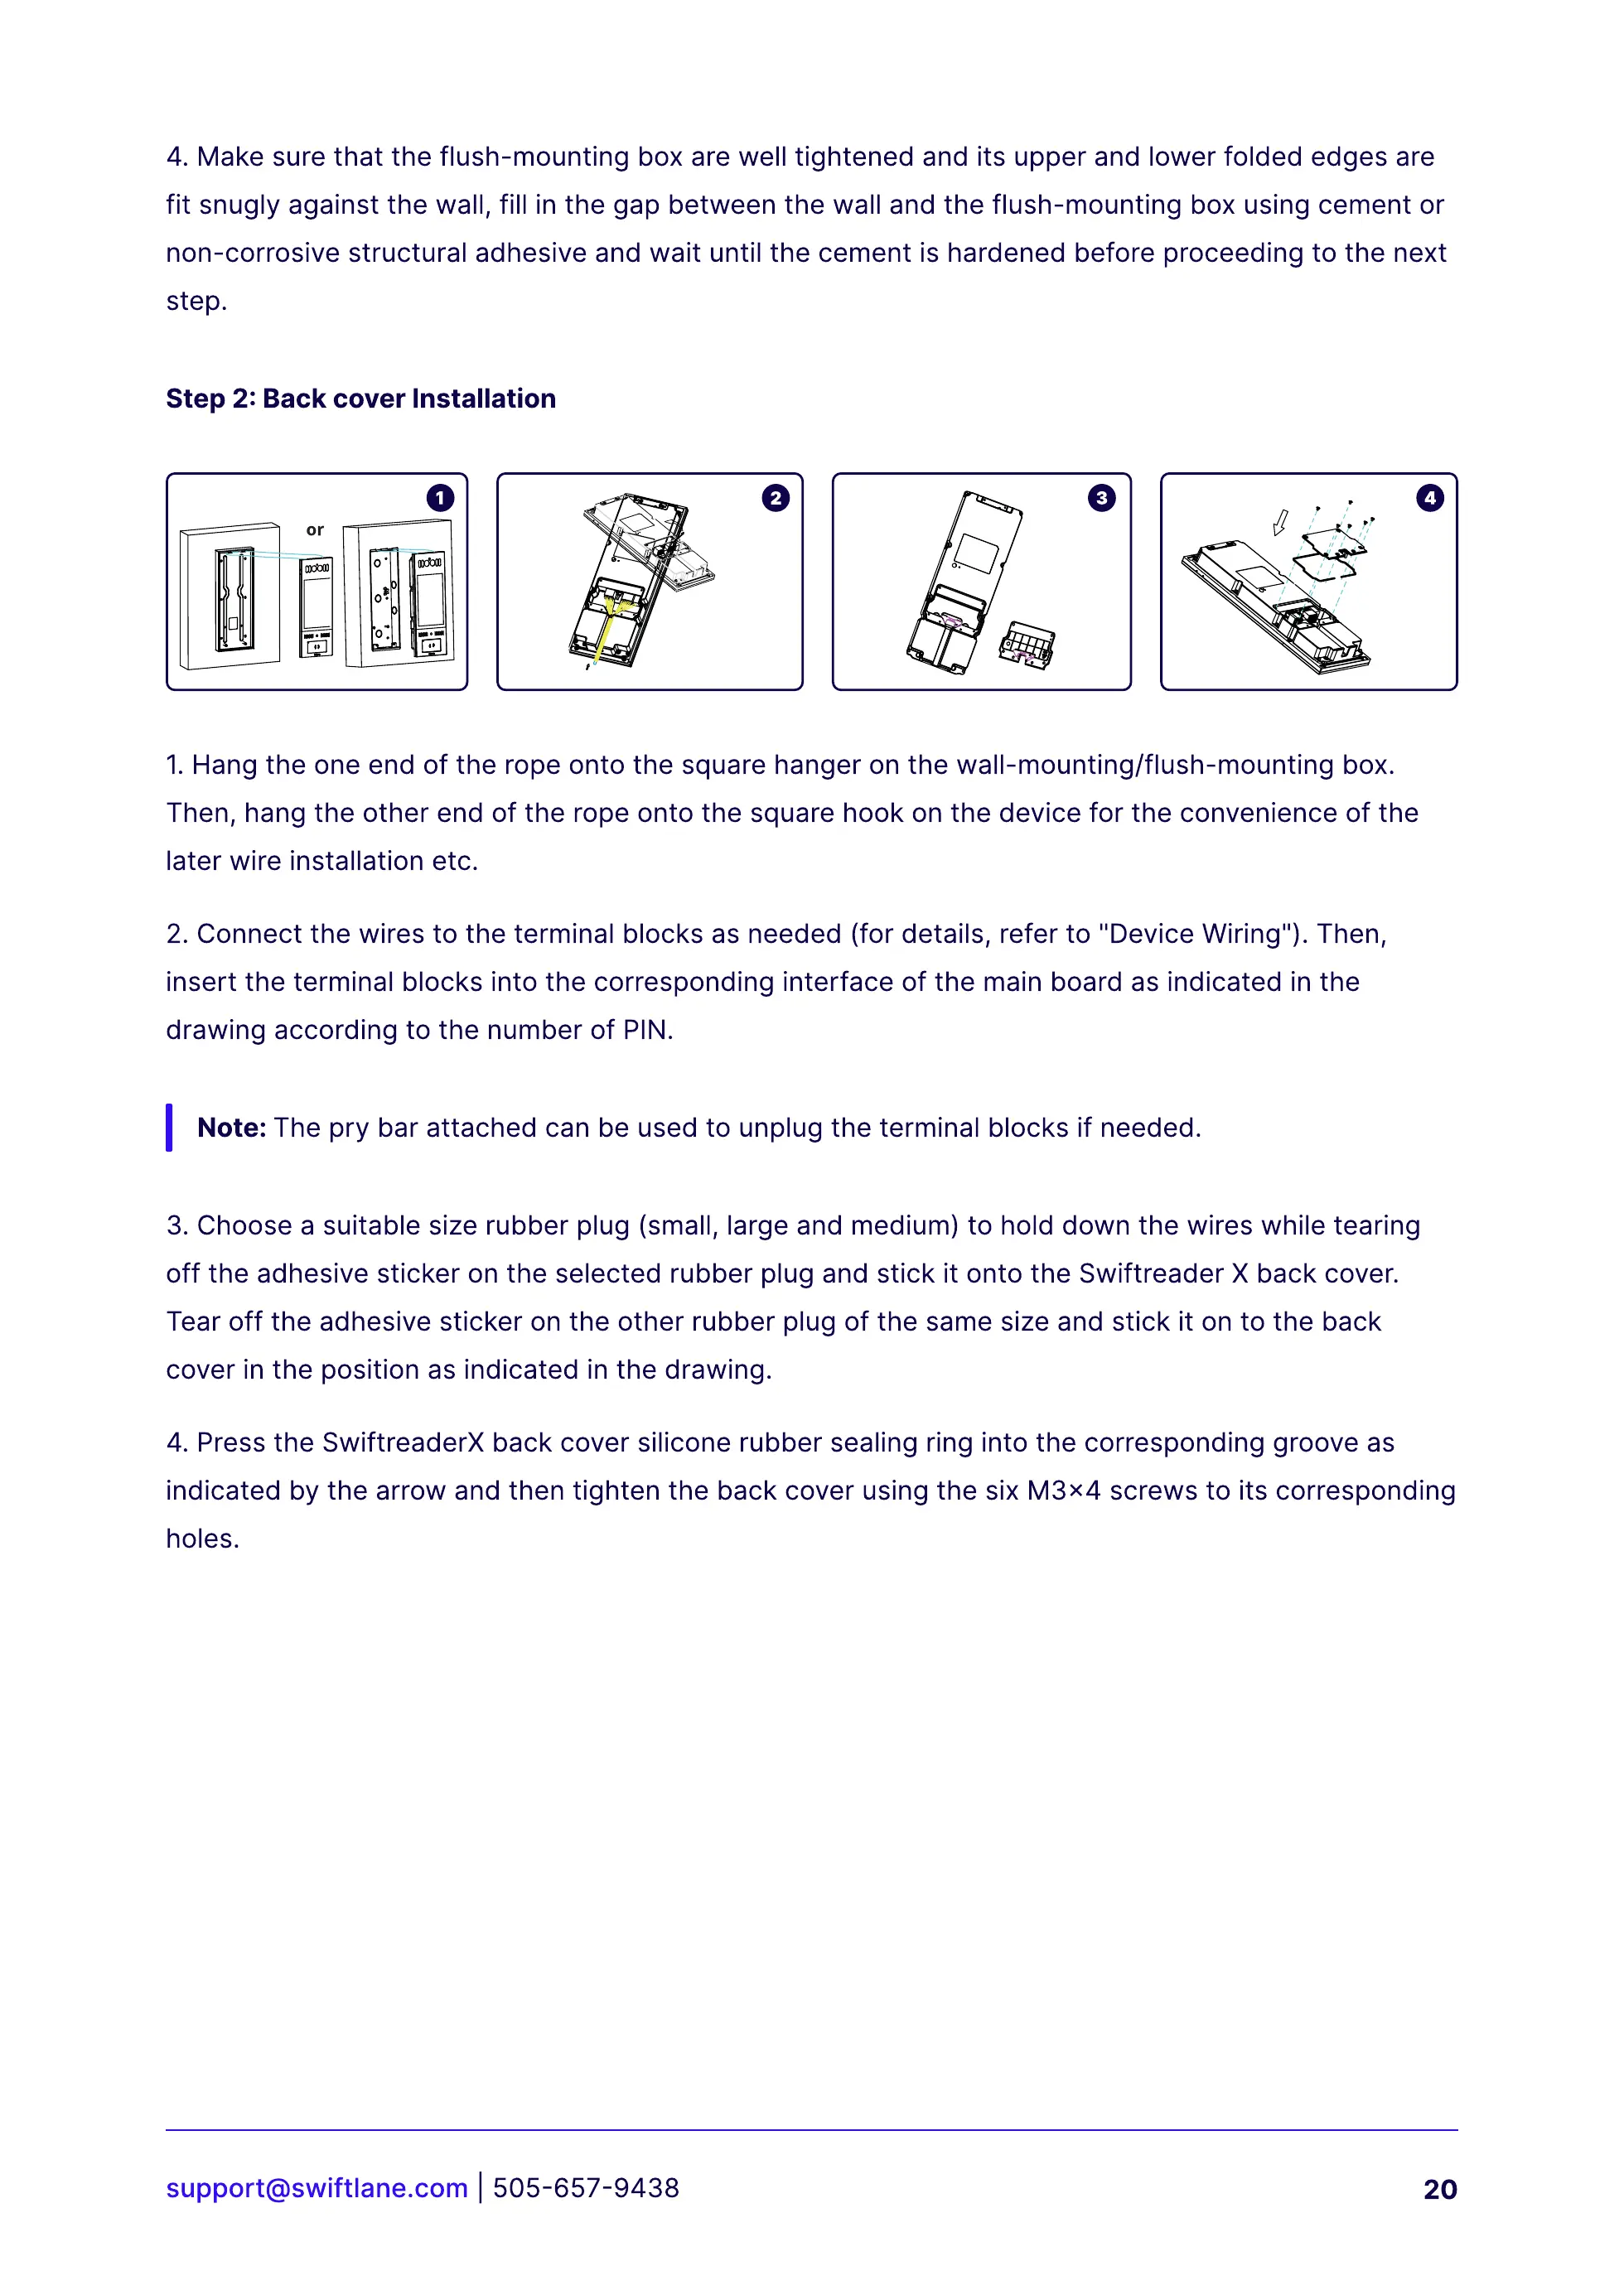
Step 2: Back cover Installation
1. Hang the one end of the rope onto the square hanger on the wall-mounting/flush-mounting box.
Then, hang the other end of the rope onto the square hook on the device for the convenience of the
later wire installation etc.
2. Connect the wires to the terminal blocks as needed (for details, refer to "Device Wiring"). Then,
insert the terminal blocks into the corresponding interface of the main board as indicated in the
drawing according to the number of PIN.
3. Choose a suitable size rubber plug (small, large and medium) to hold down the wires while tearing
off the adhesive sticker on the selected rubber plug and stick it onto the Swiftreader X back cover.
Tear off the adhesive sticker on the other rubber plug of the same size and stick it on to the back
cover in the position as indicated in the drawing.
4. Press the SwiftreaderX back cover silicone rubber sealing ring into the corresponding groove as
indicated by the arrow and then tighten the back cover using the six M3x4 screws to its corresponding
holes.
Note: The pry bar attached can be used to unplug the terminal blocks if needed.