11
6.4 Changing the Program
Switch between program 1 - 9
Press button program and hold it over 3 seconds.
The display of the selected program is blinking.
Select the program by pressing the program button.
If the button program not used for 3 seconds, the program display will end the blinking and the new program is
selected.
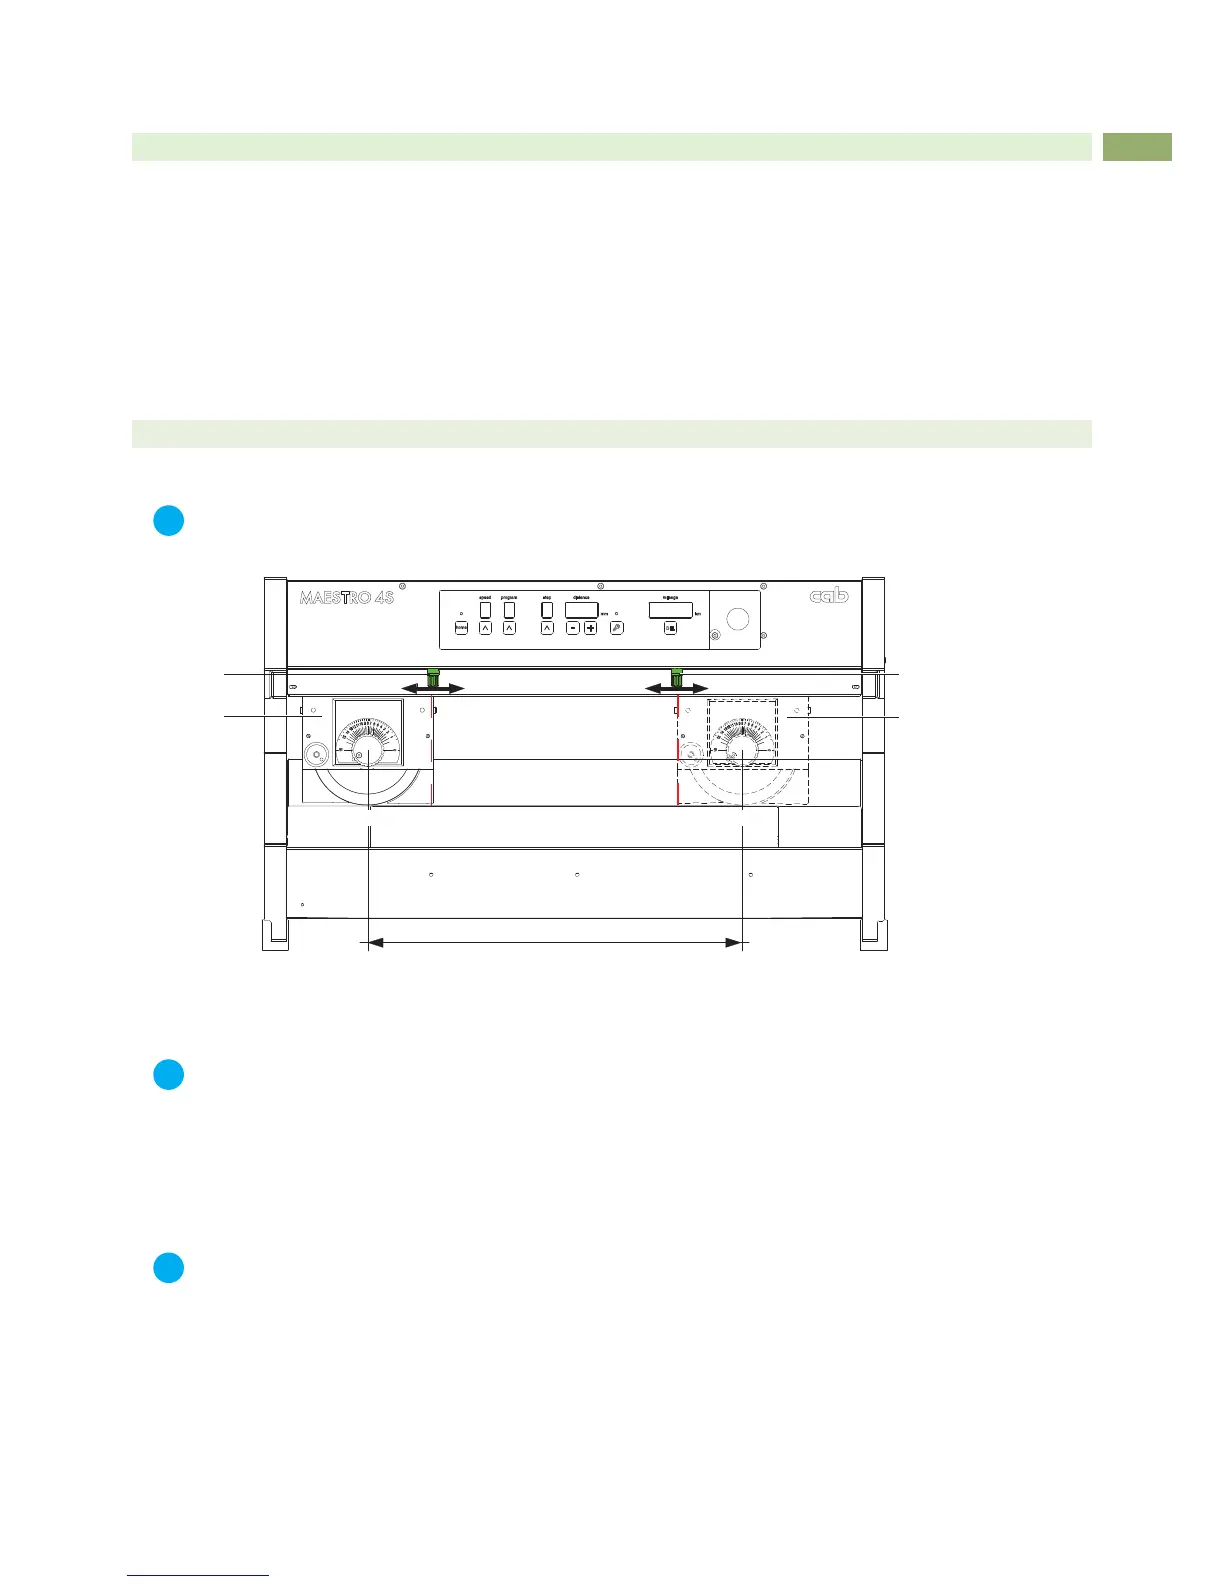
7 Adjustment the Cut Length
i
Notice!
The adjusted cut length must be orientated on the separated PCB. Then, the display "mileage" for the cut
length shown a realistic value.
Schnittlänge
a
b
3
3
22
Fig.7 Length of cut
1. Loosen easy knurled screw (1 and 2) and move it to the maximum outside position.
i
Notice!
Don't loosen the knurled screws (1 and 2) complete. loosen it only easy.
2. Activate the foot switch to start and run the program one times.
The carriage will be now in a Endposition and the lower blade is free.
3. Hold the PCB on an any position between the both knurled screw.
4. Move the knurled screws (1 and 2) to the outside edges of the PCB and tighten the screws.
i
Notice!
The distance between the knurled screws (1 and 2) must be 20mm minimum. In case of a smaller distance,
the sensors will not detected and the blade will run over the full length.
5. Activate the foot switch to start and run the program one times.
6. The carriage is standing now in the rst cut position.
7. Put the PCB into the adjusted cut area (a to b) on the lower blade and move it in direction to the round blade
midpoint ca. 10 mm under the carriage (3).
8. Check the setting with a test cut and maybe make a ne adjustment.
6 Switch on and Programming