HELiOS Portables Technical Service Manual • PN 20562190 Rev E
36
HELiOS Portables
Troubleshooting & Repair Procedures
XI
8. Remove the nut that secures the oxygen supply line quick
connect to the front cover using a 5/8 inch open-end wrench.
9. Remove the quick connect from the outside of the cover.
10. To replace the front cover, reverse steps 1-9.
RP5B – Rear Cover R/R
1. Remove the case (RP4)
2. Disconnect the two contents indicator assembly springs
from the spring hooks (shown in Figure 23) molded into the
bottom of the rear cover by grasping the hooked ends with
needle-nose pliers.
3. Disconnect the two springs from the contents indicator as-
sembly steel pull handle and indicator plate by grasping the
hooked ends with needle-nose pliers.
4. Slide the indicator plate off the end of the steel pull handle.
5. Remove the hitch pin (if present) from the steel pull handle.
6. Slide the steel pull handle out the top of the rear cover.
7. Remove the non-stick pad located above the two pull handle
guides.
8. Remove the carrying strap from the steel pull handle.
9. To replace the rear cover, reverse steps 1-8.
NOTE: Install the steel pull handle so that the arm with two
holes is the farthest from the vent lever opening. Insert the
straight leg of the hitch pin through the upper hole in the pull
handle until the pin snaps into place. The open end of the
hitch pin should face the center of the rear cover.
NOTE: This is not required for units manufactured without
the CPC Fitting.
NOTE: This is not required for units manufactured without
the CPC Fitting.
CAUTION: Do not over-stretch the contents indicator spring.
This can cause inaccurate readings.
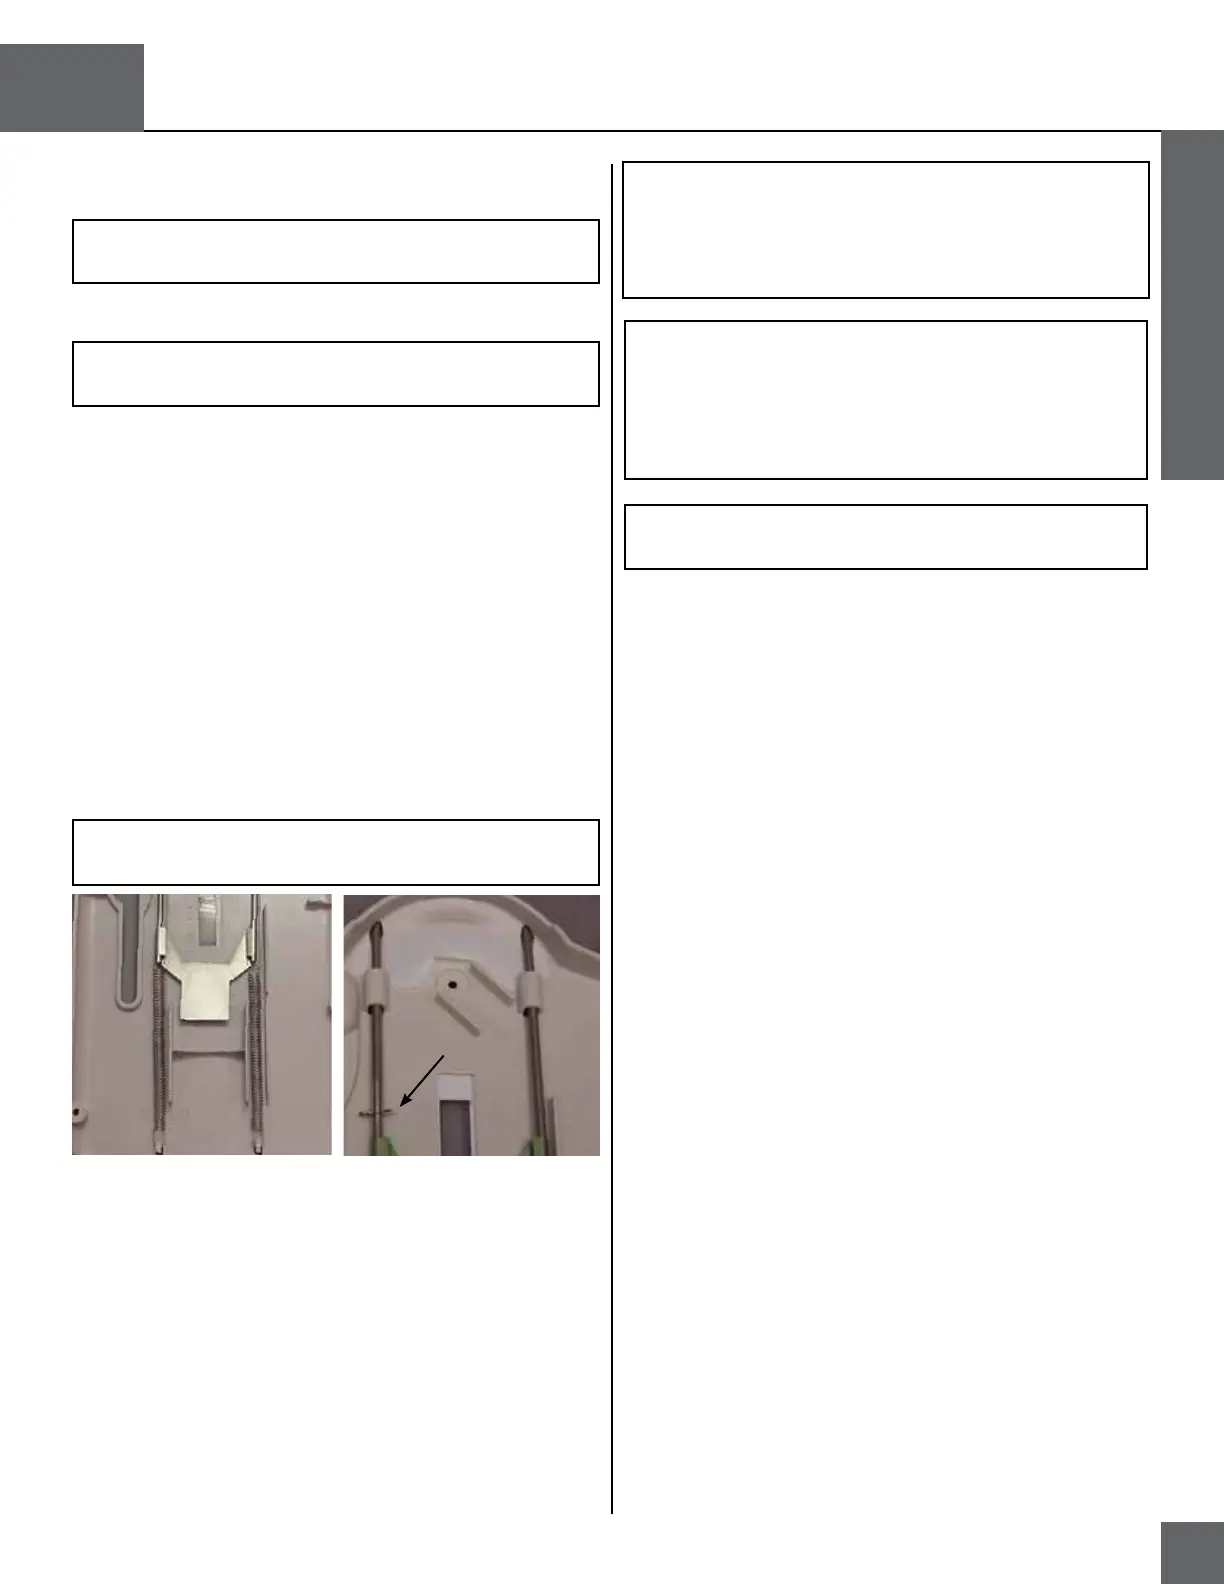
Figure 27: Contents Indicator Spring
Non-stick Pad
Hitch Pin
Spring
Hooks
Indicator
Plate
NOTE: When replacing the rear cover, be sure to install a
new warning label.
NOTE: When installing the contents indicator springs, make
sure that the open ends of the spring hooks face the center
of the rear cover. The top spring hooks must fit through the
holes in the indicator plate arms and the steel pull handle.
The non-stick pad must be in position behind the steel pull
handle.
RP6 – Contents Indicator Test
1. Verify that the unit is empty and nothing is attached to it.
2. Place the H300 or H850 on a table and hold it down while
gently pulling up on the contents indicator strap. Verify that
the indicator operates smoothly and without binding.
3. Suspend the unit in the air by its contents indicator strap
only. Verify that the green bar does not appear in the win-
dow on the rear case.
4. Completely fill the unit with liquid oxygen.
5. Lift the unit in the air by its contents indicator strap.
6. Push the bottom backside of the unit gently forward so that
it stands straight vertically. Verify that the green bar fills the
window on the rear case.
7. If the contents indicator reads inaccurately, replace the con-
tents indicator (RP5B).