13/28
4. TRANSPORT AND STORAGE
1. Transport
If you want to transport the pallet forks frame on a pallet, make sure that the attachment is securely
attached so that it can’t fall off.
Safely transport the pallet forks frame by following the next steps:
1. Check the type plate to know the weight of the pallet forks frame. Select the appropriate material
according to the weight (ropes, cables, hooks, etc.).
2. Attach the lifting device to the pallet forks frame.
3. Lift the pallet forks frame with a crane. Only use a crane with sufficient capacity and secure the
pallet forks frame to the crane, so that it can be lifted safely.
4. Place the pallet forks frame onto a pallet.
5. Secure the pallet forks frame onto a transport pallet with retaining bands.
6. Wrap the attachment with film to protect weather influences and corrosion during transport.
• Adjust your driving speed while driving over rough terrains and slopes.
• Only transport the pallet forks frame in its lowest position.
• Before transporting the pallet forks frame, carefully read the instructions in the manual of
the lifting device.
When the machine is not in use, avoid unexpected movement by ensuring that the machine is in a
stable position.
2. Storage
The pallet forks frame must always be stored in a dry and temperature-controlled environment. Do not
store this product outside in a wet environment.
Store the pallet forks frame in a safe place and make sure it can’t fall over.
Lubricate metal parts with an anti-corrosive agent (REF 166TA1570 or REF 143TA6901).
Avoid direct sunlight.
Do not leave the truck unguarded without applying the handbrake and switching off the
engine first.
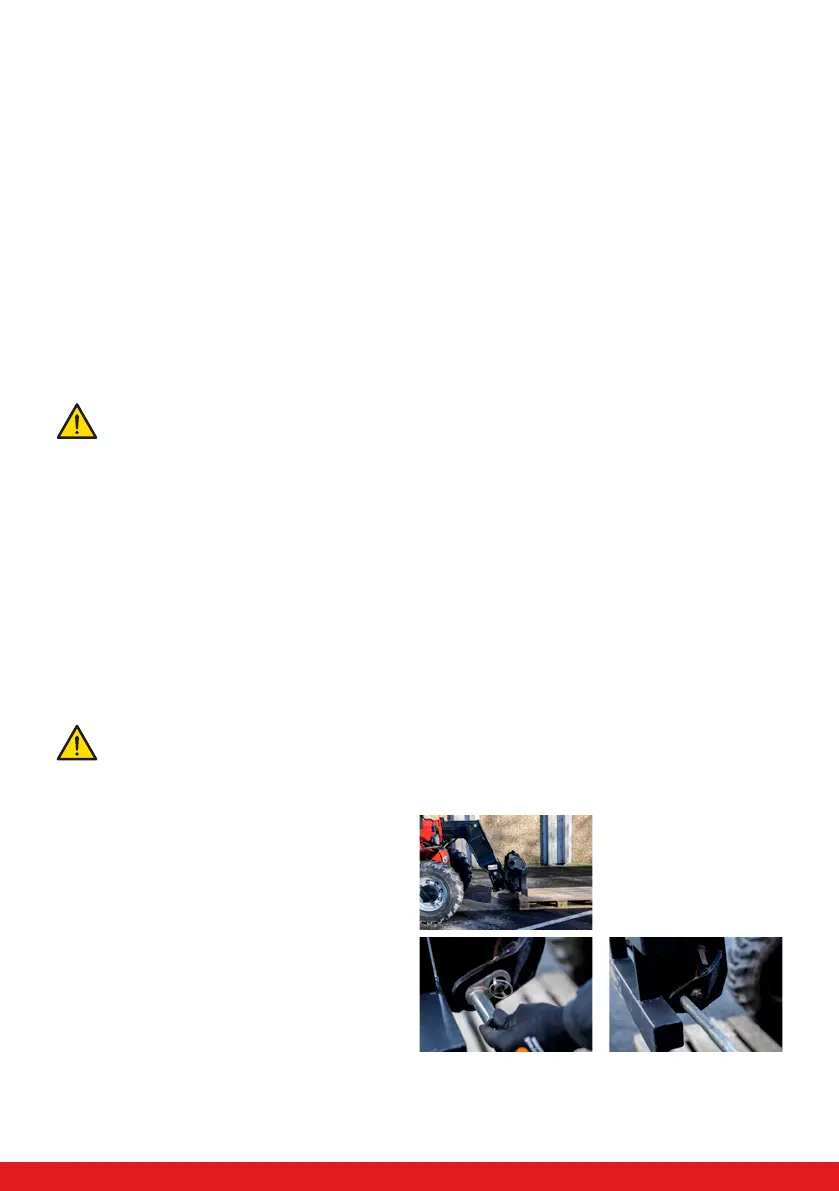
Disconnect the pallet forks frame on a flat surface by following these instructions:
1. Bring the pallet forks frame to its lowest
position.
2. Remove the pins from the quick coupling
frame.