22
Section 4 Model 752 and 752A Differential Pressure Transmitters
cess being monitored from the monitoring instruments.
3. Congure the test manifold control valve to connect the output of the test
pressure source to the high port of the DPU and vent the low side of the
DPU to atmosphere.
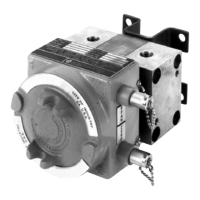
4. Verify that all electrical connections are properly installed (see electrical
connections in Figure 3.1, page 15.
5. Apply the appropriate power supply voltage to the transmitter. (To deter-
mine this voltage, see Power Supply, page 4.)
6. Exercise the transmitter by applying 0% and 100% calibration pressures
(specied in Table 4.2, page 21) three times. If performing a calibration
check only, proceed to step 10.
7. Apply the calibration pressure for the 0% checkpoint (as specied in
Table 4.2, page 21). Adjust the zero control potentiometer as required to
produce the recommended output level.
8. Apply the calibration pressure for the 100% checkpoint (as specied in
Table 4.2, page 21). Adjust the span control potentiometer as required to
produce the recommended output level.
9. Repeat steps 7 and 8 until no further renements can be made.
10. Apply the calibration pressures referred to in Table 4.2, page 21, starting
from 0% to 100%, and record the applied pressures and the output levels
at each measurement.
11. Repeat the calibration checks in descending order, from 75% to 0%, and
record the applied pressures and the output levels at each measurement.
12. Repeat steps 10 and 11 until you have completed three consecutive runs
and have recorded all relevant data.
Note: If correct readings cannot be obtained, refer to the troubleshooting sug-
gestions in Tables 4.3 and 4.4, or return the unit to the manufacturer for
repair and calibration.
DPU Inspection and Cleaning
To inspect and clean the DPU, perform the following steps.
1. Remove the instrument from service and remove pressure housing bolts.
2. Carefully remove the pressure housings.
Note: If accumulation of material is extensive, rapid removal of the housings
may damage the bellows convolutions.
3. Remove accumulation from between bellows convolutions and housings
using a solvent, if possible.
Note: Do not use sharp instrument to clean between bellows convolutions.