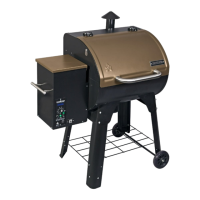
INSTALL SHELF
(Optional-Do not install if installing sear box)
1. Install shelf as shown in Fig 5.
2. Tighten all hardware
M6 HANDLE SCREW (2)
HANDLE DEFLECTOR
HANDLE
HANDLE BEZEL (2)
GREASE BUCKET
M6 X 15 SCREW
FIG. 5
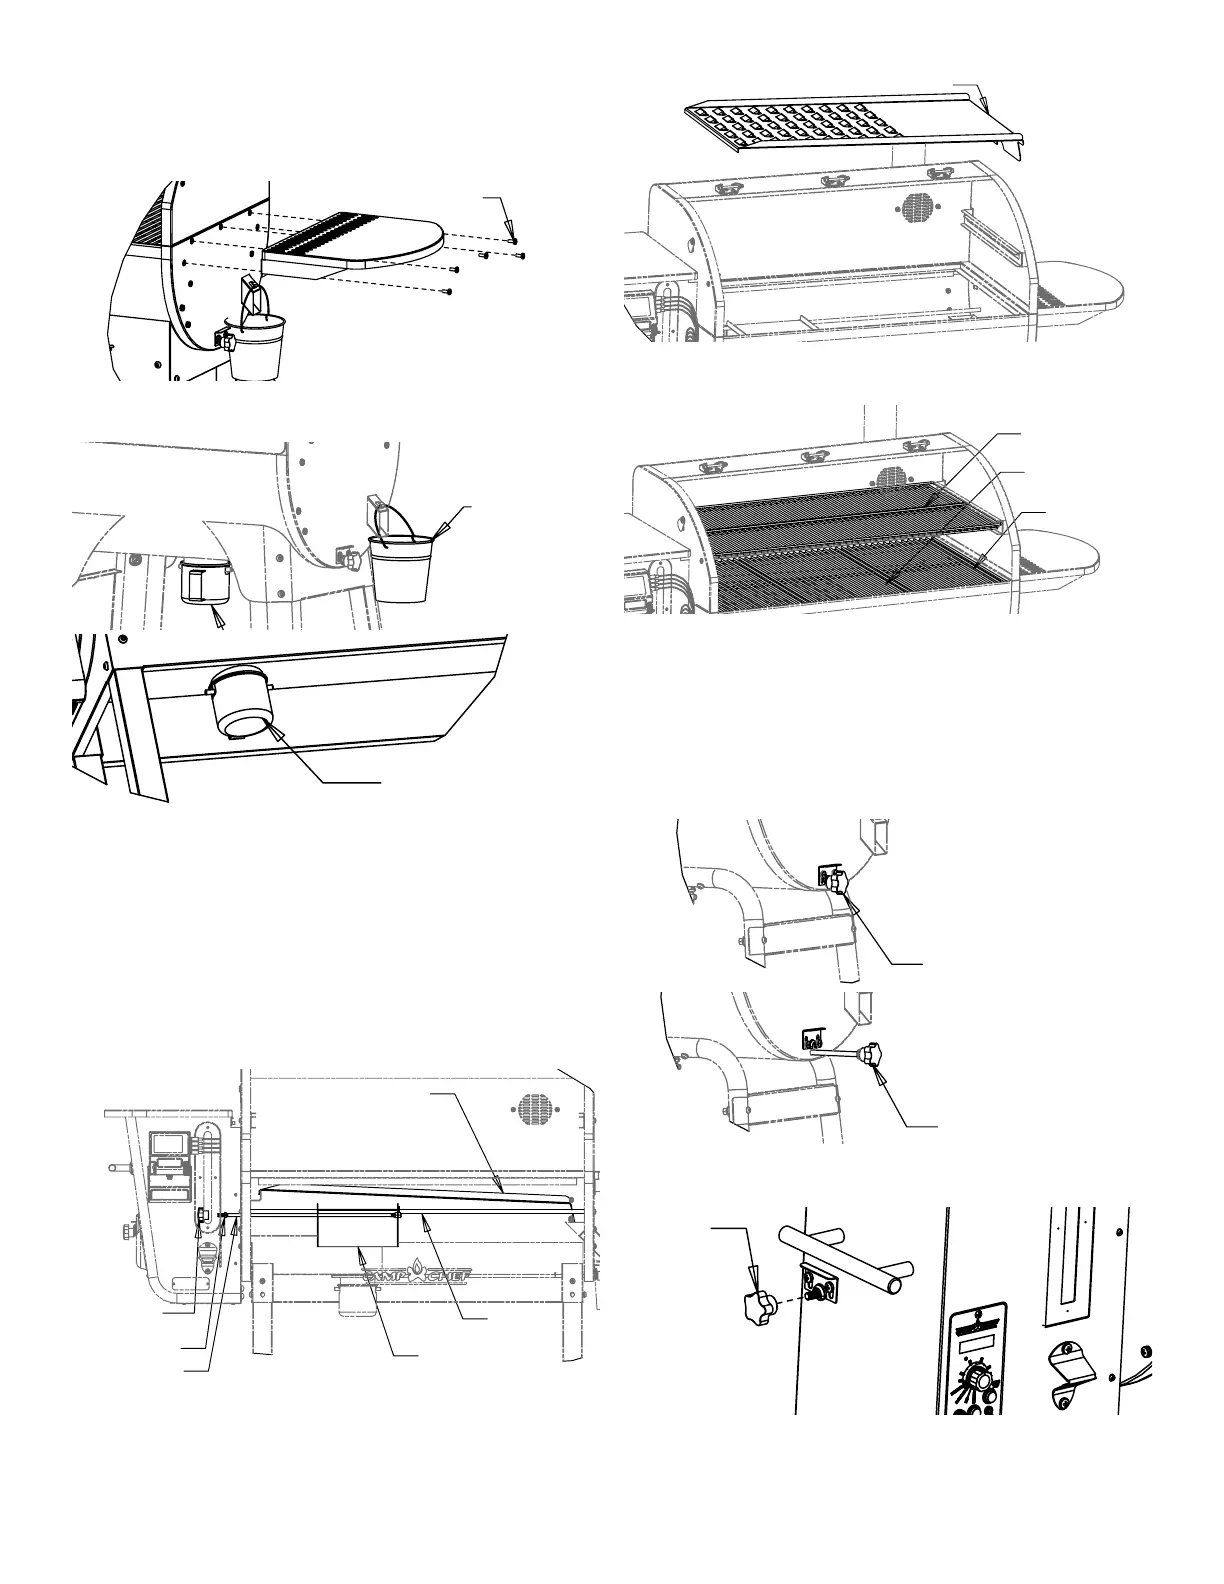
GREASE BUCKET
1. Hang grease bucket from tube as shown in Fig 13.
GREASE BUCKET
ASH CUP
FIG. 13
ASH CUP
1. Install Ash Cup as shown in Fig 13. Never use grill without
Ash Cup in place.
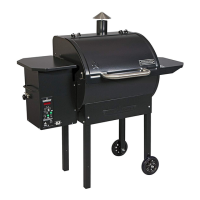
INSTALL DRIP TRAY
1. Install heat deflector as shown on top of the two guide
rods. Route the pull rod through the hole on the left side
and install the jam nut and the grill knob. Tighten jam nut
against the knob to tighten in place.
2. Install the Drip Tray as shown in Fig 14 and Fig 15.
HEAT DEFLECTOR (1)
PG24SG-2
PULLOUT KNOB (3)
PG24-9
PULL ROD (1)
SLIDE ROD (2)
PG36SGX-2
M8 X 1 JAM NUT (1)
DRIP TRAY (1)
PG36SGX-1
FIG. 14
DRIP TRAY
FIG. 15
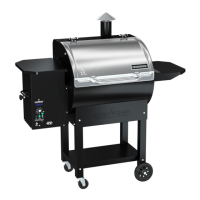
COOKING GRATES
1. Install the Cooking Grates as shown in Fig 16.
LOWER GRATE (2)
PG24-70
LOWER GRATE (1)
PG36-21
UPPER COOKING RACK (2)
PG36SGX-7
FIG. 16
CLEAN-OUT PORT KNOB
1. Clean-out Port knob must be pushed in when grill is on.
Make sure pullout lock is pushed down and locks the knob to
prevent inadvertent opening of the clean-out port. See Fig 17.
2. Lift pullout lock and pull clean-out port knob to empty ash
into ash cup. See Fig 18.
3. See instructions for burner clean-out.
CLEANOUT PORT CLOSED
FIG. 17
CLEANOUT PORT OPEN
FIG. 18
HOPPER CLEAN-OUT KNOB ASSEMBLY INSTALLATION
Hand tighten the hopper clean-out knob as shown in Fig. 19.
PG24-9 (1)
PULLOUT KNOB
FIG. 19