PARTSTOBEINSTALLED
rbl2013-002-015_a
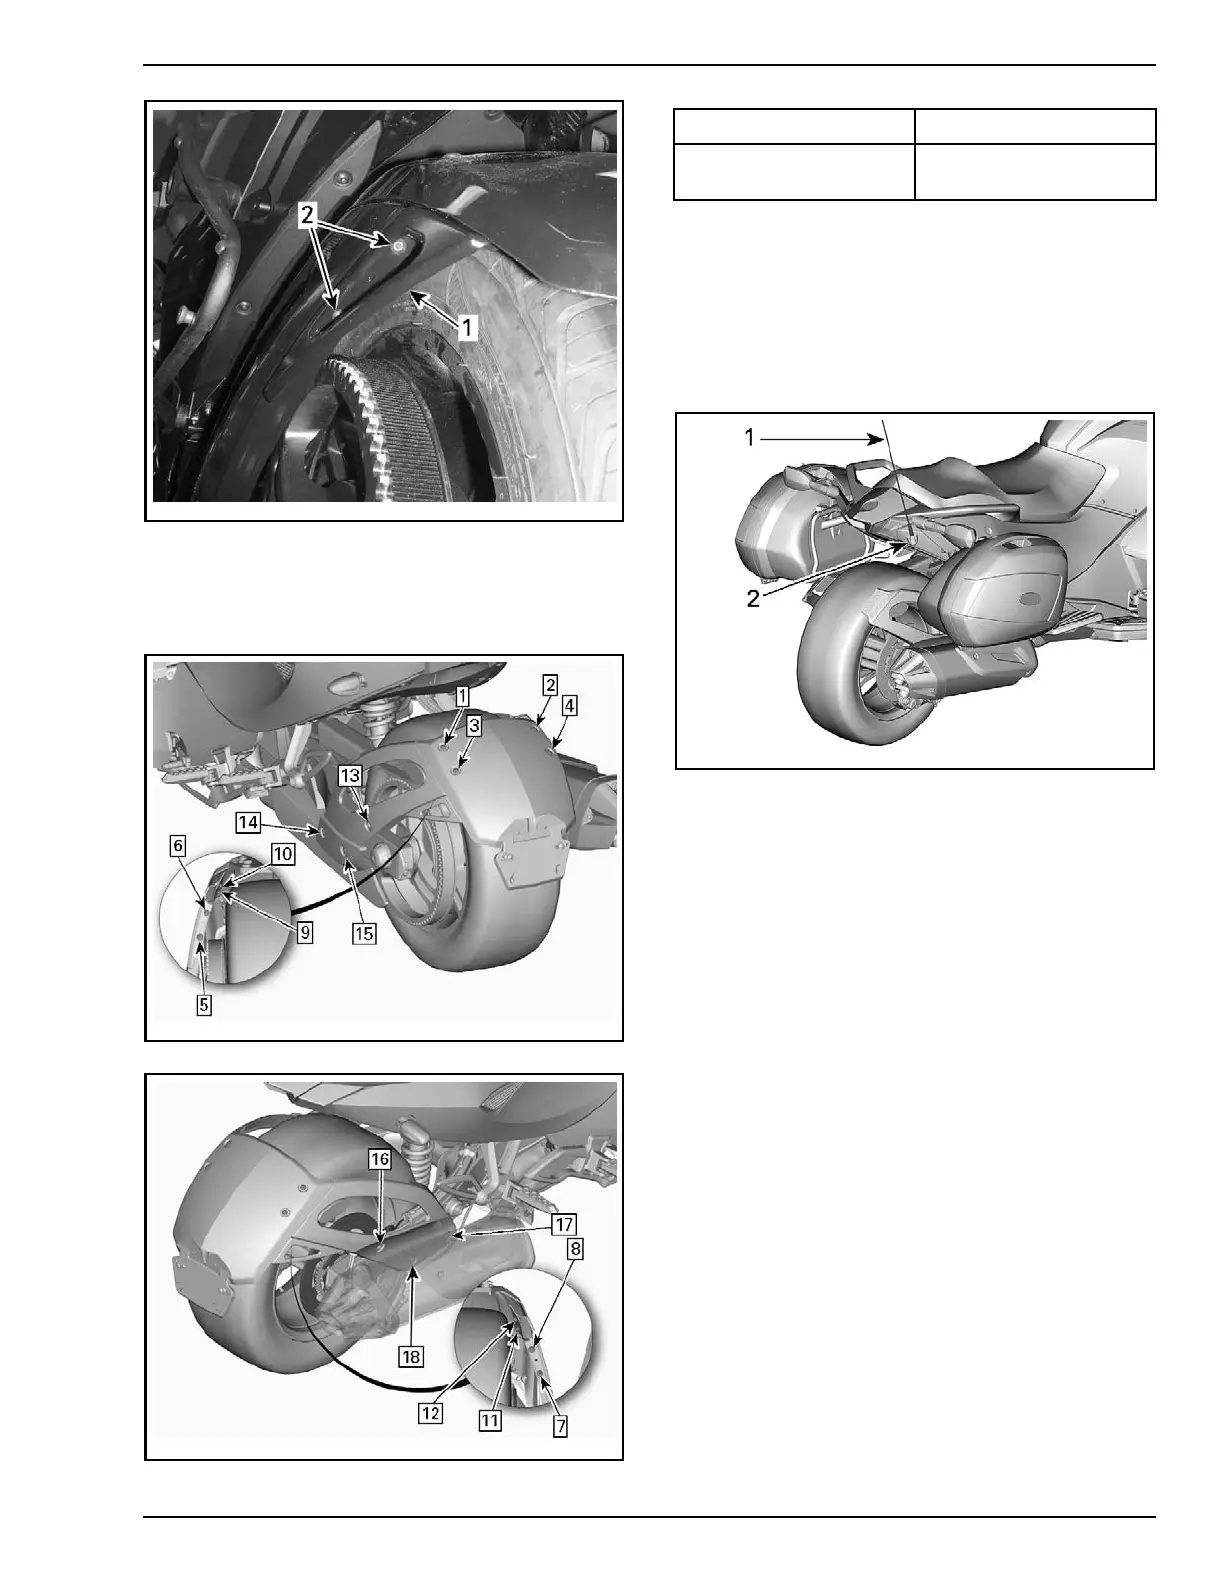
TYPICAL
1. F ender reinforcement plate
2. Sc rews and nuts
8. Torque screws and nuts according to the follow-
ing tightening sequence:
rbl2013-002-016_a
TYPICA
L
rbl2013-002-017_a
TYPICAL
PARTS SPECIFIE D TORQ
UE
Screws and nuts
7.5 N•m ± 0.5 N•m
(66 lbf•in ±4lb
f•in)
Antenna (LTD Model O nly)
Remove label from antenna. Ensure that no label
or glue residue is left on antenna.
Install antenna on RH rear side panel, near the
back of the vehicle. Tighten by hand to a snug fit
without using excessive force.
rbl2014-003-002_a
Hang Tag and Safety Labels
This vehicle c omes with a hang tag and labels
containing important safety information. The
labels are considered permanent parts of the
vehicle and should not be removed. Hang tag is
to be removed by the owner only.
Any person who rides this vehicle should read and
understand all the information given o n hang tag
and safety labels before riding.
Safety labels of several language can be chosen
by customer, according to availability.
PREDELIVERY 2014-3 25 / 41
 Loading...