[Checking the heightltilt at the rear]
1) Remove the screw [I], and detach the upper rear
cover (small) [2] of the finisher. (The figure shows
a Saddle
Finisher-AE2.)
2) Check whether the screw hole [5] is between the
upper marking-off line [3] and lower marking-off
line [4] on the fixing plate.
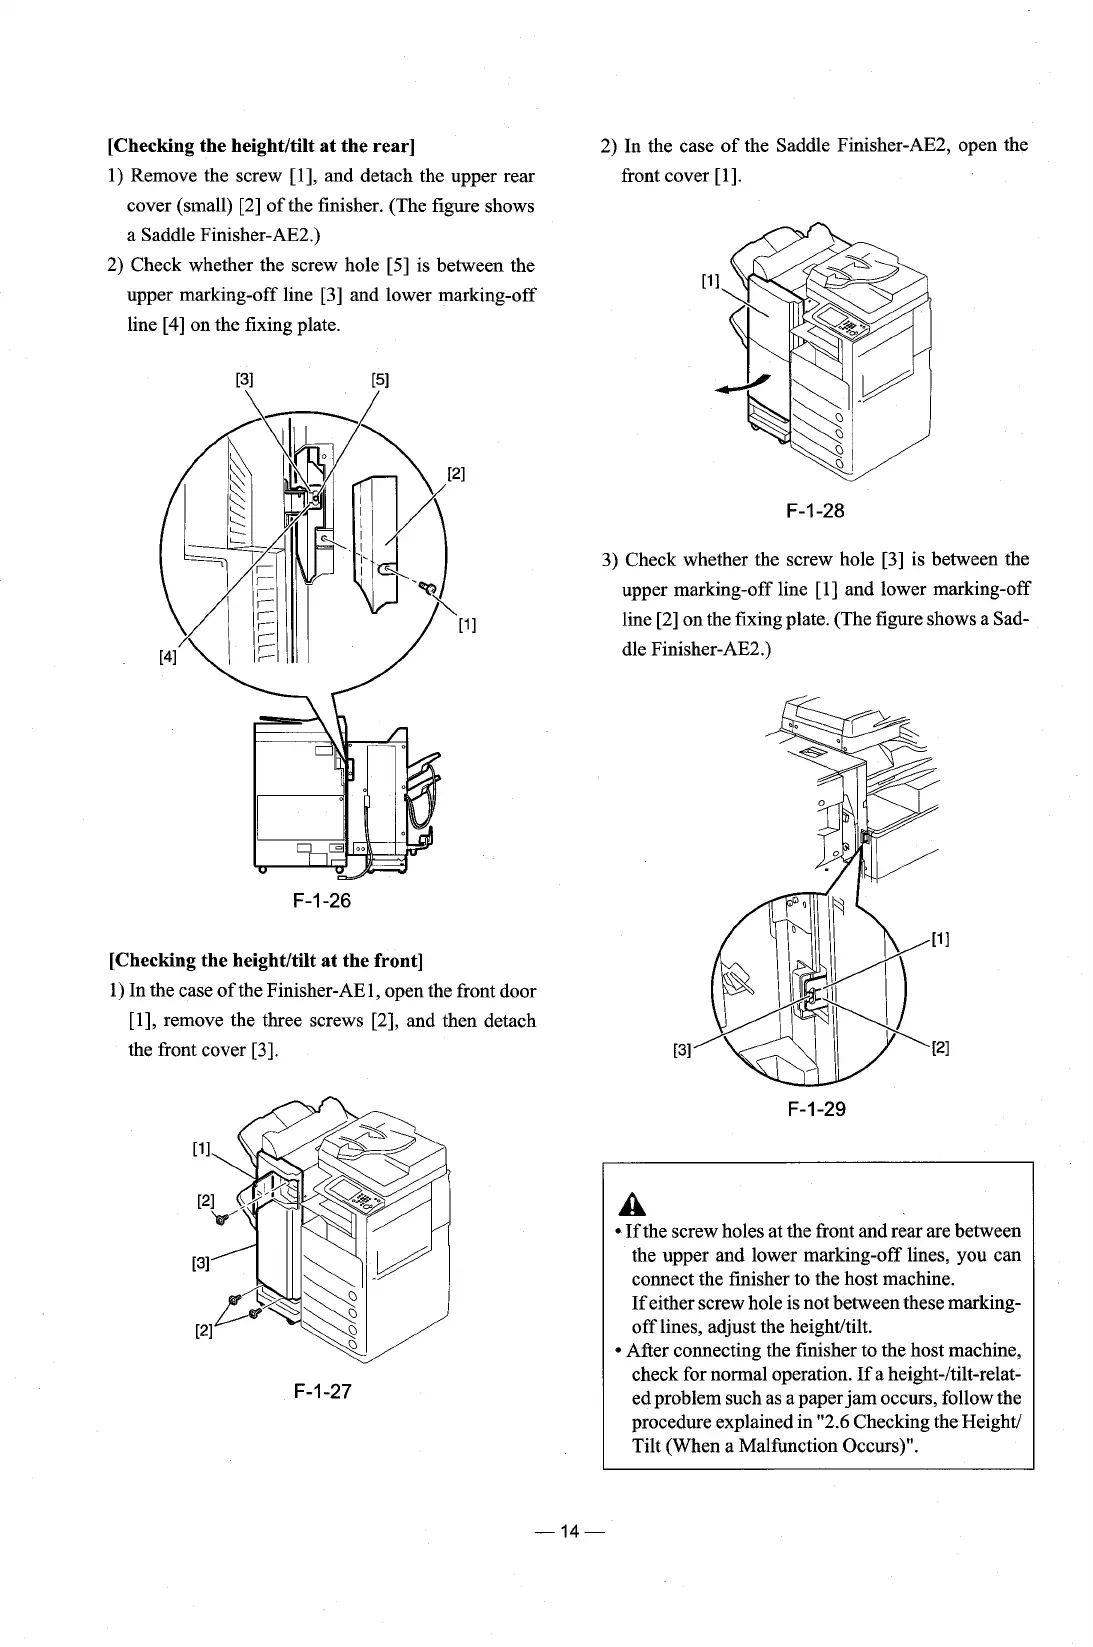
2) In the case of the Saddle
Finisher-AE2, open the
front cover
[I].
3) Check whether the screw hole [3] is between the
upper marking-off line
[I]
and lower marking-off
line [2] on the fixing plate. (The figure shows a Sad-
dle Finisher-AE2.)
[Checking the heightltilt at the front]
1) In the case of the Finisher-AE1, open the front door
[I], remove the three screws [2], and then detach
the front cover
[3].
A
If the screw holes at the front and rear are between
the upper and lower marking-off lines, you can
connect the finisher to the host machine.
If either screw hole is not between these
marking-
off lines, adjust the heightltilt.
After connecting the finisher to the host machine,
check for normal operation. If a
height-ltilt-relat-
ed problem such as a paper jam occurs, follow the
procedure explained in "2.6 Checking the
Height/
Tilt (When a Malfunction Occurs)".