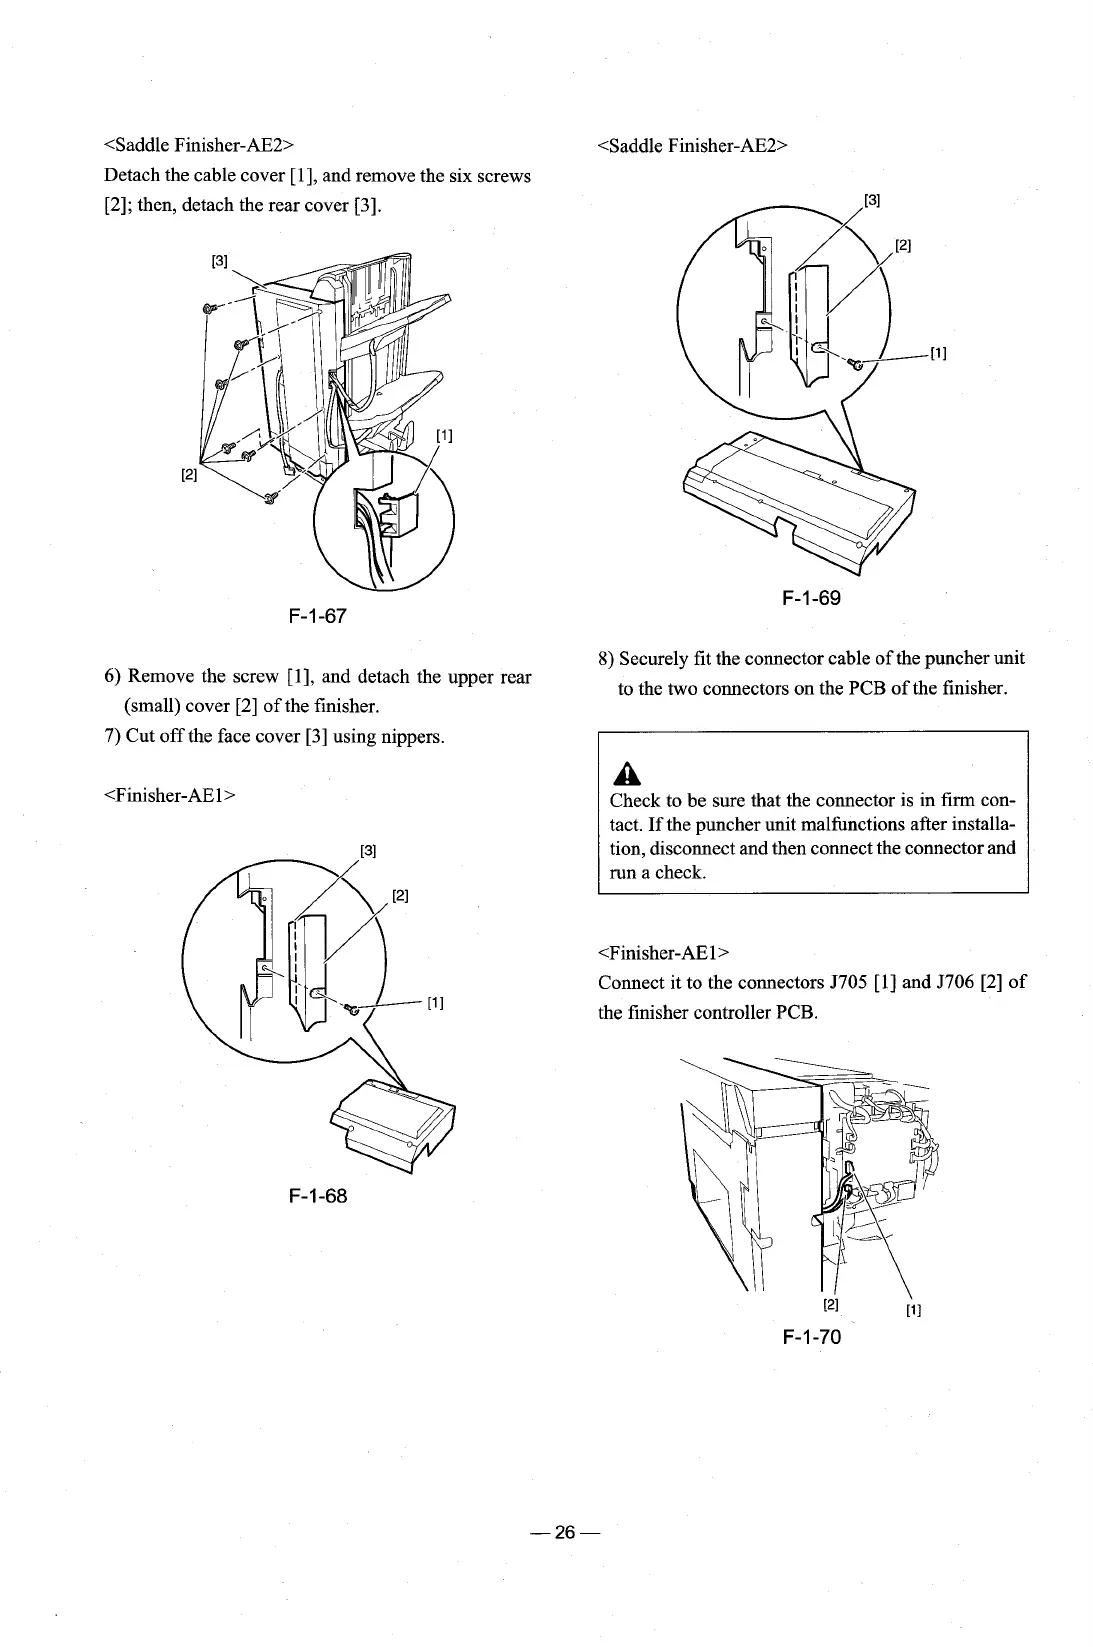
<Saddle Finisher-AE2>
Detach the cable cover [I], and remove the six screws
[2]; then, detach the rear cover [3].
6) Remove the screw [I], and detach the upper rear
(small) cover [2] of the finisher.
7) Cut off the face cover [3] using nippers.
8)
Securely fit the connector cable of the puncher unit
to the two connectors on the PCB of the finisher.
A
Check to be sure that the connector is in firm con-
tact. If the puncher unit malfunctions after installa-
tion, disconnect and then connect the connector and
run a check.
<Finisher-AE 1
>
Connect it to the connectors 5705 [I] and J706 [2] of
the finisher controller PCB.