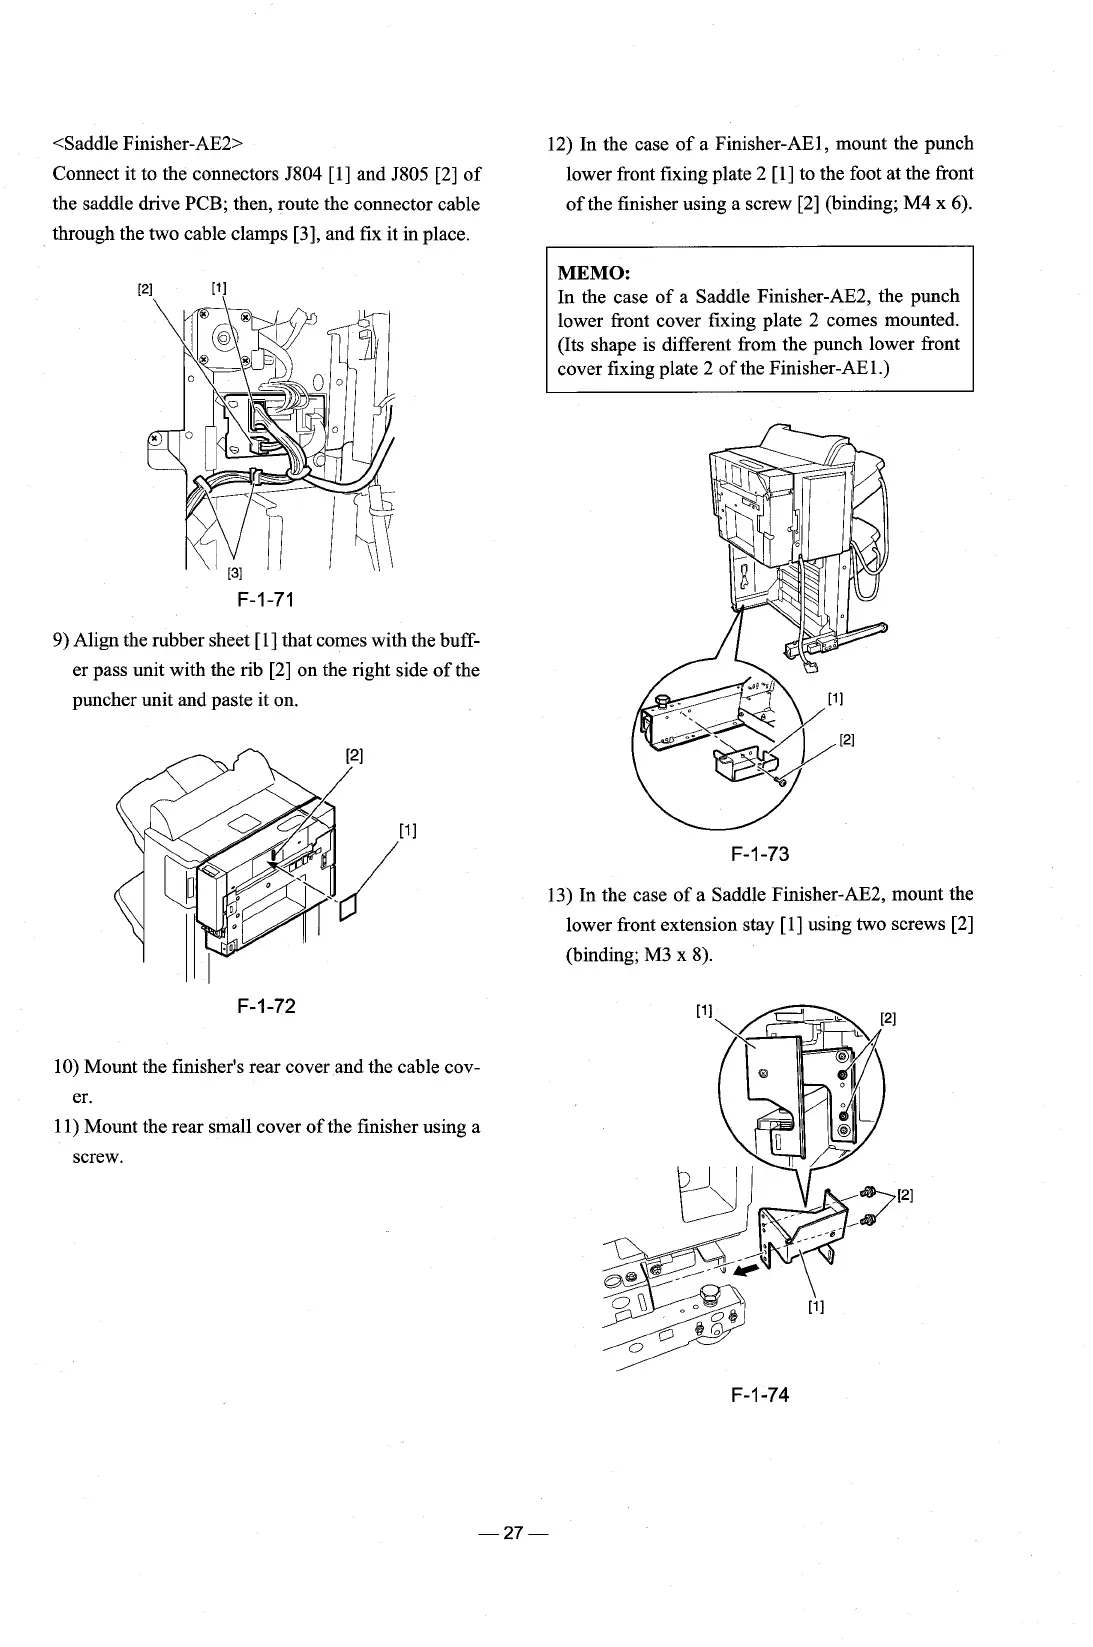
<Saddle Finisher-AE2> 12) In the case of a Finisher-AEl, mount the punch
Connect it to the connectors 5804
[I] and 5805 [2] of
lower front fixing plate
2
[I] to the foot at the front
the saddle drive PCB; then, route the connector cable
through the two cable clamps
[3], and fix it in place.
9)
Align the rubber sheet [I] that comes with the buff-
er pass unit with the rib [2] on the right side of the
puncher unit and paste it on.
10) Mount the finisher's rear cover and the cable cov-
er.
11) Mount the rear small cover of the finisher using a
screw.
of the finisher using a screw [2] (binding; M4 x
6).
MEMO:
In the case of a Saddle Finisher-AE2, the punch
lower front cover fixing plate 2 comes mounted.
(Its shape is different from the punch lower front
cover fixing plate
2
of the Finisher-AE1.)
13) In the case of a Saddle Finisher-AE2, mount the
lower front extension stay
[I] using two screws [2]
(binding; M3 x 8).