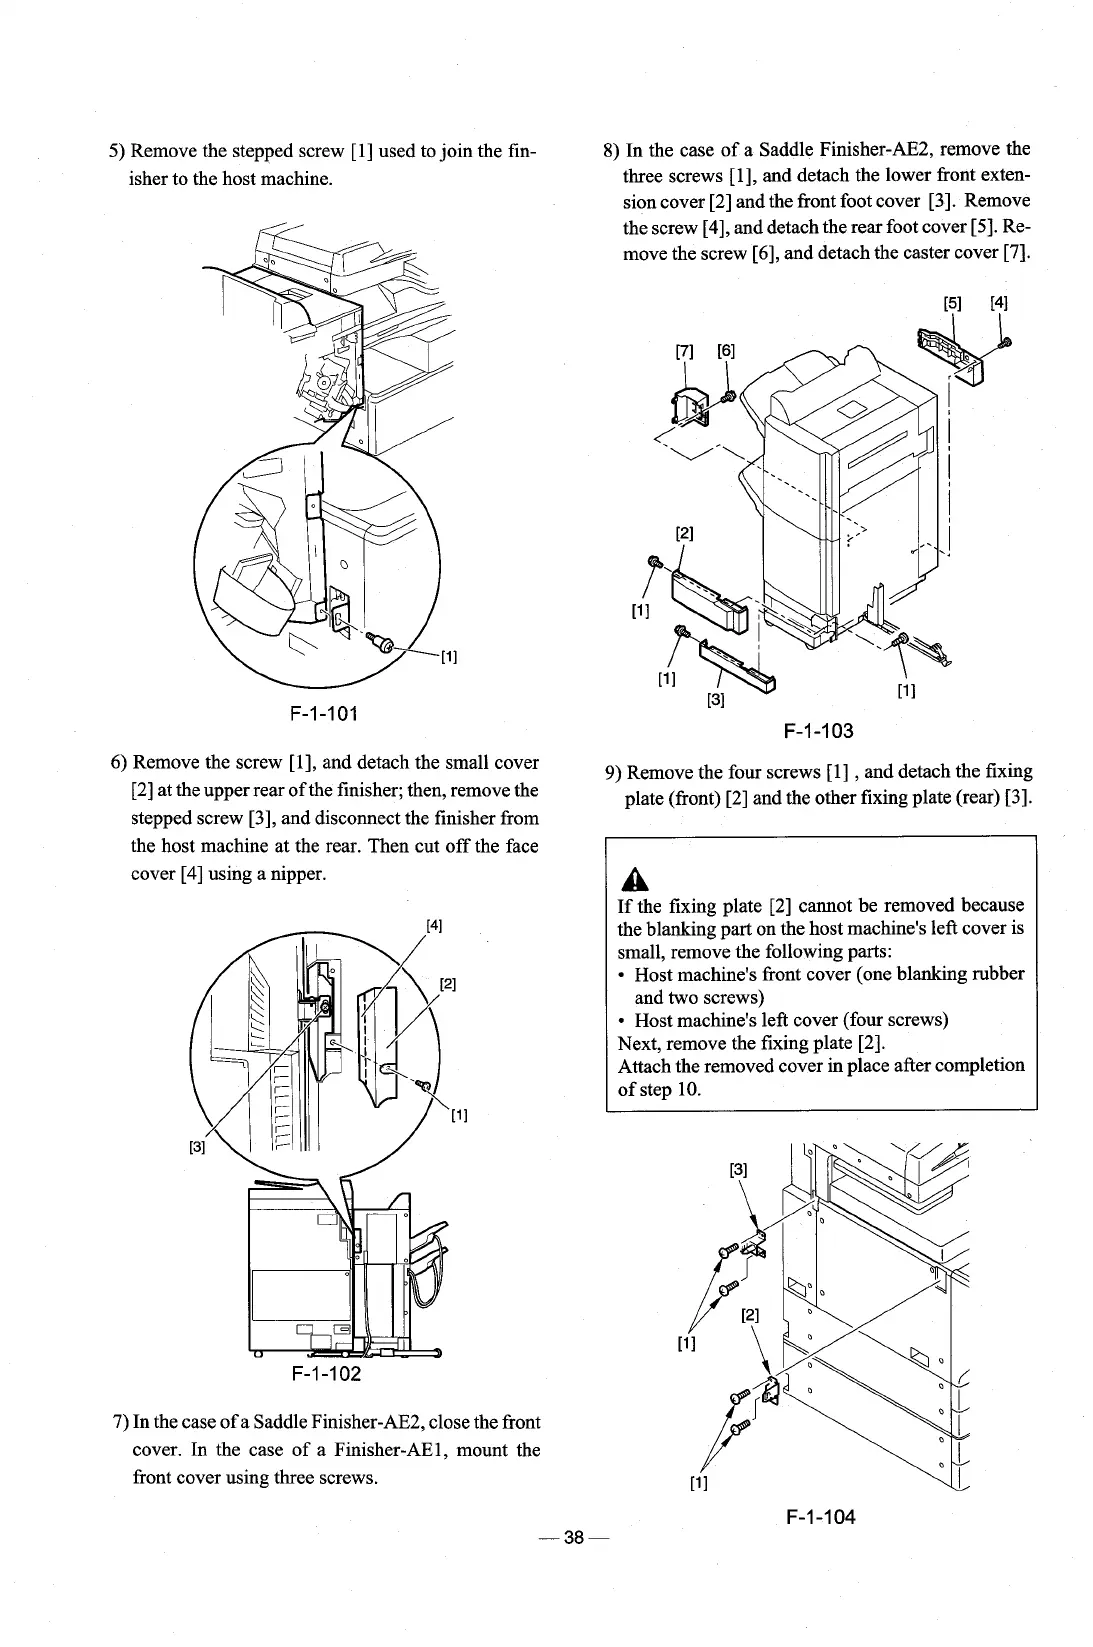
5)
Remove the stepped screw [l] used to join the fin-
isher to the host machine.
6) Remove the screw
[I], and detach the small cover
[2] at the upper rear of the finisher; then, remove the
stepped screw
[3], and disconnect the finisher from
the host machine at the rear. Then cut off the face
cover
[4]
using a nipper.
8)
In the case of a Saddle Finisher-AE2, remove the
three screws
[I], and detach the lower front exten-
sion cover [2] and the front foot cover
[3]. Remove
the screw
[4], and detach the rear foot cover [5]. Re-
move the screw
[6], and detach the caster cover [7].
9)
Remove the four screws [l]
,
and detach the fixing
plate (front) [2] and the other fixing plate (rear)
131.
A
If the fixing plate [2] cannot be removed because
the blanking part on the host machine's left cover is
small, remove the following parts:
Host machine's front cover (one blanking rubber
and two screws)
Host machine's left cover (four screws)
Next, remove the fixing plate
[2].
Attach the removed cover in place after completion
of step 10.
7) In the case of a Saddle
Finisher-AE2, close the front
cover. In the case of a Finisher-AEl, mount the
front cover using three screws.