EasyManua.ls Logo

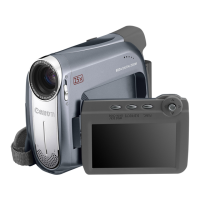
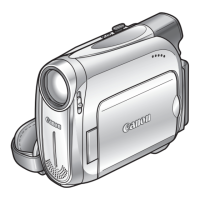
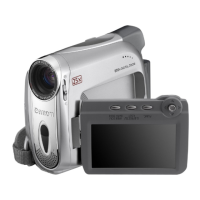
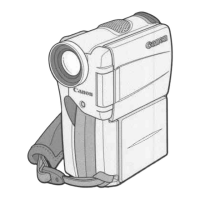
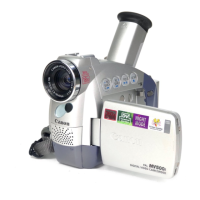
Canon MV900 User Manual

Canon MV900
86 pages
To Next Page IconTo Next Page
Page #1 background imageLoading...
Page #1 background image
English
PUB.DIE-253
PAL
English
Introduction
Basic
Functions
Advanced
Functions
Editing
Additional
Information
Digital Video Camcorder
Instruction Manual
Mini
Digital
Video
Cassette

Table of Contents

Questions and Answers:

Canon MV900 Specifications

General IconGeneral
Digital zoom800 x
Optical zoom25 x
Focal length range43.6 - 1090 mm
Sensor typeCCD
Total megapixels0.8 MP
Optical sensor size1/6 \
Display diagonal2.7 \
Display resolution112000 pixels
I/O portsA/V - in
Auto focusYes
Camcorder tape typeMini-DV
Compatible memory cardsMMC, SD
Camera shutter speed1/2000 - 1/6 s
Minimum illumination2 lx
Product colorSilver
Battery typeBP-2L5
Weight and Dimensions IconWeight and Dimensions
Depth92 mm
Width49 mm
Height115 mm
Weight445 g

Summary

Introduction

Important Usage Instructions

Safety Warnings and Cautions

Essential safety guidelines for camcorder operation, including warnings about fire, shock, and moisture.

Using this Manual

Symbols and References

Explains symbols and references used throughout the instruction manual for clarity.

Joystick Operation Guide

Details on how to use the camcorder's multi-function joystick for control and selection.

Operating Modes and Trademarks

Operating Modes Overview

Description of the camcorder's different operational states determined by the power switch.

Trademark Acknowledgments

Lists registered trademarks related to the camcorder and its software.

Supplied Accessories

Included Accessories List

Lists and illustrates items included with the camcorder package.

Camcorder Components Guide

Left Side View Components

Diagram and labels identifying components on the camcorder's left side.

Right Side View Components

Diagram and labels identifying components on the camcorder's right side.

Preparing the Power Supply

Attaching the Battery Pack

Instructions for connecting the battery pack to the camcorder.

Charging the Battery Pack

Process for charging the camcorder's battery pack using the adapter.

Using a Household Power Source

Connecting to Mains Power

Instructions for using the camcorder connected directly to a household power outlet.

Battery Performance and Backup

Battery Times and Usage

Approximate battery life for charging, recording, and playback operations.

Installing the Backup Battery

Procedure for installing the backup battery to retain settings when power is off.

Loading and Unloading Cassettes

Cassette Insertion and Removal

Steps for inserting and removing Mini DV cassettes from the camcorder.

Camcorder Preparation Steps

Adjusting the Viewfinder

How to adjust the viewfinder's diopter for clear viewing.

Fastening the Grip Belt

Adjusting the grip belt for comfortable and stable handling.

Attaching the Shoulder Strap

Instructions for attaching the optional shoulder strap for portability.

Adjusting the LCD Screen

Rotating the LCD Screen

How to position the LCD panel for viewing and shooting.

LCD Backlight Adjustment

Controls for adjusting the LCD screen brightness for different lighting conditions.

Setting Time Zone, Date, and Time

Setting Time Zone/Daylight Saving

Adjusting the camcorder's time zone and daylight saving time settings.

Setting the Date and Time

Inputting the current date and time for accurate recording metadata.

Recording Movies on a Tape

Recording Preparation

Steps to take before starting video recording, including testing and cleaning.

Recording Process Steps

Instructions for starting, pausing, and stopping video recording.

Finishing Recording Procedures

Steps to take after completing a recording session.

Advanced LCD Screen Functions

Monitoring Subject with LCD

Positioning the LCD screen for monitoring while shooting.

Displaying the Level Marker

Using the level marker as a guideline for accurate framing.

Reviewing and Searching During Recording

Record Review Function

Replaying the last few seconds of recording to check quality.

Record Search Function

Locating specific points on the tape for playback or recording.

Screen Displays During Recording

On-Screen Recording Indicators

Information shown on the LCD screen during recording, such as time code and battery status.

Zooming Operations

Optical Zoom Function

Using the camcorder's optical zoom lens for magnification.

Digital Zoom Functionality

Activating Digital Zoom

How to enable and use the camcorder's digital zoom feature.

Selecting the Zoom Speed

Adjusting Zoom Speed Levels

Setting the speed for optical and digital zoom operations.

Tips for Better Video Recording

Camcorder Handling Techniques

Techniques for stable camcorder handling to improve video quality.

Achieving More Stability

Methods to stabilize the camcorder during recording for smoother footage.

Lighting Considerations

Advice on using lighting, especially sunlight, for optimal recording.

Playing Back Recorded Tapes

Playback Procedure

Step-by-step instructions on how to play back recorded footage from a tape.

Special Playback Modes

Playback Mode Descriptions

Details on advanced playback features like pause, fast forward, and rewind playback.

Adjusting the Volume

Speaker Volume Control

How to adjust the audio playback volume using the camcorder's speaker.

Playing Back on a TV Screen (SCART)

Connecting via SCART Terminal

Instructions for connecting the camcorder to a TV using a SCART adapter.

Playing Back on a TV Screen (AV)

Connecting via AV Terminals

Instructions for connecting the camcorder to a TV using AV cables.

Selecting the Type of TV

Aspect Ratio Configuration

Configuring playback for different TV aspect ratios (16:9 or 4:3).

Selecting the Audio Output Channel

Audio Channel Configuration

Choosing audio output settings for stereo or bilingual playback.

Menus and Settings Navigation

Accessing Menu Options

Step-by-step guide to accessing and navigating the camcorder's menus.

Menu Item Overview (Part 1)

FUNC. Menu Items

Summary of FUNC. menu options, settings, and default values.

Menu Item Overview (Part 2)

Setup Menu Items

Summary of setup menu options, settings, and default values.

Using Recording Programs

Easy Recording Program

Simple point-and-shoot mode for automatic adjustments.

Scene Recording Programs

Detailed description of AE, Portrait, Sports, Night, and Snow recording modes.

Recording Programs (Continued)

More Scene Programs

Details on Beach, Sunset, Spotlight, and Fireworks recording modes.

Recording Mode Functionality

Easy Mode Selection

Instructions on how to activate the Easy recording mode.

Selecting a Recording Program

Choosing a Scene Program

How to select and activate specific scene recording programs.

Adjusting Exposure Manually

Manual Exposure Control

How to manually adjust exposure for backlit or bright subjects.

Adjusting Focus Manually

Manual Focus Control

How to manually adjust focus when autofocus is difficult.

Manual Focus Operations

Infinity Focus Mode

Using focus for distant subjects like mountains or fireworks.

Setting the White Balance

White Balance Adjustment

Adjusting color balance for accurate colors under various lighting conditions.

Selecting an Image Effect

Applying Visual Effects

Applying different color saturation and contrast effects to recordings.

Setting the Shutter Speed

Shutter Speed Adjustment

Adjusting shutter speed manually for stable shots of fast-moving subjects.

Auto Slow Shutter Function

Using Slow Shutter Speeds

Using slow shutter speeds for brighter recordings in low light.

Using the Self-Timer

Self-Timer Operation

How to use the self-timer for delayed recording after a 10-second countdown.

Changing Recording Mode (SP/LP)

SP vs. LP Recording Modes

Selecting between Standard Play (SP) and Long Play (LP) modes to manage tape usage.

Audio Recording Settings

Changing the Audio Mode

Selecting between 16-bit (high quality) and 12-bit (for added sound) audio modes.

Wind Screen Function

Reducing wind noise during recording with the built-in microphone.

Using an External Microphone

Connecting External Mic

Instructions for connecting an external microphone to the MIC terminal.

Using Digital Effects

Digital Effect Overview

Overview of various digital effects available for enhancing recordings.

Selecting a Fader Effect

Applying Fade Transitions

How to apply fade-in and fade-out transitions to video scenes.

Selecting Digital Effects

Applying Other Visual Effects

How to select and apply various visual effects like mosaic or mirror.

Widescreen TV Recording (16:9)

Setting Up Widescreen Recording

How to enable 16:9 widescreen recording for high-resolution output.

Magnifying the Playback Image

Zooming Playback Footage

How to magnify the playback image up to 5 times for detailed viewing.

Displaying Data Code and Auto Date

Displaying the Data Code

Showing recording date and time information during playback.

Six-Second Auto Date

Auto-display of date/time indicators for 6 seconds upon playback start.

End Search Function

Locating End of Scenes

Function to find the end of the last recorded scene on the tape.

Playing Back with Added Sound

Selecting Audio Tracks and Mix

Selecting audio tracks (Stereo 1/2) or adjusting mix balance.

Changing Display Language and Date Format

Changing the Display Language

Selecting the user interface language for menus and on-screen text.

Changing the Date Format

Setting the preferred format for displaying dates.

Other Camcorder Settings

Beep Sound Settings

Configuring audible alerts for camcorder operations.

Adjusting LCD Screen Brightness

Changing the brightness level of the LCD screen.

Image Stabilizer and Start-Up Image

Turning Off Image Stabilizer

Disabling the image stabilization feature, e.g., when using a tripod.

Changing Start-Up Image Display

Enabling or disabling the Canon logo display on camcorder startup.

Demonstration Mode Settings

Controlling Demo Mode

How to deactivate or cancel the camcorder's demonstration mode.

Recording to VCR or Digital Device

Connecting Devices for Copying

How to link the camcorder to a VCR or digital device for copying recordings.

Copying Recording Process

Steps for copying video content to an external device.

Recording from Digital Devices (DV Dubbing)

DV Dubbing Procedure

Transferring digital video from other devices to the camcorder.

Copyright Precautions

Copyright Protection Notes

General advice regarding copyright laws and unauthorized recording.

Copyright Signals Handling

How copyright protection signals affect playback and recording.

Transferring to a Computer (DV Cable)

DV Cable Transfer Process

Using a DV cable to transfer video recordings to a computer.

Controlling Screen Displays

Hiding LCD Screen Displays

Customizing the information displayed on the camcorder's LCD screen.

Hiding TV Screen Displays

Customizing the information displayed on the TV screen during connection.

Screen Display Elements Summary

Recording Indicators Overview

Overview and explanation of indicators shown during recording and playback.

List of Camcorder Messages

Message Explanations

Explanations for various on-screen messages displayed by the camcorder.

Maintenance and Handling Precautions

Camcorder Handling Precautions

General guidelines for handling the camcorder to prevent damage.

Storage and Cleaning Procedures

Procedures for storing the camcorder and cleaning its body and lens.

Maintenance Details

Viewfinder and Video Head Cleaning

Instructions for cleaning the viewfinder screen and video heads.

Condensation Prevention and Management

How to avoid condensation and what to do if it is detected.

Condensation and Battery Precautions

Condensation Warning and Resuming Use

Actions upon detecting condensation and steps for resuming use.

Battery Pack Handling Precautions

Safety guidelines and precautions for handling and charging battery packs.

Battery and Cassette Handling

Lithium Button Battery Precautions

Specific precautions for handling and disposing of lithium button batteries.

Cassette Handling Precautions

Guidelines for handling video cassettes to prevent damage and ensure playback.

Tape Protection and International Use

Protecting Tapes from Accidental Erasure

How to use the tape's write-protect tab to prevent accidental erasure.

Using the Camcorder Abroad

Information on power sources and PAL system TV playback for international use.

Troubleshooting Guide

Power Source Issues

Solutions for common problems related to power and battery operation.

Recording Troubleshooting

Recording Problem Solutions

Solutions for issues encountered during the recording process.

Playback Troubleshooting

Playback Problem Solutions

Solutions for issues encountered during playback.

System Diagram

Camcorder Connection Overview

Visual representation of how the camcorder connects to various accessories and devices.

Optional Accessories

Battery Packs and Chargers

Details on compatible battery packs and their corresponding chargers.

Optional Accessories (Continued)

Carrying Case and Genuine Mark

Information on the soft carrying case and the genuine accessory identification mark.

Camcorder Specifications

System Specifications

Technical details on video system, audio, sensor, tape format, and lens.

Input/Output Terminals

Specifications for AV, DV, and MIC terminals.

Specifications (Power and Components)

Power Supply and Adapter Specs

Technical details for the camcorder's power supply and AC adapter.

Battery Pack Specifications

Technical specifications for the BP-2L5 Lithium Ion battery pack.

Related product manuals