Instruction manual C223120 Please keep this instruction manual for future reference
REMOVING THE OVEN DOOR
To make it easier to clean the inside of your oven, the oven door can be easily removed by
proceeding as follows:
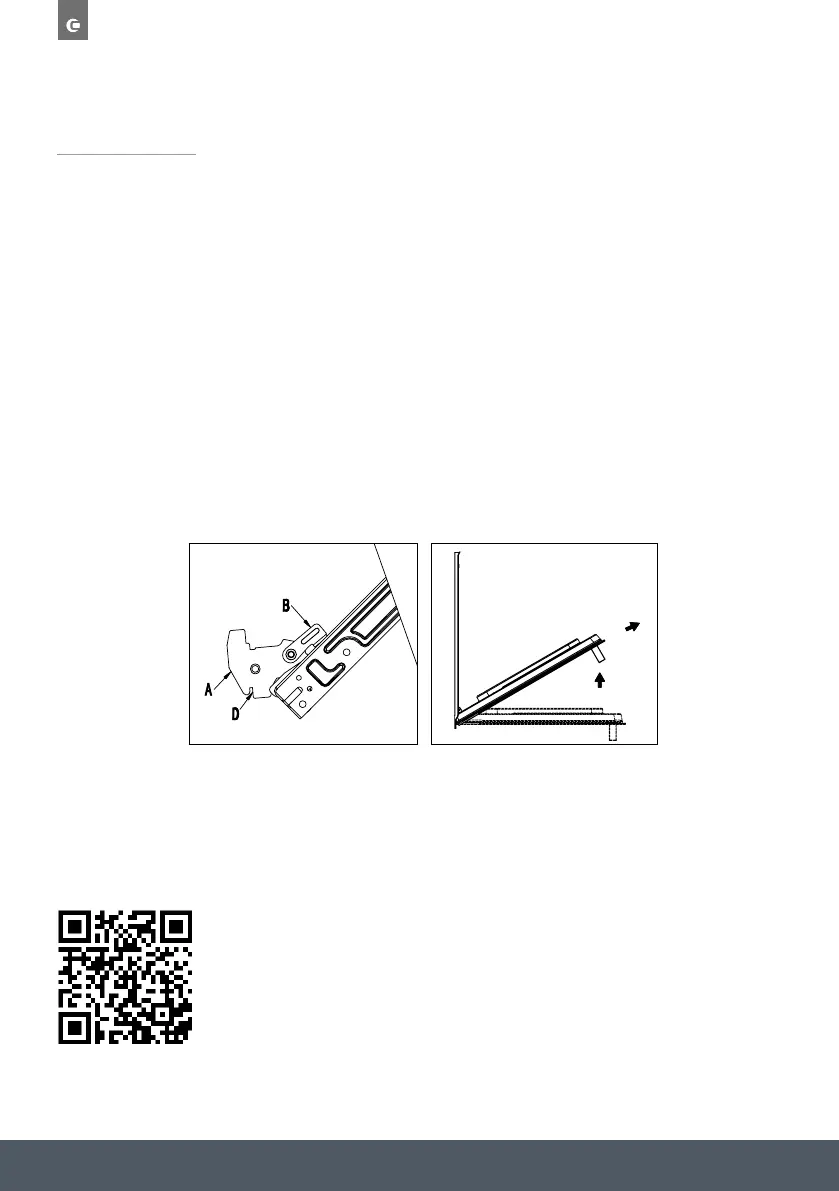
› Open the door completely and lift the 2 levers “B” (Fig.1);
› Now, shutting the door slightly, you can lift it out by pulling out the hooks “A” as shown
in Fig.2.
› To reassemble the door:
› With the door in a vertical position, insert the two hooks “A” into the slots;
› Ensure that seat “D” is hooked perfectly onto the edge of the slot (move the oven door
backwards and forward slightly);
› Keep the oven door open fully, unhook the 2 levers “B” downwards and then shut the
door again.
43
Disassembling/assembling the oven door
To make it easier to clean the inside of your oven, the oven door can be easily removed, by proceeding as
follows (fig. 11):
ƽ Open the door completely and lift the 2 levers “B” (fig.11-1);
ƽ Now, shutting the door slightly, you can lift it out by pulling out the hooks “A” as shown in figure 2.
To reassemble the door:
ƽ With the door in a vertical position, insert the two hooks “A” into the slots;
ƽ Ensure that seat “D” is hooked perfectly onto the edge of the slot (move the oven door backwards and forward
slightly);
ƽ Keep the oven door open fully, unhook the 2 levers “B” downwards and then shut the door again.
Removable the glass panels
The oven door is made up of 3 panes of glass and has vents at the top and bottom. When the oven
is operating,
air is circulated through the door to keep the outer pane cool. If condensation has worked its way
in between the
glass panes, the door can be dismantled in order to clean in between the panes.
Remove the door as per above instruction and place it on a protective surface (e.g. on a table cloth)
to prevent it
getting scratched. The door handle should line up with the edge of the table. Make sure the glass
lies flat to avoid
breakage of glass during cleaning.
Clean the glass panes
and other parts with a damp
microfibre cloth.
or a clean sponge and a solution of hot water with a little washing-up liquid. Wipe dry using a soft
cloth.
Fig.11-1
Fig.11-2
1. Press the button on left and right side of door, take out top rail. (Fig.1)
2. Take out inner glass slowly (Fig.2)
3. Loose clips by unscrewing. (Fig.3)
4. Take out middle glass. (Fig.4)
Fig.1 Fig.2
Scan the QR code below to access the ‘How to video’.