Instruction manual CCH12
Please keep this instruction manual for future reference
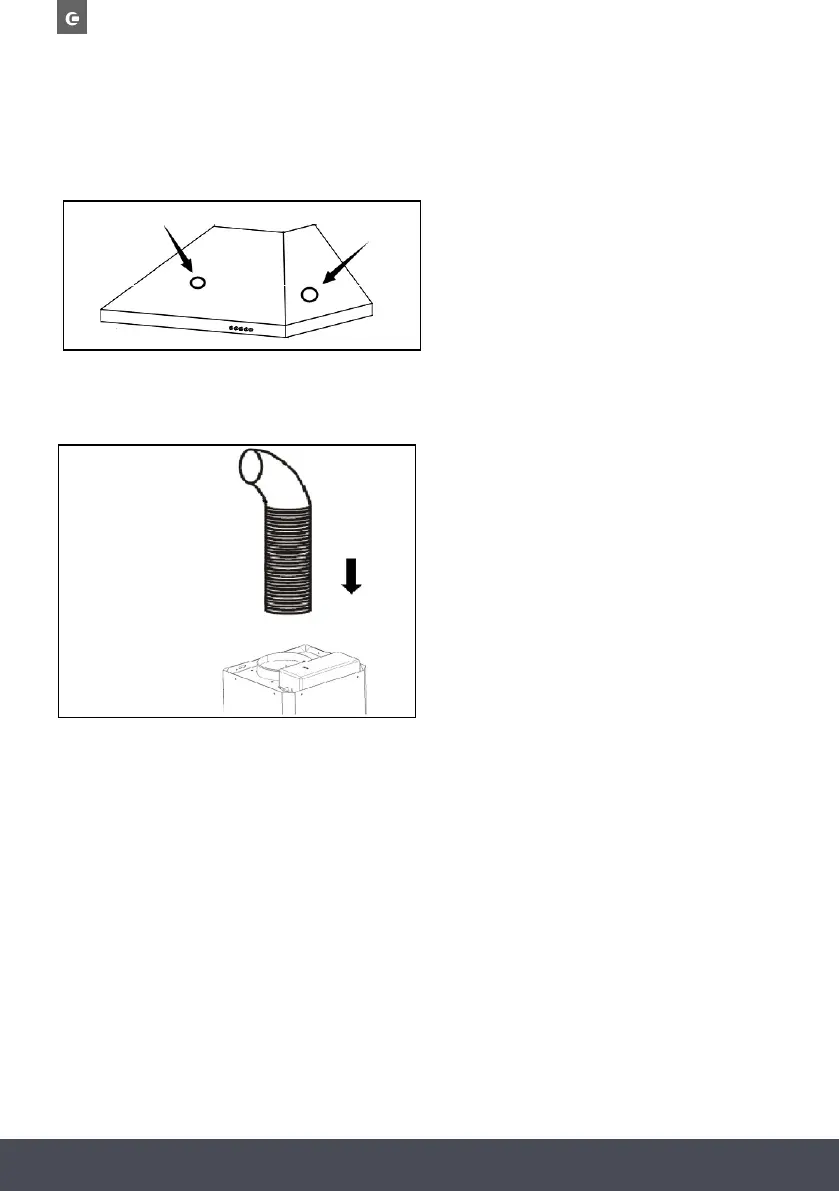
After hanging the hood on the bracket, remove the grease filters, mark 2 holes inside the hood for
safety screws. After marking, remove the hood, drill two holes and insert 2 wall plugs and finally
fix the safety screws with 2 screws (ST4x30mm).
Fix the one-way-valve to the air outlet of the cooker hood. Then, attach the exhaust pipe onto the
one-way-valve as shown below.
CHIMNEY INSTALLATION
Place the upper chimney into lower chimney, use 2 pcs ST4x8mm screws to attach lower and
upper chimney together.
Before attaching the bracket to the chimney, decide the location of lower chimney bracket fixing
holes for fixing the lower chimney bracket in the later steps.
NOTE:
Do not fasten screws too much, make sure upper chimney can be telescopically adjusted after
assembled.
6
Instruction manual CCH
Please keep this instruction manual for future reference
12
Fix the one-way-valve to the air outlet of the cooker hood. Then, attach the exhaust
pipe onto the one-way-valve as shown below.
Chimney installation.
Place the upper chimney into lower chimney,Use 2 pcs ST4x8mm screws to attach
lower and upper chimney together.
6
6
After hanging the hood on the bracket , remove the Alu Filters , mark 2 holes
inside the hood for safety screws .After marking , remove the hood ,drill two holes
and insert 2 pcs of Wall Plugs and finally fix the safety screws with
2 screws ST4x30mm.
Before attaching the bracket to the chimney,decide the location of lower
chimney bracket fixing holes for fixing the lower chimney bracket in the later steps.
Noted: Do not fasten screws too much, make sure upper chimney can be
telescopically adjusted after assembled.
Exhaust Pipe
Cooker Hood