Instruction manual CCH 13
Please keep this instruction manual for future reference
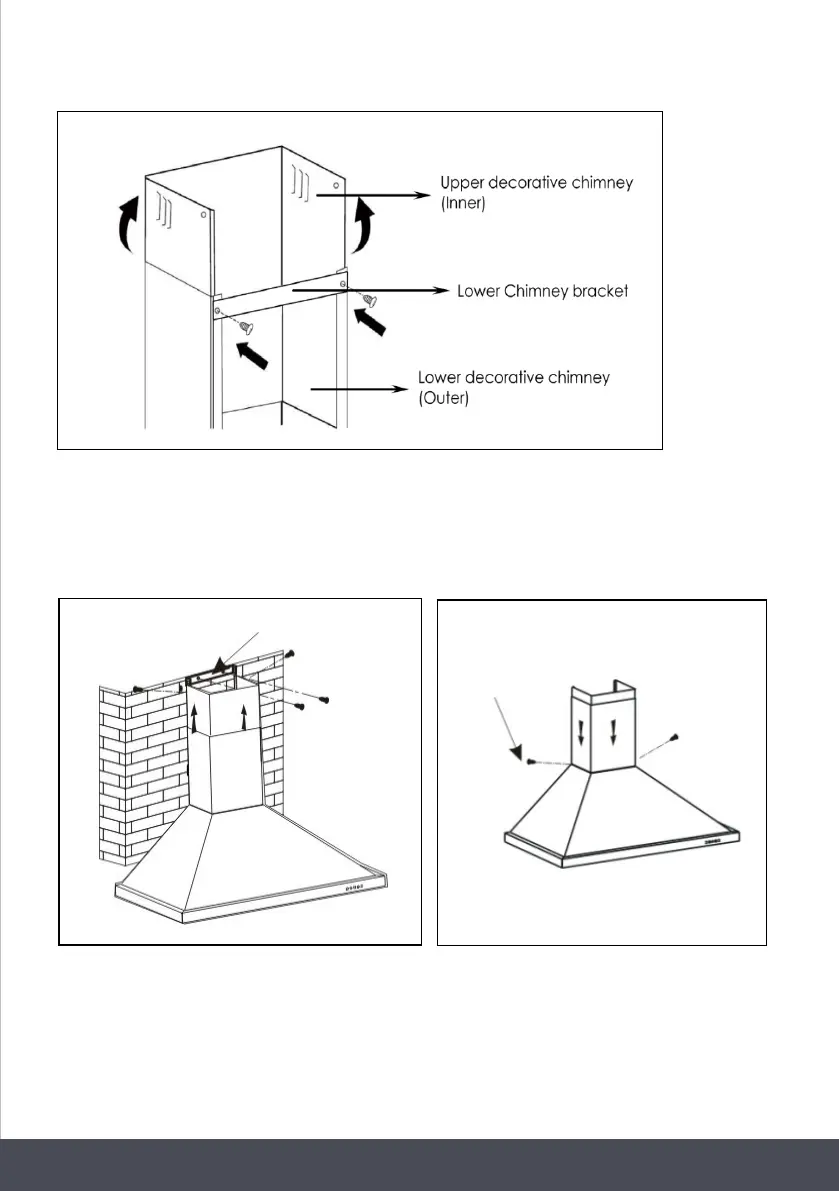
Drill 2×8mm holes to accommodate the plate II. Screw and tighten the plate II onto the wall with
two screws and wall plugs provided. Slide up the upper chimney and fix the upper chimney with
plate II with 2 screws ST4x8mm.
Fix the lower chimney with the hood with 2 screws ST4x8mm.
Instruction manual CCH
Please keep this instruction manual for future reference
13
Drill 2×8mm holes to accommodate the plate II. Screw and tighten the plate II onto
the wall with two screws and wall plugs provided. Slide up the upper chimney and
fix the upper chimney with plate II with 2 screws ST4x8mm.
7
7
Fix the lower chimney with the hood with 2 screws ST4x8mm.
Screw
4 x 8mm
4 x 30mm
Plate ||