8555-M512-O1 Rev D 01/15 50
CARE AND CLEANING
NOTE: The MV1 contains no user-serviceable parts and maintenance should be
limited to an occasional cleaning and battery replacement as required.
Do not submerge the MV1 in water, pour or spray water directly on it to clean. The
MV1 is not waterproof and covering it with water will damage it and void the warranty.
Always remove power before cleaning.
Do not use wire brushes, abrasives, or cleaning tools such as steel pads and
scrapers, which will scratch the painted surface. Instead, use soft cloths or plastic
scouring pads for cleaning.
When possible use treated water. Hard water can leave behind deposits. Soft water
is much gentler on the painted steel’s surface.
Avoid the use of acetone, thinner or other volatile solvents and abrasive type
cleaners for cleaning. If required, a mild solvent such as mineral spirits can be used
to remove oil, grease, tars, wax, and similar substances. Use a cloth dampened with
mineral spirits and apply only to areas that are contaminated. Follow up the use of
this mild solvent with detergent cleaning and rinsing.
SECURITY SEAL INSTALLATION
If your metrology laws require the use of physical
sealing, a lead and wire security seal can be
installed on the MV1 to prevent the end cap from
being removed from it to gain access to the
calibration switch thereby preventing unauthorized
access to the calibration adjustments.
NOTE: In order to install the lead and wire
security seal, the two screws securing the left end
cap (as viewed from the MV1 front) MUST be
replaced with two drilled screws. They are
available from the Cardinal/Detecto Parts
Department. The part number is MVSK
(MEDVUE SEALING KIT).
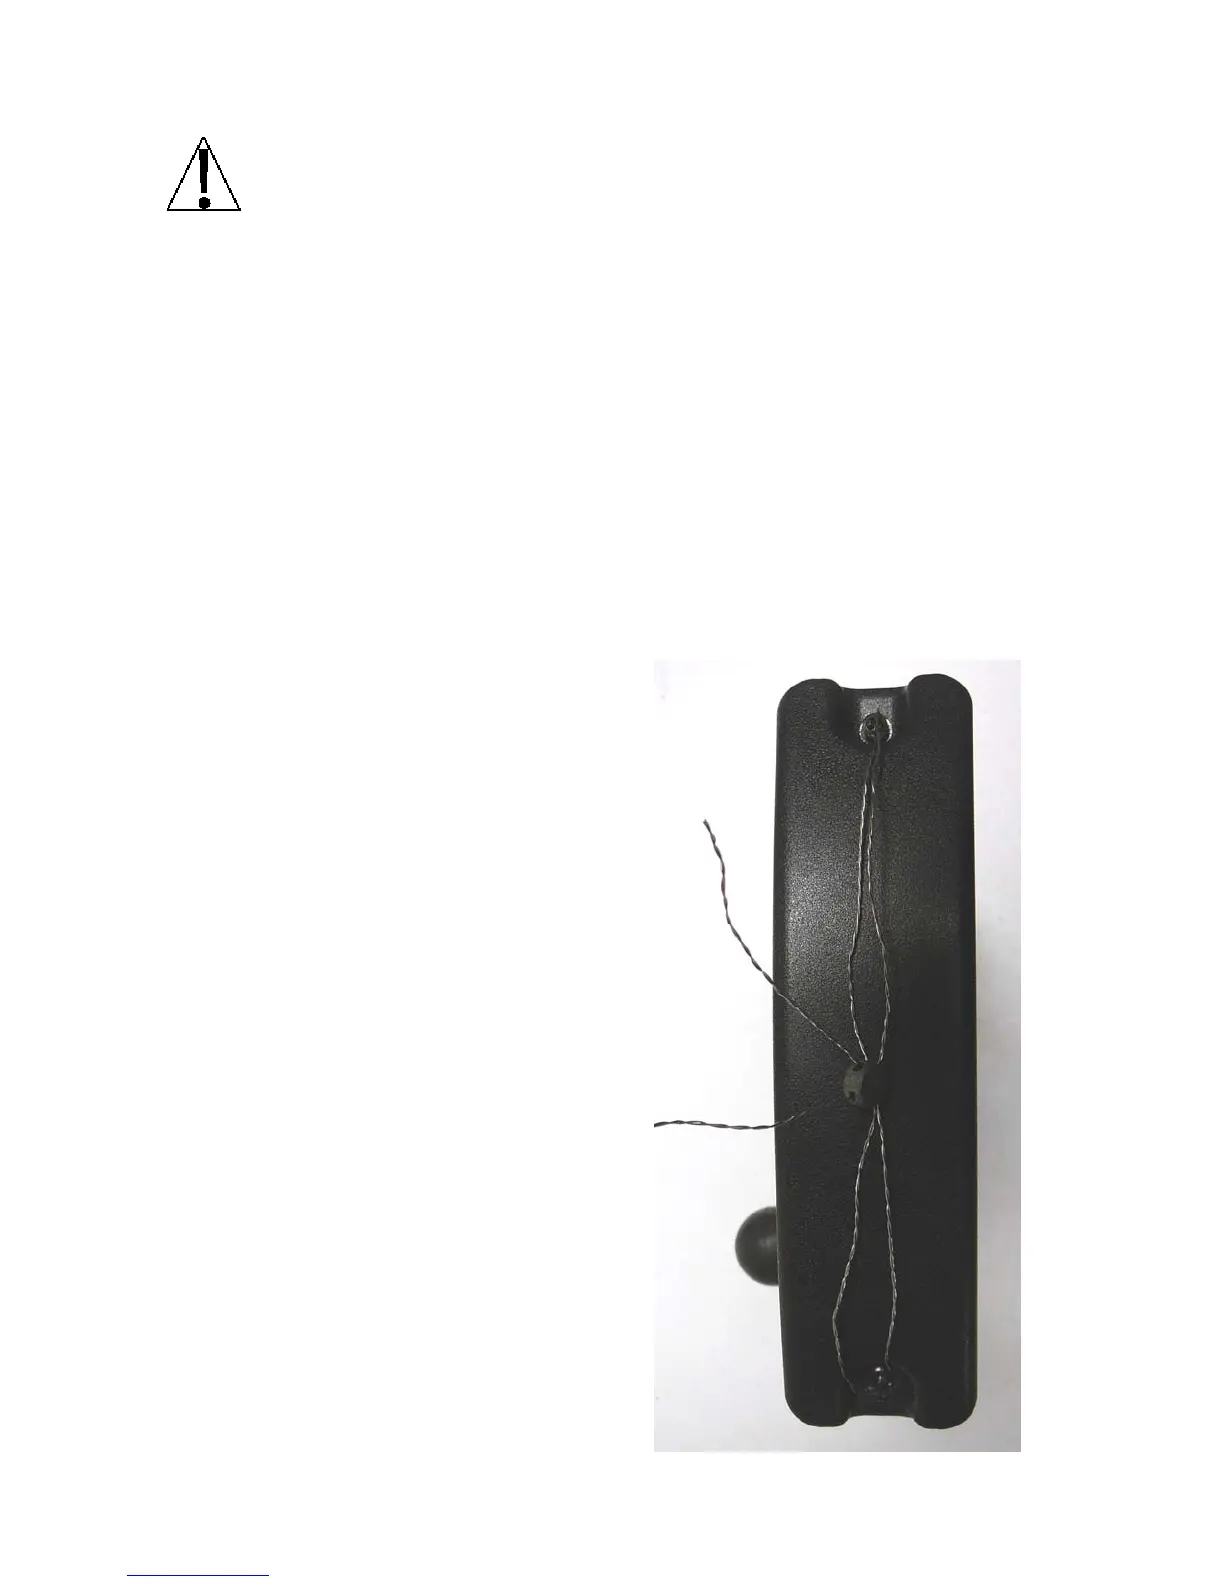
To install a lead and wire security seal, refer to
Figure No. 12 and follow the steps provided below:
1. Remove the two screws securing the left end
cap (as viewed from the MV1 front).
2. Install the two drilled screws (and lock
washers) in the end cap making certain they
are securely tighten before proceeding.
3. Thread the sealing wire through the hole in
the drilled screws.
4. Pull the wire tight and install the lead seal.
5. The screws can not be removed without
damaging the seal.
Figure No. 12
 Loading...