12
ENG
mpxone +0300086EN rel. 2.2 - 13.11.2023
Installation
2. INSTALLATION
2.1 Warnings
Caution: avoid installing the controller in environments with the following characteristics:
• temperature and humidity that do not comply with the ambient operating conditions (see “Technical specifi cations”);
• strong vibrations or knocks;
• exposure to water sprays or condensate;
• exposure to aggressive and polluting atmospheres (e.g.: sulphur and ammonia gases, saline mist, smoke) which may cause
corrosion and/or oxidation;
• strong magnetic and/or radio frequency interference (thus avoid installation near transmitting antennae);
• exposure to direct sunlight and the elements in general;
• wide and rapid fl uctuations in ambient temperature;
• exposure of the controller to dust (formation of corrosive patina with possible oxidation and reduction of insulation);
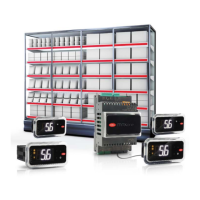
2.2 Panel version
2.2.1 Dimensions - mm (in)
78.5 (3.09)
36.5 (1.44)
46.6 (1.83)
88.6 (3.49)
Drilling template - mm (in)
71x29 (2.79x1.14)
74.7 (2.94)
84.9 (3.34)
300086_029_R01
Fig. 2.a
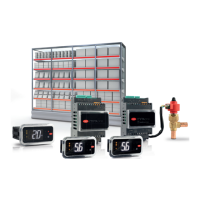
2.2.2 Removing the frame
Notice: the panel version is supplied with the frame already fi tted. Nonetheless, this can be easily removed without aff ecting
the IP protection rating.
300086_027_R01
Press the frame gently upwards at one of the points indicated by the
arrows in the fi gure until hearing a click, and repeat the operation at
the other points so as to detach the frame.
Fig. 2.b
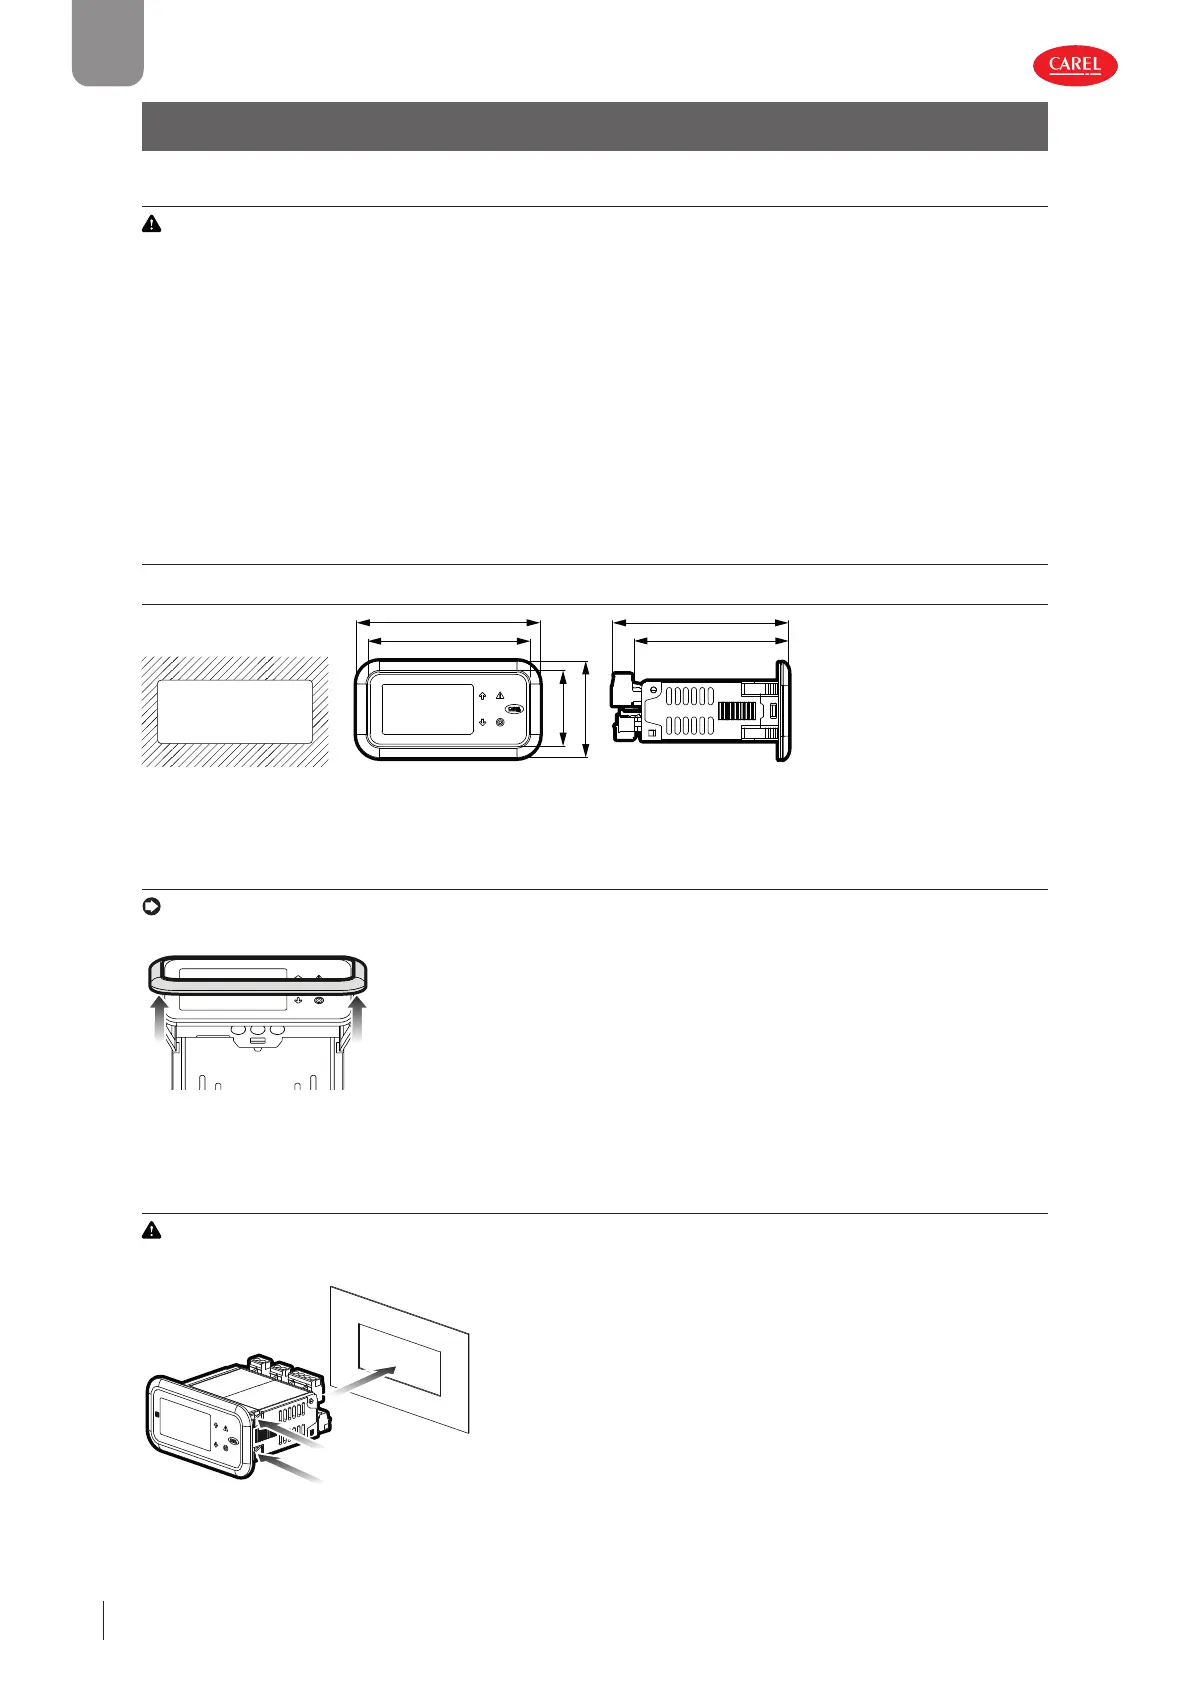
2.2.3 Assembly
Caution: before carrying out any maintenance, disconnect the controller from the power supply by moving the main sys-
tem switch to “off ”.
300086_026_R01
1. Place the controller in the opening, pressing lightly on the side an-
choring tabs.
2. Then press on the front until fully inserted (the side tabs will bend,
and the catches will attach the controller to the panel).
Fig. 2.c