Two Stall Installations
Flush Volume & Stall Setup
2
1
4
3
5
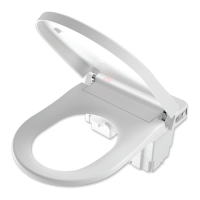
Single Remote Button
Datum
Blank Access Panel
*
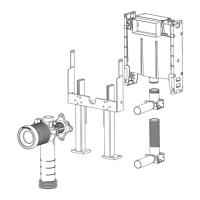
Ø20 sparge pipe
*
Reducer to Ø40
copper pipe (supplied)
400mm - 420mm
Frame
45mm
600mm
950mm
Recommended
335mm to
access panel
centre line
Centre Line Button
(standard mounting)
Finished Floor Level
Refer to specifications of the selected urinal.
Adjustment
Screw
Bucket
3.8L = Two Stall Urinal
For two stall installations the outlet valve must first be configured by following the
conversion instructions adjacent.
The water level in the cistern must then be set to the “WL” mark, using the float
adjustment screw located on the side of the inlet valve.
The pneumatic tube must be connected to the full flush position.
= Full Flush Position
Conguring Flush Volume
Remove Outlet Valve, refer to page 17.
Using a screw driver lever the bucket
hangers over the hooks, allowing it to sit
level with the 3.8L mark on the valve.
Replace parts back into Cistern.
Set Water Level using the adjustment
screw.
.
The Water Level should be set to
the “WL” mark on the inside of the
cistern.
Dust Cover
NOTE:
When installing the
Remote Mounting Box in
this position, please refer
to the ‘Installation Note’ on
page 5
 Loading...