14.4 - Cleaning the coils
■ Switch off the unit.
■ If the unit is tted with a "protective screen" option, remove this to access the coils.
■ If the ns are damaged, straighten them using a comb.
■ In the event of minor fouling (non-clogging dry residue or dust, leaves, wires, etc.):
- Counter-ow supply air: dry air up to 30 bar.
- Where possible, periodically reversing the ow of air generated by the fans can prevent this. This operation is not possible if the
unit is equipped with EC motors.
■ In the event of moderate fouling (moderate clogging due to dry residues, damp dust or grass, insects, etc.):
- Use a high-pressure (HP) steam cleaner with a at jet nozzle (25°).
- Max. pressure 100 bar
- Steam: max. 140°C
- Min. distance between the nozzle and the ns = 200 mm
- Cleaning uid: municipal water with pH neutral detergent (pH 7). Avoid alkaline detergents.
- Flushing with clean water using the same adjustment parameters.
■ IMPORTANT: the use of detergent is prohibited for cleaning ns with a BLYGOLD
®
, ALTENA
®
or HERESITE
®
coating.
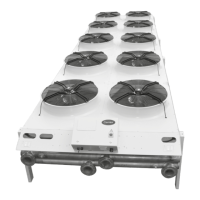
Recommendations to follow when using a HP cleaner
1. Ensure the high-pressure cleaner has reached its correct temperature. Check that the
uid exiting the nozzle is steam rather than liquid.
2. Hold the high-pressure cleaner's lance at a distance greater than that recommended, then
move forward into the working position.
3. Direct the at jet created by the nozzle onto the surface of the ns and perpendicular to
them. An angled position risks pushing the ns together and a parallel position risks pushing
them apart.
4. To prevent residue from being pushed inside the nned block, it is often useful to perform
an initial wash against the air ow direction (at the discretion of the operator and depending
on the fouling level).
5. Some detergents may damage the unit's paintwork.
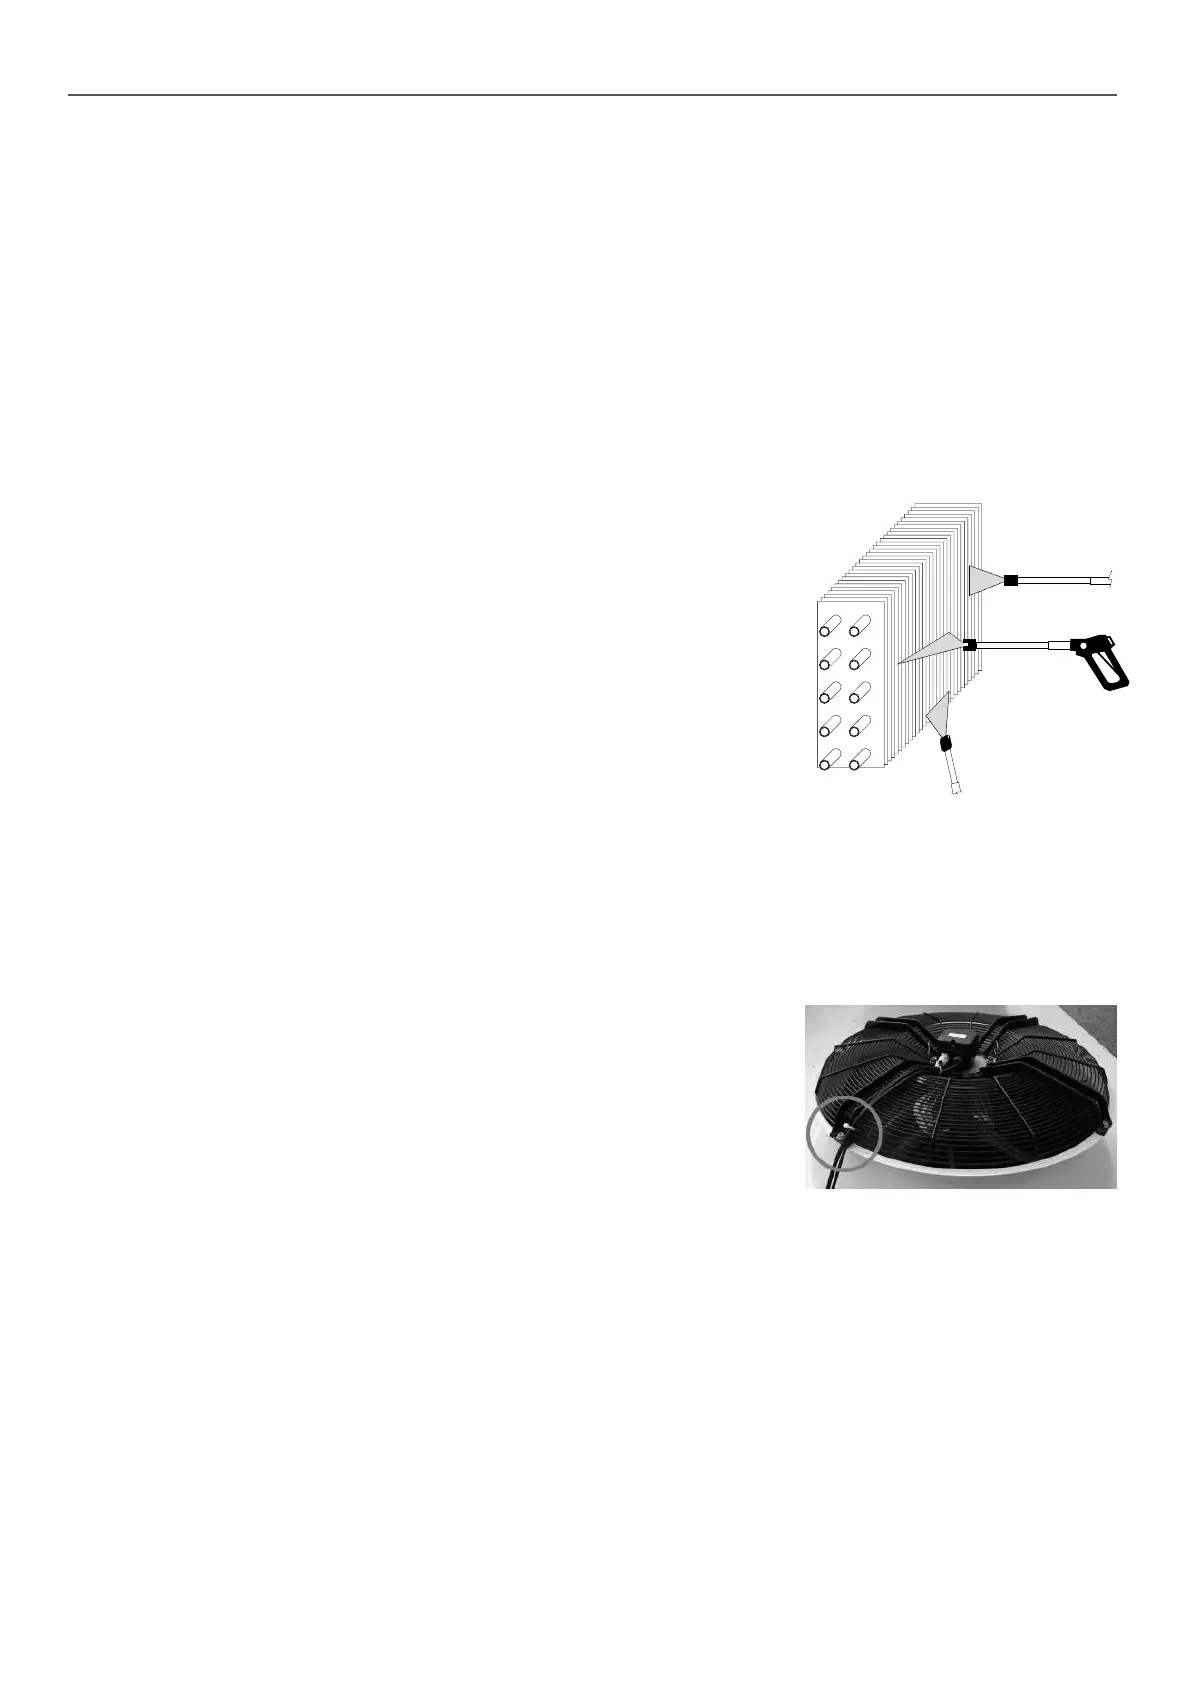
14.5 - Removing and retting a fan
■ The removal of a fan is a simple operation, however special care must be taken during handling, in particular:
- Do not pull on the blades.
- Place the fan motor assembly on a safe surface away from areas of activity.
- If the unit is to be shipped, provide the necessary protection and packing materials.
- Do not remove the panel.
■ The fan must be repaired if any of the blades are bent.
Operating procedure for motor type A9A, A9C, A8A, A8B,E9A, E8A, E8B, M9, M8, B9A, B9B, B9C, B8A, B8B, B8C and B8D:
Switch off the power supply using the mains switch or maintenance switch (optional).
1. Remove the cover from the motor's terminal box.
2. Disconnect the wires, marking the terminals to facilitate rewiring.
3. Loosen the cable gland(s) on the terminal box and pull out the cable. Remove the
clamps connecting it to the fan support arm.
4. Remove the 4 M8 bolts mounting the fan on the collar (T40 torx type spanner)
WARNING: do not unscrew the motor mounting bolts.
Remove the fan using the lifting lugs.
■ When retting, position the fan on the 4 collar inserts then carry out the operations in the
reverse order to removal, ensuring only the M8 bolts provided are used (tightening torque 16 Nm).
■ Before turning the unit back on, make sure:
- the ends of the blades do not touch the collar (centring of the blades in their collar): rotate the impeller by hand.
- the wiring is correct and the terminals are properly tightened.
- the motor terminal box seal is correctly in place and the screws which secure it in place are correctly tightened to a torque of 1.5
± 0.2 Nm (risk of rainwater ingress).
- the cable glands are properly tightened.
NO
NO
YES
14 - MAINTENANCE
14