17
MAINTENANCE
Periodic maintenance is necessary to keep all components func-
tioning as designed. A maintenance log is recommended to ensure
a proper maintenance schedule is followed.
Pumpout Compressor Oil Charge
Use oil conforming to Carrier specifications for centrifugal or
screw compressor use. Oil requirements are listed in Table 6.
Monitor and adjust compressor oil level as often as necessary.
When replacing lost oil, add the same type of oil that is used in the
chiller being pumped out.
Table 6 — Pumpout Compressor Requirements
The pumpout oil separator comes pre-charged with 13 oz of ISO
viscosity 220 POE (Polyol Ester) oil. The pumpout compressor is
approved for use with ISO viscosity 220 POE oil or ISO viscosity
68 POE oil. The pumpout compressor is also factory precharged
with POE oil.
Oil should be visible in the pumpout compressor sight glass both
during operation and at shutdown. Always check the oil level be-
fore operating the pumpout compressor.
Oil can be added to the 1/4-in. SAE flare access valve port running
from the top of the oil separator to the compressor while the com-
pressor is running. Be careful not to overfill.
NOTE: Compressor access valve has a self-sealing fitting which
will require a hose connection with a depressor to open.
To change or remove oil, the compressor will have to be removed
from the assembly. Compressor can be disconnected from con-
nected tubing by the quick connect fittings at suction and dis-
charge and oil recovery line.
Prior to removal, close service valves 2, 3, 4, and 5, and run the
pumpout compressor in AUTOMATIC until the vacuum switch is
satisfied and the compressor shuts off. Move pumpout selector
switch to OFF, and turn off all power to unit prior to removing
compressor unit from pumpout assembly frame and connecting
tubing.
Service valves 2, 3, 4, and 5 remain closed while compressor is re-
moved. Put compressor back in place. Use the torque values listed
in Table 7 for reassembly:
Table 7 — Torque Values for Reassembly
Be sure to use backup wrench and pull a deep vacuum in the ser-
viced pumpout tubing prior to any refrigerant exposure. At this
point, confirm that the oil level is satisfactory and put the pumpout
back in service.
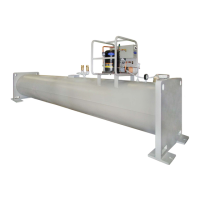
Storage Tank
To prevent moisture and contaminants from entering the storage
tank, maintain positive pressure in the tank when not transferring
refrigerant. Leak test the storage tank periodically.
Ordering Replacement Parts
The following information must accompany an order for Carrier
specified parts:
• machine model number and serial number
• name, quantity, and part number of the part required
• delivery address and method of shipment
TROUBLESHOOTING
Information on troubleshooting for the PPS system is included in
Table 8.
Table 8 — Troubleshooting
REFRIGERANT
ISO
VISCOSITY
CARRIER
SPECIFICATION NO.
R-513A
68 PP47-31
220 PP47-32
PARAMETER
VALUES
ft-lb Nm
Suction 80 to 100 109 to 136
Discharge 50 to 60 68 to 81
O-ring Face Seal 7 to 9 10 to 12
SYMPTOM PROBABLE CAUSE REMEDY
Compressor Does Not
Run
Main power line open Replace fuse or reset circuit breaker.
Loose terminal connection Check connections.
Improperly wired controls Check wiring and rewire.
Low line voltage Check line voltage; determine location of voltage drop.
Compressor motor defective Check motor winding for open or short. Replace compressor if
necessary.
Seized compressor Replace compressor.
High level gage alarm Check refrigerant level and remove excess.
Compressor Cycles On
High-Pressure Control
High-pressure control erratic in action Check capillary tube for pinches. Set control as required.
Discharge valve partially closed. Open valve.
Air in system Purge system.
Condenser scaled. Clean condenser.
Condenser water pump or fans not
operating.
Start pump or fans.
Unit Operates Too Long Isolation valves partially open Close valves.
System Noises Piping vibrations Support piping as required. Check for loose pipe connectors.
Insufficient compressor oil Add oil.
Compressor Loses Oil Leak in system Locate and repair leak.
Plugged or stuck compressor oil return check
valve
Repair or replace valve.
Liquid refrigerant carries oil out of
compressor
Check to ensure only refrigerant vapor enters compressor suction
line. Add oil as necessary.
Motor shutdown on internal thermal protec-
tion high temperature cutout.
High temperature cutout should reset within 120 minutes.
 Loading...