INSTALLATION
The bypass controller receives power from the bypass damper
actuator. The bypass damper actuator contains the wiring har-
ness and wire nut connections for the bypass controller and
the bypass controller sensors (pressure sensor and indoor-air
quality [IAQ] sensor). All wiring connections must be made
correctly before the bypass controller will function.
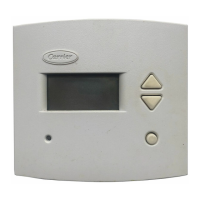
Bypass Controller Placement — Begin the bypass
controller installation by determining where the bypass con-
troller will be located. In most cases, this will be pre-
determined by the building plans and the location of the by-
pass damper actuator. See Fig. 1.
The bypass controller should be located on an interior wall,
about 5 ft from the ground, near the bypass damper. The by-
pass controller can be placed in a remote location if used in
conjunction with a remote room sensor.
Mounting Bypass Damper Actuator to Duct —
The bypass damper should already be installed in the bypass
ductwork. The bypass damper actuator is mounted on the
duct at the damper location.
Wiring Requirements — The wiring requirements for
the VVT System bypass controller are:
BYPASS CONTROLLER TO THERMOSTAT (NETWORK)
— Wiring shall be 18 gage, 3-conductor, shielded, stranded
wire, color coded (RED, BLACK, GREEN), plenum rated if
required, and long enough to run from bypass controller to
thermostat in daisy-chain configuration. A T-tap wiring con-
figuration is not acceptable. The bypass controller does not
have to be below the monitor thermostat.
BYPASS CONTROLLER TO DAMPER ACTUATOR —
Wiring shall be 18 gage, 5-conductor, shielded, stranded wire,
color coded (RED, WHITE, BLUE,YELLOW, GREEN), ple-
num rated if required, and long enough to run from bypass
controller to damper actuator. Do not run wire longer than
500 ft.
NOTE: Do not run the network and the control wire in the
same conduit for more than 5 ft. Never run wires near any
cable carrying AC voltage. For further wiring information,
consult the local Carrier distributor.
Power required to the damper actuator is 24 vac/30 va.
Typical wiring is 18 gage thermostat wire (standard or ple-
num cable). The maximum load of a relay contact is 24 vac,
1 amp. A short in the field wiring will cause non-warranty
damage to the bypass controller. Test before attaching to by-
pass controller.
Call the local Carrier representative if more information
is needed about wiring the VVT System or the bypass
controller.
Wiring Connections
Electric shock can cause injury or death. Ensure power
to the HVAC unit has been disconnected before wiring.
WIRE BYPASS CONTROLLER TO NETWORK — Wire
the bypass controller to the network as shown in Fig. 2. All
wiring should be kept a minimum of 12 in. away from any
cables carrying AC current. For more information refer to
the installation instructions included with each relay pack.
Red, black, and green network wires should be connected to
the bypass controller connector board. The shielding on the
cables should be wirenutted together.
Three-wire network shielding must be connected to earth
ground at one location only. Network communications
will not be transmitted properly.
WIRE BYPASS CONTROLLER TO DAMPER BOARD —
The damper board thermostat wiring bundle contains the wires
required to connect the bypass controller to the damper
actuator. See Fig. 2. Wire nut the RED, WHITE, BLUE,
YELLOW, and GREEN wires of the bypass controller to the
damper board wiring bundle.
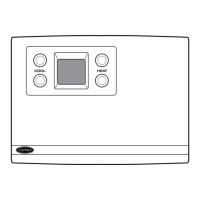
Fig. 1 — Bypass Controller Dimensions
2