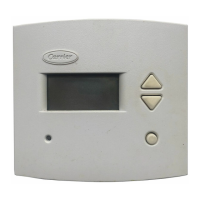
Step 10 — Programming Thermostat Sche-
dules —
Before programming the thermostat, plan the ther-
mostat daily schedule. The schedule is divided into 7 days
(Monday through Sunday). Each day has 4 time periods (OC1,
UN1, OC2, UN2). Each time period has a start time, heating
set point, and cooling set point. Fill in Table 2 as an aid to
programming the daily schedules.
PROGRAMMING MODE — To program the daily sched-
ules, perform the following procedure:
1. Enter programming mode by pressing the Program but-
ton. The PROGRAMMING annunciator will appear on
the thermostat display. The first day of the schedule (MON)
will be displayed and the first programming time period
(OC1) of that day will be displayed. The SET TIME an-
nunciator is also displayed.
NOTE: If a programming button is not pushed for 60 sec-
onds, the thermostat will exit programming mode and any
changes made will be saved.
2. Press the Up and Down buttons to set the start time for
the schedule day and period shown (MON, OC1).
3. Press the Program button once the correct time is shown.
The SET TIME annunciator will turn off and the SET DE-
SIRED TEMP annunciator will be displayed.
4. The heating and cooling set points can now be pro-
grammed. The HEAT and COOL annunciators are dis-
played for the heating and cooling set points respectively.
The Mode button is used to toggle between the heating
and cooling set points. Use the Up and Down buttons to
raise and lower the temperature set points.
NOTE: There must be at least 3 degrees difference be-
tween the cooling and heating set points. The thermo-
stat will automatically change any set points closer than
3 degrees.
5. Press the Program button to advance to the next time pe-
riod (UN1).
6. Perform Steps 2 through 5 until the times and tempera-
ture set points have been entered for the entire day. Press
the Change Day button to move to the schedule for the
next day.
7. Repeat Steps 2 through 6 to program the remaining sched-
ule days. The Copy Previous Day button can be used to
copy the previous day’s schedule if the schedules are the
same.
8. After all the times and set points for each day have been
entered, press the End Program button to finish entering
the schedule.
NOTE: The thermostat will continue to follow the schedule
until a new one is entered. The schedule may need to be
updated for different seasons or prolonged changes in tem-
perature.
OVERRIDING THE SCHEDULE — The schedule can be
overridden in two ways, the Hold button can be pressed to
lock in the current temperature setting, or the Up or Down
buttons can be pressed to change the desired temperature.
The thermostat will use the held or new set point until the
next scheduled time period starts (with a maximum Hold time
of 4 hours).
Step 11 — Final Checklist
1. Put away tools and instruments. Clean up debris and
packaging.
2. Review Owner’s Guide with occupant or owner.
3. Leave Owner’s Guide with occupant or owner.
Table 2 — Daily Schedule Planner
DAY OF
THE WEEK
SCHEDULE
OC1 UN1 OC2 UN2
Time / Heat / Cool Time / Heat / Cool Time / Heat / Cool Time / Heat / Cool
Monday // // // //
Tuesday // // // //
Wednesday // // // //
Thursday // // // //
Friday // // // //
Saturday // // // //
Sunday // // // //
NOTE: The cooling temperature set point must be at least 3 degrees higher than the heating temperature set point.
10