45MAHAQ: Installation Instructions
Manufacturer reserves the right to change, at any time, specifications and designs without notice and without obligations.
16
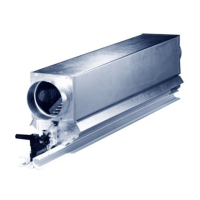
Drill Wall Hole
1. Using a 2.5in (65mm) or 3.54in (90mm) core drill, drill a hole in the
wall. Ensure that the hole is drilled at a slight downward angle, so that
the outdoor end of the hole is lower than the indoor end by about 0.2-
0.275in(5-7mm). This ensures proper water drainage.
Fig. 16 — Drill the wall hole
2. Place the protective wall cuff into the hole. This protects the edges of
the hole and helps seal it when you finish the installation process.
Fig. 17 — Place the protective wall cuff in the hole
NOTE: If the wall is made of brick, concrete, or similar material,
drill 0.2in-diameter(5mm-diameter) holes in the wall and
insert the sleeve anchors provided. Then secure the mounting
plate to the wall by tightening the screws directly into the clip
anchors.
Step 3: Install Refrigerant Pipe & Drain Hose
Prepare Refrigerant Piping
1. Based on the position of the wall hole relative to the mounting plate,
choose the side from which the piping exits the unit. You have four
options for the exit direction of the piping.
NOTE: In some locations of US, a conduit tube must be used to
connect the cable. To ensure an enough space for the pipes
running and the machine is against the wall after installation,
It is recommended to attach the drain hose to the right-hand
side (when you are facing the back of the unit). When choose
Left-hand side or Right-hand side piping, ensure that the
pipes come out horizontally so as not to affect the lower panel
installation.
Fig. 18 —Piping Connections
2. If the wall hole is behind the unit, keep the knock-out panel in place. If
the wall hole is to the side of the indoor unit, remove the plastic knock-
out panel from that side of the unit. Use needle nose pliers if the plastic
panel is too difficult to remove by hand.
Fig. 19 — Knock-Out Panel
When drilling the wall hole, make sure to avoid wires,
plumbing, and other sensitive components.
CAUTION
3.54in
ĭPP
2.5in
ĭPP
8VLQJDLQPPRULQPP
FRUHGULOODFFRUGLQJWRWKHXQLW\RXSXUFKDVHG
:DOO
,QGRRU
2XWGRRU
LQ
PP
wall hole.
the protective
wall cuff
Left-hand
side
Left rear
Right rear
Right-hand
side
Knock-out Panel(cut
depending on the actual
size needed)
Knock-out Panel on
the left and right side
 Loading...