45MAHAQ: Installation Instructions
Manufacturer reserves the right to change, at any time, specifications and designs without notice and without obligations.
21
Step 6: Mount the Indoor Unit
Fig. 30 —Mount the Indoor Unit
If you installed new connective piping to the outdoor unit, perform the
following steps:
1. If you have already passed the refrigerant piping through the hole in the
wall, proceed to “Step 4: Electrical Work Preparation on page 19.
Otherwise, double-check that the ends of the refrigerant pipes are
sealed to prevent dirt or foreign materials from entering the pipes.
2. Slowly pass the wrapped bundle of refrigerant pipes, drain hose, and
signal wire through the hole in the wall.
3. Hook the top of the indoor unit on the upper hook of the mounting
plate.
4. Check that unit is hooked firmly on mounting by applying slight
pressure to the left and right-hand sides of the unit. The unit should not
jiggle or shift.
5. Using even pressure, push down on the bottom half of the unit. Keep
pushing down until the unit snaps onto the hooks along the bottom of
the mounting plate.
6. Again, check that the unit is firmly mounted by applying slight pressure
to the left and the right-hand sides of the unit.
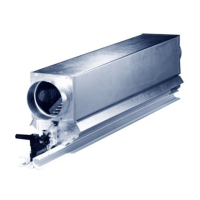
Fig. 31 — Connector A and B
• Before performing the refrigerant piping connection, always wear
work gloves and goggles, and remember that the connectors A and B
are not allowed to face people directly.
• Keep pressing the cross-shape part of connector B with a wrench or
channel locks for about 5~10 seconds until the red protruding point of
connector A retracts completely.
• Remove connectors A and B, then perform the refrigerant piping
connection between indoor unit and outdoor unit.
INSTALL ALL POWER, INTERCONNECTING
WIRING, AND PIPING TO THE INDOOR UNIT
1. Run interconnecting piping and wiring from the outdoor unit to the
indoor unit.
2. Run an interconnecting cable through the hole in wall (outside to
inside).
3. Lift the indoor unit into position and route piping and drain through the
hole in wall (inside to outside). Fit the interconnecting wiring into the
back side of the indoor unit.
4. Put an upper claw at the back of the indoor unit on the upper hook of
the mounting plate and move the indoor unit from side to side to ensure
it is securely hooked. See “Step 2: Drill Wall Hole for Connecting
Piping on page 15.
5. Open the indoor unit’s front cover and remove the field wiring terminal
block cover.
6. Pull the interconnecting wire up from the back of indoor unit and
position close to the terminal block on the indoor unit.
7. Push the lower part of the indoor unit up on the wall, then move the
indoor unit from side to side, up and down to ensure it is hooked
securely (see Fig. 32).
Fig. 32 — Indoor Unit Installation
8. Connect the wiring from the outdoor unit per the connection diagram
(see Figure 25 - Figure 26).
9. Replace the field wiring cover and close the indoor unit’s front cover.
Put pipes in wall hole Hook it and press down
lightly to secure
Check that the unit is
firmly mounted
Drain
hose
Connecting
cable
Hook it
For the units, adopt the following pipe connectors, strictly
perform the piping work in accordance with the following
instructions.
CAUTION
Connector A
Connector B
Cross-shape
part
Red point
protruding
 Loading...