6
Fig. 5 —Distance from Wall or Obstruction
• Do not position where the discharge air could blow
directly on the thermostat.
• The unit should not be positioned directly above any
obstruction.
• The unit must be installed square and level.
• The condensate drain should have sufficient downward
slope (1 in. per 100 in.) in any horizontal run between
unit and drain.
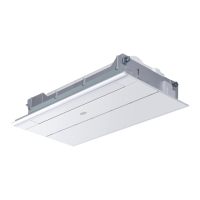
Step 3 — Mount the Unit
INSTALLING HANGER BOLTS (UNDER CEILING
MOUNT) — Install the hanger bolts at the locations shown in
Fig. 6. Use 3/8-in. all-threaded rod. For unit weight and
mounting dimensions, see Table 3.
Fig. 6 —Hanging Bracket Locations
Table 3 —Unit Weight and Mounting Dimensions
(Under Ceiling Mount)
MOUNTING UNIT (UNDER CEILING MOUNT) —
The unit can now be lifted on to the hanging rods for under
ceiling mounting.
1. Use rods and fasteners for under ceiling mount to suspend
the hanging bracket.
2. Secure the hanging brackets in position with locknuts and
washers on both sides. Ensure the threaded rod does not
protrude more than 1 in. below the mounting hole on the
hanging bracket as shown in Fig. 7.
Fig. 7 —Mounting the Hanging Bracket
3. Remove the side board and grille from the unit as shown
in Fig. 8 (does not apply to unit size 048).
Fig. 8 —Removing Side Board and Grille
4. Slide the unit backwards onto the hanging bracket until
the mounting hole on the unit lines up with the mounting
hole on the hanging bracket. Secure the unit using
mounting bolts as shown in Fig. 9.
Fig. 9 —Securing Unit To Hanging Bracket
IMPORTANT: Be sure that the ceiling grid is
supported separately from the unit. The ceiling grid
must not be supported by an part of the unit or any
associated wiring or piping work.
STRUCTION
a40-1859
24 in.
min.
24 in.
min.
40VMU UNIT WEIGHT (lb)
DIMENSION (in.)
A B
012 57 35-
3
/
4
7-
7
/
8
015-024 62 35-
3
/
4
7-
7
/
8
030 77 47 7-
7
/
8
036,048 106 60-
3
/
4
7-
7
/
8
0.
8 – 1 in.
WASHER
NUT
HANGING
BOLT
HANGING BRACKET
A40-1862
ARD
 Loading...