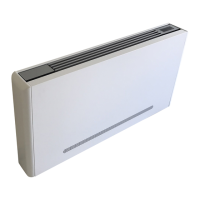
18
knockouts, making sure the insulation penetrates into the
unit as shown in Fig. 20-23.
2. Before anchoring the equipment in place, the unit must
be leveled and the cabinet must be plumb and squared.
The unit may be anchored in place by bolting directly
through the unit floor or attaching to the cabinet in some
location that will not interfere with drywall or other
items such as the supply grille, thermostat, or return
access panel. When attaching to the unit cabinet, care
must be taken to not penetrate the cabinet in locations
that may damage internal components or wiring. The
mounting technique is a matter of choice; however, the
unit should always be anchored securely to prevent
movement during construction and riser expansion and
contraction. After anchoring the unit, it is then ready for
the various service connections such as riser connections
and electrical.
3. The plastic flare caps on the end of the riser ball valves
should be removed and discarded.
4. All universal stack units use reinforced braided stainless
steel flexible hose kits for piping between field-installed
risers and unit water coils as shown in Fig. 21. The hose
kit design has threaded connections on each end. The
hose kits allow for riser fluctuations due to thermal
expansion.
Fig. 20 — 42SU Unit Riser to Unit Installation Setup
Fig. 21 — 42SU Unit Riser to Unit Installation
Fig. 22 — 42SU Unit Riser to Unit Installation
(Tighten Swivel Connections)
Fig. 23 — 42SU Unit Riser to Drain Installation
5. Use a wrench to tighten the swivel connections. Use a
backup wrench to hold the riser ball valve stationary to
prevent it from bending or twisting during installation as
shown in Fig. 22. Be careful not to over-tighten swivel
connections.
6. Locate the unit’s coil fitting.
7. The plastic flare caps on the end of the coil fitting should
be removed and discarded.
8. Use a wrench to tighten the swivel connections. The baf-
fle acts as a secondary wrench. Be careful not to over-
tighten swivel connections.
9. Locate the p-trap drain and rubber hose factory installed
to the drain pan connection in the bottom of the unit as
shown in Fig. 23.
10. Push the rubber drain hose over the riser drain stubout.
Be careful not to bend the drain stubout.
11. Adjust the hose clamp over the riser stubout and rubber
hose to hold in place as shown in Fig. 23.
12. Test for leaks. Any and all leaks should be repaired
before proceeding with installation. When testing with
air or some other gas, it might be necessary to tighten
stem packing nuts on some valves to maintain air pres-
sure in the riser. Pressure testing risers with water should
be done with the unit service valves closed to prevent
flushing debris into the unit valve packages. This will
FLARE CAP
BALL
VALVE
RISER STUBOUT
INSULATION
THREADED
FLARE FITTING
UNIT INSULATION
OUTER
CABINET
RISER KNOCKOUT
SLOT
FLEXIBLE
HOSE KIT
RISER
BALL
VALVE
RISER STUBOUT
INSULATION
CONNECTION POINT TO ANY FACTORY
FURNISHED AND INSTALLED
COMPONENTS.
COIL
BAFFLE
CAUTION
Hose connection torque requirements are 350 in. lb +10/
–0 in. lb to prevent leaks.
CAUTION
Hose connection torque requirements are 350 in. lb +10/
–0 in. lb to prevent leaks.
BACKUP
WRENCH
BALL
VALVE
WRENCH
SWIVEL
CONNECTION
DRAIN PAN
DRAIN
CLAMP
CLAMP
RISER KNOCKOUT
UNIT INSULATION
PTRAP
UNIT WALL
RISER
RISER STUBOUT
 Loading...