19
also allow risers to be drained down after testing in the
winter to avoid freeze-up problems. In the event that
leaking or defective components are discovered, the
sales representative must be notified BEFORE any
repairs are attempted. All leaks should be repaired before
proceeding with the unit installation.
13. After system integrity has been established, the riser
insulation must be pulled back into place over the joint
and glued or sealed to prevent sweating and heat loss or
gain. All of the risers, including the riser stubouts, should
be properly covered with insulation. Internally mounted
chilled water piping and valves are located over the drain
pan and need not be insulated.
Any fireproofing requirements where risers or piping pene-
trate floors or walls are the responsibility of the installer. This
work should be done only after all pressure testing is com-
pleted. The fireproofing method used must accommodate
pipe expansion and contraction and the piping must be pro-
tected from abrasion and chemical attack. The pipe insulation
also must be maintained to prevent sweating and must be pro-
tected from wear or erosion at the joint between the insulation
and the fireproofing material.
When no risers are ordered for the universal stack unit, it is
the responsibility of the installer to make sure that an isola-
tion ball valve is installed between each supply and return
piping connection to the unit. Flare fittings are factory pro-
vided to allow connection between the ball valves and the
hoses.
Supply Air Installation
Each side of the unit has one supply air knockout as well as a
supply air knockout on the top of the unit (see Fig. 17).
1. Determine which supply air opening/openings are
required for your application.
NOTE: The supply air opening on the riser side of the unit
should not be used.
2. Use a sharp retractable knife to trim insulation using cen-
ter knockout slot/trim line as pattern (see Fig. 24).
3. Use a sharp standard needle nose pliers and grab knock-
out tab (see Fig. 24).
Fig. 24 — 42SU Unit Supply Air Knockout Tab
Location
4. Twist or pry pliers back and forth until knockout tab
breaks away from unit.
5. Repeat for all supply air tabs until all have been broken.
6. Discard center knockout piece. Be careful of sharp
edges.
7. Use a sharp retractable knife to trim any excess insula-
tion using knockout hole as pattern.
8. Use duct pliers (hand seamers) to fold duct flange out of
the unit 90 degrees for each side of the supply air open-
ing along duct break (see Fig. 24). The 90-degree flanges
can now be used as drywall stops to prevent coverage of
discharge opening (see Fig. 25).
Fig. 25 — 42SU Supply Air Installation
9. Use adhesive or glue to re-attach insulation that has
pulled away from the unit during knockout removal
process.
10. For ducted applications tape should be applied along and
around all of the supply air opening knockouts to prevent
air leakage.
All installations should be made in compliance with all gov-
erning codes and ordinances. Compliance with all codes is
the responsibility of the installing contractor.
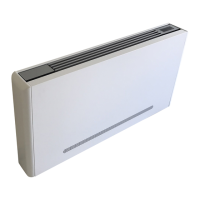
42SM UNITS
The unique design of the mega stack fan coil unit allows for
field-configuration of each unit. Risers, shown with unit, are
for reference only. All risers are factory-fabricated and
shipped loose for field installation.
It is important that you identify all of the unit feature loca-
tions before proceeding with the installation (see Fig. 9). Al-
so, it must be determined whether your application requires a
mating unit (primary/secondary) and its configurations. Con-
sult your local sales representative or the factory for further
details on primary/secondary arrangements.
Unit orientation is determined based on the location of the
risers in the building. Risers can only be installed on the rear
side of the unit and always determine the rear of the mega
stack unit. The return air is always on the front (see Fig. 26).
Fig. 26 — 42SM Unit Installation
KNOCKOUT TAB
10 PLACES
DUCT BREAK
4 PLACES
KNOCKOUT TAB
TRIM LINE
UNIT
WALL
UNIT
INSULATION
90°
DUCT FLANGE
RETURN AIR
42SM
CABINET
HR CRDHS CS
HR = HOT WATER RETURN
HS = HOT WATER SUPPLY
D = DRAIN
CR = COLD WATER RETURN
CS = COLD WATER SUPPLY
D
CR
HS
CS
HR
R = RETURN
D = DRAIN
S = SUPPLY
R
D
S
2 or 4PIPE
RIGHTLEFT
REAR
FRONT
 Loading...