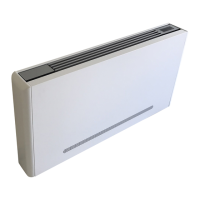
20
Supply, Return, and Drain Risers
Submittals and product literature detailing unit operation,
controls, and connections should be thoroughly reviewed BE-
FORE beginning the connection and testing of risers and
piping.
The supply and return connections are marked on the coil
stubouts and the valve package depending on your configura-
tion. “CS” means cold water supply, “CR” means cold water
return, “HS” means hot water supply, and “HR” means hot
water return to indicate flow direction to and from the coil.
Blue letters mark the chilled water connections and red letters
mark the hot water connections.
The unit internal piping is designed to accommodate a total
riser vertical movement of ±1
1
/
2
in., due to thermal expansion
and/or contraction, when positioned properly at the jobsite.
Risers must be anchored to the building structure to limit riser
expansion and contraction movement to a maximum of 3
inches. Riser anchoring and expansion compensation is not
included in the factory-supplied unit and must be field-pro-
vided. While some special riser features are available from
the factory, riser end caps, air vents, and/or flushing loops are
normally provided on the job by the installer.
Riser to Unit Installation
Proper riser installation and vertical positioning in the unit
provides for a unit piping run-out to the service valves which
are centered in the access slots and level or sloping down
slightly away from the riser. This prevents condensation from
running back to the riser and possible damage from dripping
at the bottom of a riser column. Each job has specific require-
ments and satisfying those requirements is the responsibility
of the installer.
Riser to Drain Installation
1. Carefully position the unit so that the riser ball valves
penetrate into the unit through the riser slot making sure
the insulation penetrates into the unit as shown in Fig. 27
and 28.
Fig. 27 — 42SM Riser to Unit Installation
Fig. 28 — 42SM Riser to Unit Connection
2. Before anchoring the equipment in place, the unit must be
leveled and the cabinet must be plumb and squared. The
unit may be anchored in place by bolting directly through
the unit’s floor or attaching to the building walls through
the cabinet walls in some location that will not interfere
with drywall or other items such as the supply grille, ther-
mostat, or return access panel. When attaching sheet rock
to the unit cabinet, care must be taken to not penetrate the
cabinet in locations that may damage internal components
or wiring. The mounting technique is a matter of choice;
however, the unit should always be anchored securely to
the building to prevent movement during construction and
riser expansion and contraction. After anchoring the unit,
it is then ready for the various service connections such as
riser connections and electrical.
3. The plastic flare caps on the end of the riser ball valves
should be removed and discarded.
4. All mega stack units use reinforced braided stainless
steel flexible hose kits for piping between field-installed
risers and unit water coils as shown in Fig. 28. Each hose
has threaded connections on each end. The hose kits
allow for riser fluctuations due to thermal expansion.
5. Use a wrench to tighten the swivel connections. Use a
backup wrench to hold the riser ball valve stationary to
prevent it from bending or twisting during installation as
shown in Fig. 29. Be careful not to over-tighten swivel
connections.
Fig. 29 — 42SM Riser to Unit Installation
(Tighten Swivel Connections)
CAUTION
Toxic residues and loose particles resulting from manu-
facturing and field piping techniques such as joint com-
pounds, soldering flux, and metal shavings may be pres-
ent in the unit and the piping system. Special consider-
ation must be given to system cleanliness when
connecting to solar, domestic or potable water systems.
BALL
VALVE
RISER STUBOUT
INSULATION
THREADED
FLARE FITTING
FLARE CAP
UNIT INSULATION
OUTER
CABINET
RISER KNOCKOUT
SLOT
CAUTION
Hose connection torque requirements are 350 in. lb +10/
–0 in. lb to prevent leaks.
FLEXIBLE
HOSE KIT
RISER
BALL
VALVE
RISER STUBOUT
INSULATION
CONNECTION POINT TO ANY FACTORY
FURNISHED AND INSTALLED
COMPONENTS.
COIL
BAFFLE
BACKUP
WRENCH
BALL
VALVE
WRENCH
SWIVEL
CONNECTION
 Loading...