EasyManua.ls Logo

Carrier ComfortLink 30HXA User Manual

Carrier ComfortLink 30HXA
140 pages
To Next Page IconTo Next Page
Page #1 background imageLoading...
Page #1 background image
Manufacturer reserves the right to discontinue, or change at any time, specifications or designs without notice and without incurring obligations.
PC 903 Catalog No. 533-00052 Printed in U.S.A. Form 30G,H-9T Pg 1 1-04 Replaces: New
Book 2
Tab 5 c
Controls Start-Up, Operation,
Service, and Troubleshooting
SAFETY CONSIDERATIONS
Installing, starting up, and servicing this equipment can be
hazardous due to system pressures, electrical components, and
equipment location (roof, elevated structures, etc.). Only
trained, qualified installers and service mechanics should
install, start up, and service this equipment.
When working on this equipment, observe precautions in
the literature, and on tags, stickers, and labels attached to the
equipment, and any other safety precautions that apply. Follow
all safety codes. Wear safety glasses and work gloves. Use care
in handling, rigging, and setting this equipment, and in
handling all electrical components.
CONTENTS
Page
SAFETY CONSIDERATIONS ...................... 1
GENERAL .......................................2,3
MAJOR SYSTEM COMPONENTS ................3,4
Main Base Board (MBB) .......................... 3
Screw Compressor Board (SCB) ................. 3
Electronic Expansion Valve (EXV) Board ......... 3
Comfort
Link Compressor Protection
(CCP) Board ................................... 3
Energy Management Module (EMM) .............. 3
Enable/Off/Remote Connect Switch .............. 3
Emergency On/Off Switch ........................ 3
Board Addresses................................. 3
Control Module Communication.................. 3
Carrier Comfort Network (CCN) Interface......... 3
OPERATION DATA............................. 4-40
Electronic Expansion Valve (EXV) ................ 4
EXV OPERATION
•ECONOMIZEROPERATION
Oil Pumps........................................ 5
Motor Cooling....................................5
Back Pressure Valve (30GXN,R
and 30HXA only) ............................... 5
Sensors ..........................................5
Comfort
Link Compressor Protection
(CCP) Board 7
OUTPUTS
INPUTS
Wye-Delta vs Across-the-Line (XL)
Starting Option ................................8
Capacity Control ................................. 8
MINUTES LEFT FOR START
MINUTES OFF TIME
LOADING SEQUENCE
CLOSE CONTROL
LEAD/LAG DETERMINATION
CAPACITY SEQUENCE DETERMINATION
MINIMUM LOAD VALVE
CAPACITY CONTROL OVERRIDES
Electrical shock can cause personal injury and death. Shut
off all power to this equipment during installation and ser-
vice. There may be more than one disconnect switch. Tag
all disconnect locations to alert others not to restore power
until work is completed.
This unit uses a microprocessor-based electronic control
system. Do not use jumpers or other tools to short out com-
ponents, or to bypass or otherwise depart from recom-
mended procedures. Any short-to-ground of the control
board or accompanying wiring may destroy the electronic
modules or electrical components.
To prevent potential damage to heat exchanger tubes
always run fluid through heat exchangers when adding or
removing refrigerant charge. Use appropriate brine solu-
tions in cooler and condenser fluid loops to prevent the
freezing of heat exchangers when the equipment is exposed
to temperatures below 32 F (0° C).
DO NOT VENT refrigerant relief valves within a building.
Outlet from relief valves must be vented outdoors in accor-
dance with the latest edition of ANSI/ASHRAE (American
National Standards Institute/American Society of Heating,
Refrigeration and Air Conditioning Engineers) 15 (Safety
Code for Mechanical Refrigeration). The accumulation of
refrigerantinanenclosedspacecandisplaceoxygenand
cause asphyxiation. Provide adequate ventilation in enclosed
or low overhead areas. Inhalation of high concentrations of
vapor is harmful and may cause heart irregularities,
unconsciousness or death. Misuse can be fatal. Vapor is
heavier than air and reduces the amount of oxygen available
for breathing. Product causes eye and skin irritation.
Decomposition products are hazardous.
DO NOT attempt to unbraze factory joints when servicing
this equipment. Compressor oil is flammable and there is
no way to detect how much oil may be in any of the refrig-
erant lines. Cut lines with a tubing cutter as required when
performing service. Use a pan to catch any oil that may
come out of the lines and as a gage for how much oil to add
to system. DO NOT re-use compressor oil. Do NOT leave
refrigerant system open to air any longer than necessary.
Seal circuits being serviced and charge with dry nitrogen to
prevent oil contamination when timely repairs cannot be
completed.
30GXN,R080-528
30HXA,HXC076-271
Air-Cooled and Water-Cooled Chillers with
Comfort
Link™ Controls
50/60 Hz
Series 6

Table of Contents

Question and Answer IconNeed help?

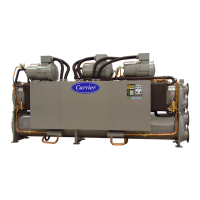
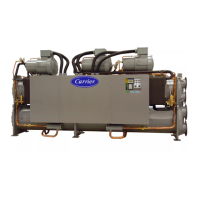
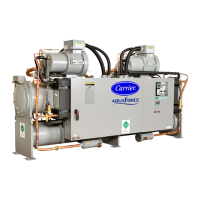
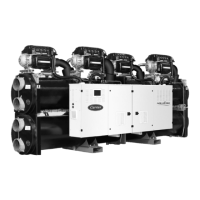
Do you have a question about the Carrier ComfortLink 30HXA and is the answer not in the manual?

Carrier ComfortLink 30HXA Specifications

General IconGeneral
BrandCarrier
ModelComfortLink 30HXA
CategoryChiller
LanguageEnglish

Summary

Safety Considerations

General Safety Precautions

General safety advice for installation, servicing, and handling equipment.

Electrical Safety Precautions

Warnings about electrical shock hazards and the need to shut off power.

Refrigerant Handling and Venting

Vent all relief valves outdoors and handle refrigerant vapors.

Major System Components

Energy Management Module (EMM)

Receives inputs for temperature reset, cooling set point, and demand limit.

Emergency On/Off Switch

Immediately shuts down the chiller by cutting power to modules.

Operation Data

Electronic Expansion Valve (EXV)

Controls refrigerant flow via a stepper motor for precise cooler level control.

EXV Operation

Details how the EXV operates to control refrigerant flow based on superheat.

Economizer Operation

Explains economizer function for capacity improvement and motor cooling.

Oil Pumps

Describes the operation and function of the prelubricating oil pumps.

Sensors

Gathers information from sensors for chiller operation control.

ComfortLink Compressor Protection (CCP) Board

Monitors compressor status, motor temp, high-pressure, and controls solenoids.

Wye-Delta vs Across-the-Line (XL) Starting Option

Explains the two methods for starting compressors and their benefits.

Capacity Control

How the system cycles components to maintain the leaving fluid temperature set point.

Minimum Load Valve (MLVS)

Capacity Control Overrides

Modifies the normal operation of the capacity control routine.

Head Pressure Control

Low Saturated Suction Temperature

Prevents unit capacity increase if saturated suction temperature is too low.

GENERAL

Microprocessor controls condenser fans to maintain saturated condensing temperature.

AIR-COOLED UNITS (30GXN,R)

Fan staging based on compressor status or saturated condensing temperature.

WATER-COOLED UNITS (30HXC)

Controls direct acting water valves based on PID loop for head pressure.

CONDENSERLESS UNITS (30HXA)

Fans controlled by relay outputs or variable speed for head pressure control.

Control Methods and Cooling Set Points

Navigator Display Module Usage

Service Test (See Table 13)

Function to verify proper operation of outputs, compressors, and other components.

Configuring and Operating Dual Chiller Control

Table 12 — Configuration Mode and Sub-Mode Directory

Table 12 — Configuration Mode and Sub-Mode Directory (cont)

Table 13 — Service Test Mode and Sub-Mode Directory

OUTS Sub-Mode

Testing of EXV, variable head pressure, oil pump, motor cooling, and fans.

COMP Sub-Mode

Testing of compressor relays, loaders, minimum load valve, and oil heater.

Table 14 — Temperature Mode and Sub-Mode Directory

Table 15 — Pressure Mode and Sub-Mode Directory

Table 17 — Inputs Mode and Sub-Mode Directory

Table 18 — Outputs Mode and Sub-Mode Directory

Table 19 — Operating Mode and Sub-Mode Directory

Table 20 — Run Status Mode and Sub-Mode Directory

Table 24A — Example of Configuring Dual Chiller Control (Master Chiller)

Table 24B — Example of Configuring Dual Chiller Control (Slave Chiller)

Alarms/Alerts

Viewing and Clearing Alarms

How to view active alarms, alarm history, and clear alarms.

Temperature Reset

Demand Limit

Demand Limit Types

Explanation of 2-stage switch, 4-20mA, and CCN Loadshed demand limiting.

EXTERNALLY POWERED DEMAND LIMIT (4 to 20 mA Controlled)

Configuring demand limit using a 4 to 20 mA signal.

DEMAND LIMIT (CCN Loadshed Controlled)

Configuring demand limit using a CCN Loadshed module.

Cooling Set Point (4 to 20 mA)

Table 29 — Configuring Demand Limit

Demand Limit Configuration

Detailed configuration steps for demand limit settings.

Table 30 — Menu Configuration of 4 to 20 mA Cooling Set Point Control

TROUBLESHOOTING

Checking Display Codes

How to interpret diagnostic information displayed on the Navigator.

Unit Shutoff

Procedures for shutting off the unit using the EOR switch or emergency stop.

Complete Unit Stoppage

Lists conditions that can cause a complete unit shutdown.

Single Circuit Stoppage

Lists conditions that cause a single circuit to stop without affecting the other.

Restart Procedure

Steps for restarting the unit after a stoppage, including manual reset.

Alarms and Alerts

Warnings of abnormal conditions that may cause shutdown or default values.

Table 31 — Typical Stoppage Faults and Reset Types

Common stoppage faults and their corresponding reset types.

Compressor Alarm/Alert Circuit

Table 32 — Alarm and Alert Codes

Lists alarm/alert codes, description, cause, action taken, and probable cause.

Table 32 — Alarm and Alert Codes (cont)

Alarm and Alert Code Descriptions

Detailed explanations of various alarm and alert codes.

Alarm and Alert Code Details

Specific causes and actions for alarms related to compressor protection, refrigerant flow, and dual chiller communication.

EXV Troubleshooting Procedure

Inspecting/Opening Electronic Expansion Valves

Steps for inspecting and opening electronic expansion valves.

BRAZED-PLATE ECONOMIZERS

SERVICE

Servicing Coolers and Condensers

Procedures for servicing cooler and condenser components.

CONDENSERS (30HX Only)

Refrigerant Charging/Adding Charge

Indication of low charge on a system

How to check for low refrigerant charge using sight glass and EXV percent open.

Adding Charge to 30HXC Systems

Procedure for adding refrigerant charge to 30HXC systems.

Adding Charge to 30GX and 30HXA Systems

Procedure for adding refrigerant charge to 30GX and 30HXA systems.

Oil Charging/Low Oil Recharging

Addition of oil charge to 30HX,GXN,GXR systems

Procedure for adding oil charge to 30HX,GXN,GXR systems.

Oil Filter Maintenance

Compressor Changeout Sequence

Step-by-step procedure for changing a compressor.

Compressor Changeout Sequence

Moisture-Liquid Indicator

To Service Compressor Motor Thermistors

Pressure Transducers

TROUBLESHOOTING

Troubleshooting steps for faulty transducers, including voltage checks and comparisons.

FLOW SENSOR

Description and troubleshooting of the flow sensor and its LEDs.

Safety Devices

COMPRESSOR PROTECTION

Safety devices and logic protecting the compressor from overcurrent and other faults.

Motor Overload

CCP modules protect compressors from overcurrent; MTA settings are critical.

High-pressure switch Settings

Table showing high-pressure switch settings in psig and kPa.

COOLER PROTECTION

Shuts down chiller if leaving fluid temperature drops too low.

Relief Devices

Description of fusible plugs and pressure relief valves.

Control Modules

Operation and troubleshooting of control modules (MBB, SCB, EXV, EMM, CCP, Navigator).

Table 42 — Compressor Control Troubleshooting

Carrier Comfort Network (CCN) Interface

Connecting the chiller to a CCN for network communication.

Replacing Defective Modules

Information on ordering and replacing defective control modules.

Table 43 — Replacement Module Part Number

Maintenance

Recommended maintenance schedule for the chiller.

PRE-START-UP PROCEDURE

System Check

Verifying installation and wiring of all components before startup.

START-UP AND OPERATION

Procedures for actual start-up and verifying proper operation.

Operating Sequence

Describes the sequence of events during chiller startup.

FIELD WIRING

APPENDIX A

APPENDIX A (cont)

ComfortLink™ Compressor Protection Module Configuration Header Punch-Outs and Must Trip Amps

Table mapping unit models to punch-out configurations and must trip amps.

APPENDIX B

Capacity Loading Sequence Example

Example loading sequences for 30HX chillers.

APPENDIX B (cont)

APPENDIX E

APPENDIX E (cont)

APPENDIX F

Typical System Components, 30GXN,GXR080-106,114, Without Economizer

Diagram illustrating typical system components without an economizer.

APPENDIX F (cont)

Typical System Components, 30GXN,GXR108,125-178, With Economizer

Diagram illustrating typical system components with an economizer.

Typical System Components, 30HXC206-271 Circuit A, With Economizer

Diagram illustrating system components for 30HXC Circuit A with economizer.

Typical System Components, 30HXC206-271 Circuit B, With Economizer

Diagram illustrating system components for 30HXC Circuit B with economizer.

Typical System Components, 30HXC076-146, Without Economizer

Diagram illustrating system components for 30HXC076-146 without economizer.

Typical System Components, 30HXC161-186, With Economizer

Diagram illustrating system components for 30HXC161-186 with economizer.

Typical System Components, 30HXA076-146, Without Economizer

Diagram illustrating system components for 30HXA076-146 without economizer.

Typical System Components, 30HXA161-186, With Economizer

Diagram illustrating system components for 30HXA161-186 with economizer.

APPENDIX G (cont)

TESTMODE: Maintenance Display

Maintenance display for service test mode controls.

APPENDIX G (cont)

SERVICE: Configuration

Configuration for PID gains, miscellaneous settings, and compressor enable.

APPENDIX H

APPENDIX I: MOTORMASTER® V OPERATION INSTRUCTION

Configuration

Configuring the Motormaster V VFD for different operating modes.

APPENDIX I (cont)

Troubleshooting

Observing system operation and VFD display information for troubleshooting.

Component Test

MODE – SERVICE TEST

Enabling Service Test Mode to perform component tests.

Related product manuals