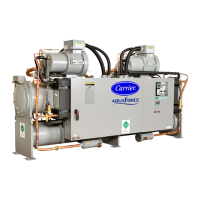
22
30HXA PIPING, VALVE, AND FAN CYCLING PRES-
SURE SWITCH INSTALLATION
Relieve Pressure and Recover Refrigerant
— The 30HXA
units are shipped from the factory with a holding charge of
nitrogen or R-134a. Before opening the refrigerant system, re-
lieve system pressure and recover system refrigerant through
the access fitting on the cooler.
30HXA Refrigerant Piping (See Fig. 14A and 14B)
— When
running the refrigerant piping from the 30HXA unit to the
remote condenser(s), avoid excessive pressure drops. Minimiz-
ing line pressure drop is critical to the proper operation of the
unit expansion device. Refer to Tables 2 and 3 for refrigerant
line sizing guidance. The pressure drop using R-134a refriger-
ant is different than when using R-22 refrigerant. See Tables 4
and 5 for an example of a 2 F (1.1 C) pressure drop in saturated
temperature in the discharge (hot gas) line and liquid line, re-
spectively. Refer to Fig. 15 and 16 for line sizing information
for the discharge and liquid lines for 30HXA (R-134a) units.
See Fig. 17 for double discharge riser details.
Table 4 — Discharge Line 2 F (1.1 C) Drop in
Saturated Temperature Example
Table 5 — Liquid Line 2 F (1.1 C) Drop in
Saturated Temperature Example
An inverted trap should be installed in the discharge line at
the condenser to prevent refrigerant from flowing back to the
oil separator and compressor during unit shutdown. The invert-
ed trap must extend to the height of the condenser. The
discharge line must be brazed to the back-pressure valve locat-
ed on the top of the oil separator. Be sure to wrap back-pressure
valve when brazing discharge line to avoid damaging the
valve. Liquid line solenoid valves with manual lift stems
should be installed between the field-supplied liquid line filter
driers and the unit. For proper electrical connections see
Fig. 18.
If valves are installed in the liquid lines, it is recommended
that field-supplied pressure relief valves be installed in each
liquid line and the pressure setting should be 320 psig
(2205 kPa). Most local codes require that the relief valves be
vented directly outdoors. The vent must not be smaller than the
relief valve outlet.
30HXA Low-Ambient Considerations
— In installations
where outdoor ambient temperatures may be below 34 F
(1.1 C), it is recommended that inhibited ethylene glycol or
other suitable corrosion-resistant antifreeze solution be used in
the cooler loop to prevent cooler freeze-up.
If a suitable antifreeze solution is not used in the cooler
loop, chilled water pump control is required. The chiller will
automatically start the chilled water pump if the saturated suc-
tion temperature is less than the brine freeze point minus 6° F
(3.3° C) or if the entering or leaving water temperature is less
than the brine freeze point plus 2° F (1.1° C). Maintaining flow
through the cooler is required for freeze protection.
Fan-Cycling Pressure Switches (09DK Condensers)
— In
order to provide proper head-pressure control in 30HXA units,
install fan-cycling pressure switches in each circuit in the liquid
line between the separate condenser unit and expansion device.
Two switches are shipped from the factory with the 30HXA
units. Refer to the 09DK condenser installation literature for
details on the location and installation of the switches. Since
the 30HXA is an HFC-134a unit, switch selection is based on
R-134a refrigerant pressures.
NOTES: The switches that are standard with the 09DK con-
densers are designed for R-22 operation and must not be used.
Instead use the switches shipped with the chiller (Part No.
HK02YB097). Switches open at 97 psig (± 10 psi), and close
at 185 psig (± 10 psi).
Back-Pressure Valve, 30HXA Units
(See Fig. 19 and 20) —
The 30HXA back-pressure valves are supplied with an integral
mounting flange. The valves mount on the 30HXA oil separa-
tor. This reduces brazing when installing the discharge piping,
and allows the installer to orient the valve in any desired
position.
Complete the steps below to install the flanged back-
pressure valves on the 30HXA chiller before running discharge
piping. Follow these steps for both refrigerant circuits.
1. Be sure to remove nitrogen charge or properly recover re-
frigerant charge before removing the blank-off plate. Re-
move the blank-off plate from the mating flange on top of
the oil separator by removing the screws from the flange.
See Fig. 19 for location.
2. Using the screws that were removed in Step 1, bolt the
flanged back-pressure valve to the mating flange on top
of the oil separator. An O-ring is included in the box with
the back-pressure valve for sealing the flange.
The valve may be oriented in any desired position in or-
der to make discharge piping easier. Install pipe hangers
where needed. Make sure no weight or stress is placed on
the back-pressure valve.
3. Once the back-pressure valve has been mounted to the
mating flange, and the piping is properly supported, a
SATURATED
DISCHARGE
TEMP
PRESSURE
R-134a R-22
F C Psig kPa Psig kPa
126 52.2 187.5 1293 281.6 1942
124 51.1 182.0 1255 274.3 1891
Δ PRESSURE 5.5387.351
SATURATED
LIQUID
TEMP
PRESSURE
R-134a R-22
F C Psig kPa Psig kPa
100 37.8 124.3 857 195.9 1351
98 36.7 120.1 828 190.2 1311
Δ PRESSURE 4.2295.740
IMPORTANT: The back-pressure valves are not mounted
to the 30HXA chiller at the factory. They are packaged and
supplied attached to the unit shipping skid. These valves
must be installed at the time of chiller installation. Failure
to install the back-pressure valves will result in improper
unit operation.
TO
CONDENSER
B
RED.
TEE
90 DEGREE
STR ELLS
FROM
CHILLER
45 DEGREE
STR ELLS
A
LEGEND
RED. TEE — Reducing Tee
STR ELLS — Street Elbows
Fig. 17 — Double Discharge Riser
Construction Detail
 Loading...