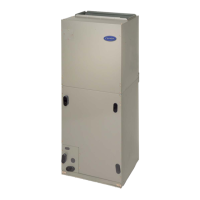
FCM/A5, FEV, FJM, FEM4, FHMA5, FMA4/5, FM(C,U)5, FS(A,M,U)4, FTMA5, F(V,X)M4, F5M4, REM4, WA(H,M,P,X) WB(G,H)L, WC(G,H)L: Service and Maintenance
Manufacturer reserves the right to change, at any time, specifications and designs without notice and without obligations.
13
communication pulses determines motor speed. The rotor is permanently
magnetized.
ECM Control Power
The ECM control power is supplied from R circuit through printed
circuit runs to motor control connector Plug 1, Pin 1, through motor
control harness to motor. The C side of low-voltage control power circuit
is connected by printed circuit runs to motor connector Plug 1, Pin 2 then
through motor control harness to motor. A digital signal is sent from
Plug 1, Pins 3 and 4 to communicate with the motor including all airflow
requirements.
Low-Voltage Circuit Fusing and Reference
The low-voltage circuit is fused by a board-mounted 5A automotive type
fuse placed in series with transformer SEC2 and R circuit. The C circuit
of transformer is referenced to chassis ground through a printed circuit
run at SEC1 connected to metal standoff.
NOTE: The PCB must be mounted with two screws and motor ground
lead secured to blower housing or erratic motor operation can result.
Transformer, Motor, and Electric Heater Power Connection
Transformer high voltage supplied from electric heater package or high
voltage leads through 12-pin heater connector plug/recp2. The ECM 3.0
power connections are made at the transformer primary terminals. The
transformer secondary connections are made at SEC1 and SEC2
connectors.
Troubleshooting (FCM)
NOTE: Always check high and low voltage supply to the fan coil
components. Check the integrity of the plug receptacle connections and
fan coil wiring harness prior to assuming a component failure.
LED Description
LEDs built into fan coil control provide installer or service person
information concerning operation and/or fault condition of the fan coil
control and ECM motor. This information is also available at system
User Interface in text with basic troubleshooting instructions. Careful
use of information displayed will reduce the need for extensive manual
troubleshooting.
The amber LED located at bottom center of control adjacent to motor
harness plug is Motor Status LED, and it is labeled MOTOR. A second
amber LED, located in upper right center of control adjacent to System
Communications connector (A,B,C,D) is the System Status LED, and it
is labeled STATUS. The green LED labeled COMM is also located
adjacent to System Communications connector, below STATUS LED,
and is used as an indicator of system communications status. Status
Codes will be displayed on the STATUS LED using the following
protocol:
1. The number of short flashes indicates first digit of code.
2. The number of long flashes indicates second digit of code.
3. A short flash is 0.25 seconds on. A long flash is one second on.
4. The time between flashes is 0.25 seconds.
5. The time between last short flash and first long flash is 1 second.
6. The LED will be off for 2.5 seconds before repeating code.
Fan Coil Control Start-Up and System Communications
Troubleshooting
On power up, green COMM LED will be turned off until successful
system communications are established (this should happen within 10
seconds). Once communications with User Interface are successful,
COMM LED will be lit and held on. At the same time, amber STATUS
LED will be lit and held continuously on until a request for operating
mode is received. The STATUS LED will be on any time fan coil is in
idle mode.
If, at any time, communications are not successful for a period exceeding
two minutes, fan coil control will only allow emergency heating or
cooling operation using a common thermostat, a non-communicating
outdoor unit and the R, C, Y, O, W outdoor unit terminal strip
connections and will display Status Code 16, System Communication
Fault, on amber STATUS LED. No further fan coil troubleshooting
information will be available at User Interface until communications are
re-established.
If COMM LED does not light within proper time period and status code
is not displayed:
1. Check system transformer high and low voltage to be sure the
system is powered.
2. Check fuse on fan coil control to be sure it is not blown. If fuse is
open, check system wiring before replacing it to be sure a short
does not cause a failure of replacement fuse.
If COMM LED does not light within proper time period and status code
is displayed:
Check system wiring to be sure Observer wall control is powered and
connections are made Dx+ to DX+, DX- to DX-, etc. and wiring is not
shorted. Mis-wiring or shorting of the DX+, DX-, C, R communications
wiring will not allow successful communications.
NOTE: Shorting or mis-wiring low voltage system wiring will not cause
damage to fan coil control or User Interface but may cause low voltage
fuse to open.
ECM Motor Troubleshooting
The ECM motor used in this product consists of two parts: the control
module and the motor winding section. Do not assume motor or module
is defective if it will not start. Use the designed-in LED information aids
and follow troubleshooting steps described below before replacing
motor control module or entire motor. Motor control module is available
as a replacement part.
Table 7 – Troubleshooting Status Codes
Code Description / Procedure Link to Text
16
(STATUS CODE 16, SYSTEM COMMUNICATION FAULT: on p15)
45
(STATUS CODE 45, CONTROL BOARD TEST FAULT: on p14)
37
(STATUS CODE 37, HEATER OUTPUT SENSED “ON” WHEN NOT
ENERGIZED: on p14)
44
(STATUS CODE 44, MOTOR COMMUNICATION FAULT: on p14)
25
(STATUS CODE 25, INVALID MOTOR / MODEL SELECTION:
on p15)
27
(STATUS CODE 27, INVALID OUTDOOR UNIT SIZE: on p15)
26
(STATUS CODE 26, INVALID HEATER SIZE: on p15)
36
(STATUS CODE 36, HEATER OUTPUT NOT SENSED WHEN
ENERGIZED: on p15)
41
(STATUS CODE 41, BLOWER MOTOR FAULT: on p15)
46
(STATUS CODE 46, BROWNOUT CONDITION: on p16)
53
(STATUS CODE 53, OUTDOOR AIR TEMPERATURE SENSOR
FAULT: on p16)