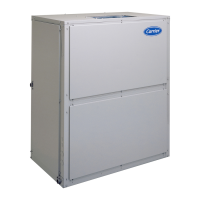
Step 3—Information Plate—WeatherMaker™
The information plate is secured to the front of the control box and
provides a cover for it. (See Fig. 9.) This plate also provides a
surface to attach the wiring schematic, superheat-charging tables
with instructions, and warning labels. The plate has 2 tabs on the
top edge that are bent down at slightly more than 90°. When the
information plate is removed, these tabs can be inserted into 2
mating slots in the bottom-front edge of the control box, and the
plate will hang down, forming a lower front panel. (See Fig. 10.)
This is convenient where access to the controls is required while
the unit is operating. The information plate on the small size casing
completely covers the opening below the control box. On larger
models, the information plate may not cover the entire opening. In
this instance, the top cover can be removed and placed on its side
to cover the additional space.
Step 4—Control-Box Cover—Cube Products
This panel contains much of the same information as the informa-
tion plate mentioned previously, but is designed only to cover the
control box.
Step 5—Remove Top Cover—Cube Products
1. Turn off all power to outdoor and indoor units.
2. Remove 5 screws holding top cover to coil grille and coil tube
sheet.
3. Remove 2 screws holding control-box cover.
4. Remove 2 screws holding information plate.
5. Disconnect fan motor wires, cut any wire ties, and move wires
out of control box and through tube clamp on back of control
box.
6. Lift top cover from unit.
7. Reverse sequence for reassembly.
Step 6—Remove Fan-Motor Assembly—Cube Products
1. Perform items 1, 3, 4, and 5 above. (Note item 2 is not
required.)
2. Remove 4 screws holding wire basket to top cover.
3. Lift wire basket from unit.
4. Remove nuts holding fan motor to wire basket.
5. Remove motor and fan blade assembly.
6. Pull wires through wire raceway to change motor.
7. Reverse sequence for reassembly.
8. Prior to applying power, check that fan rotates freely.
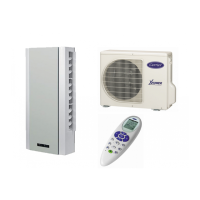
Fig. 7—Application with Air Conditioner or Heat Pump Installed Above Indoor Unit
A90077
HEAT PUMP ONLY
150' MAX.
11
 Loading...