6871082-R2 11
INSTALLATION
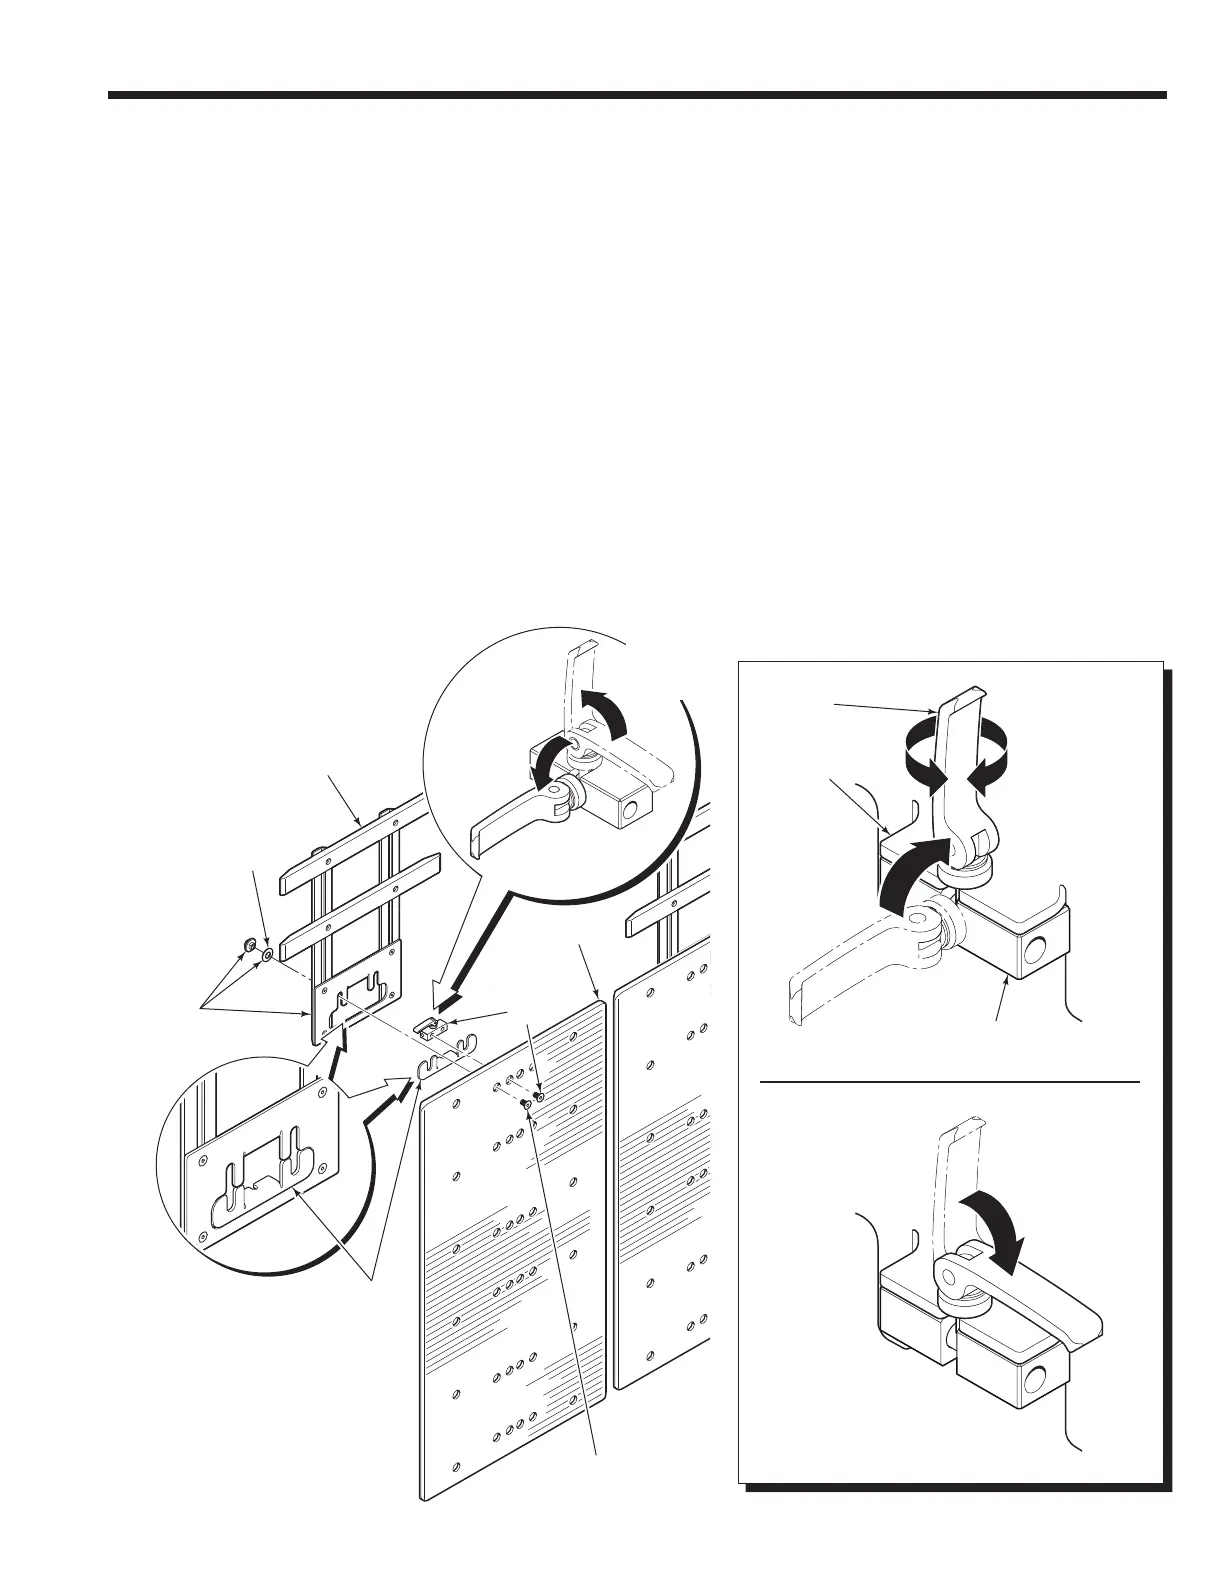
Attachments supplied with contact pad extensions are
installed as follows:
1 Install pivot block to contact pad. Tighten capscrews
to 66 ft.-lbs. (90 Nm).
2 Release lever on pivot block. Position the lever to the
front face of the pivot block.
3 Insert the lower lock plate into the pad extension.
4 Install pad extension to contact pad. Tighten
capscrews to 66 ft.-lbs. (90 Nm). The pad extension
lock flange should be flush with the top of the pivot
block.
5 Position the lever to the top face of the pad extension
lock flange.
6 Adjust the lock lever to firmly clamp the lock flange to
the pivot block when in the lock position.
7 Fully lock the lever by positioning the lever in the
downward position.
NOTE: The face of the pad extension should be flush with
the contact pad surface. Shim as required.
CONTACT PAD EXTENSION
CL5645.eps
4
6
7
4
3
1
2
5
Shim
Pad Extension
Contact Pad
Lever
Pivot Block
Pad Extension
Lock Flange
Lower
Lock
Plate
NOTE: If the pad extension
assembly is removed, install
the lower lock plate with the
pivot block.