May 2015 Page 9 of 51
5.1 Mounting the dBadge2
The recommended location for mounting a personal noise exposure meter is normally in a
position close to the ear (10-15cm). The dBadge2 should therefore be mounted on the apex of
the shoulder to avoid reflections from the head which might otherwise affect the
measurements. Consult your local Legislation and Standards for more information.
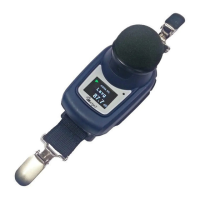
Upon delivery, the dBadge2 will be fitted with crocodile-style mounting clips on flexible
webbing to aid positioning. The clip assembly simply snaps in place but are designed to ‘fail
safe' i.e. the tab on the black plastic part that mates with the main body of the instrument has
to be lifted (pulled) to remove it (in normal use it would tend to be pressed/pushed).
Should the clip assembly require replacement, hold the dBadge2 with the back uppermost in
one hand and with the other hand simultaneously lift the tab with a finger whilst pulling the clip
away from the dBadge2 body. There is a knack to this operation to deter tampering. A pack of
spare clips (5 pairs) is available (part number DB2CLIPS). When refitting the clip assembly
ensure that the tab is locked by pushing it into place and pull on the clip assembly to check
that it is secured.
A pin attachment (part number CL63) is also available which can be secured directly via the
clip or be attached to the webbing.
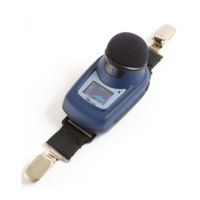
It is also possible to attach the dBadge2 to a harness (part number D8147/Z) by feeding the
harness though the blank webbing buckle clip fittings (part number 207073B). For any existing
harness that an employee might already be wearing, use the pin attachment. In addition, the
dBadge2 may be mounted to most hard hats using the mounting kit (part number CEL-6354)
 Loading...