— 7 —
6. Removal of keys
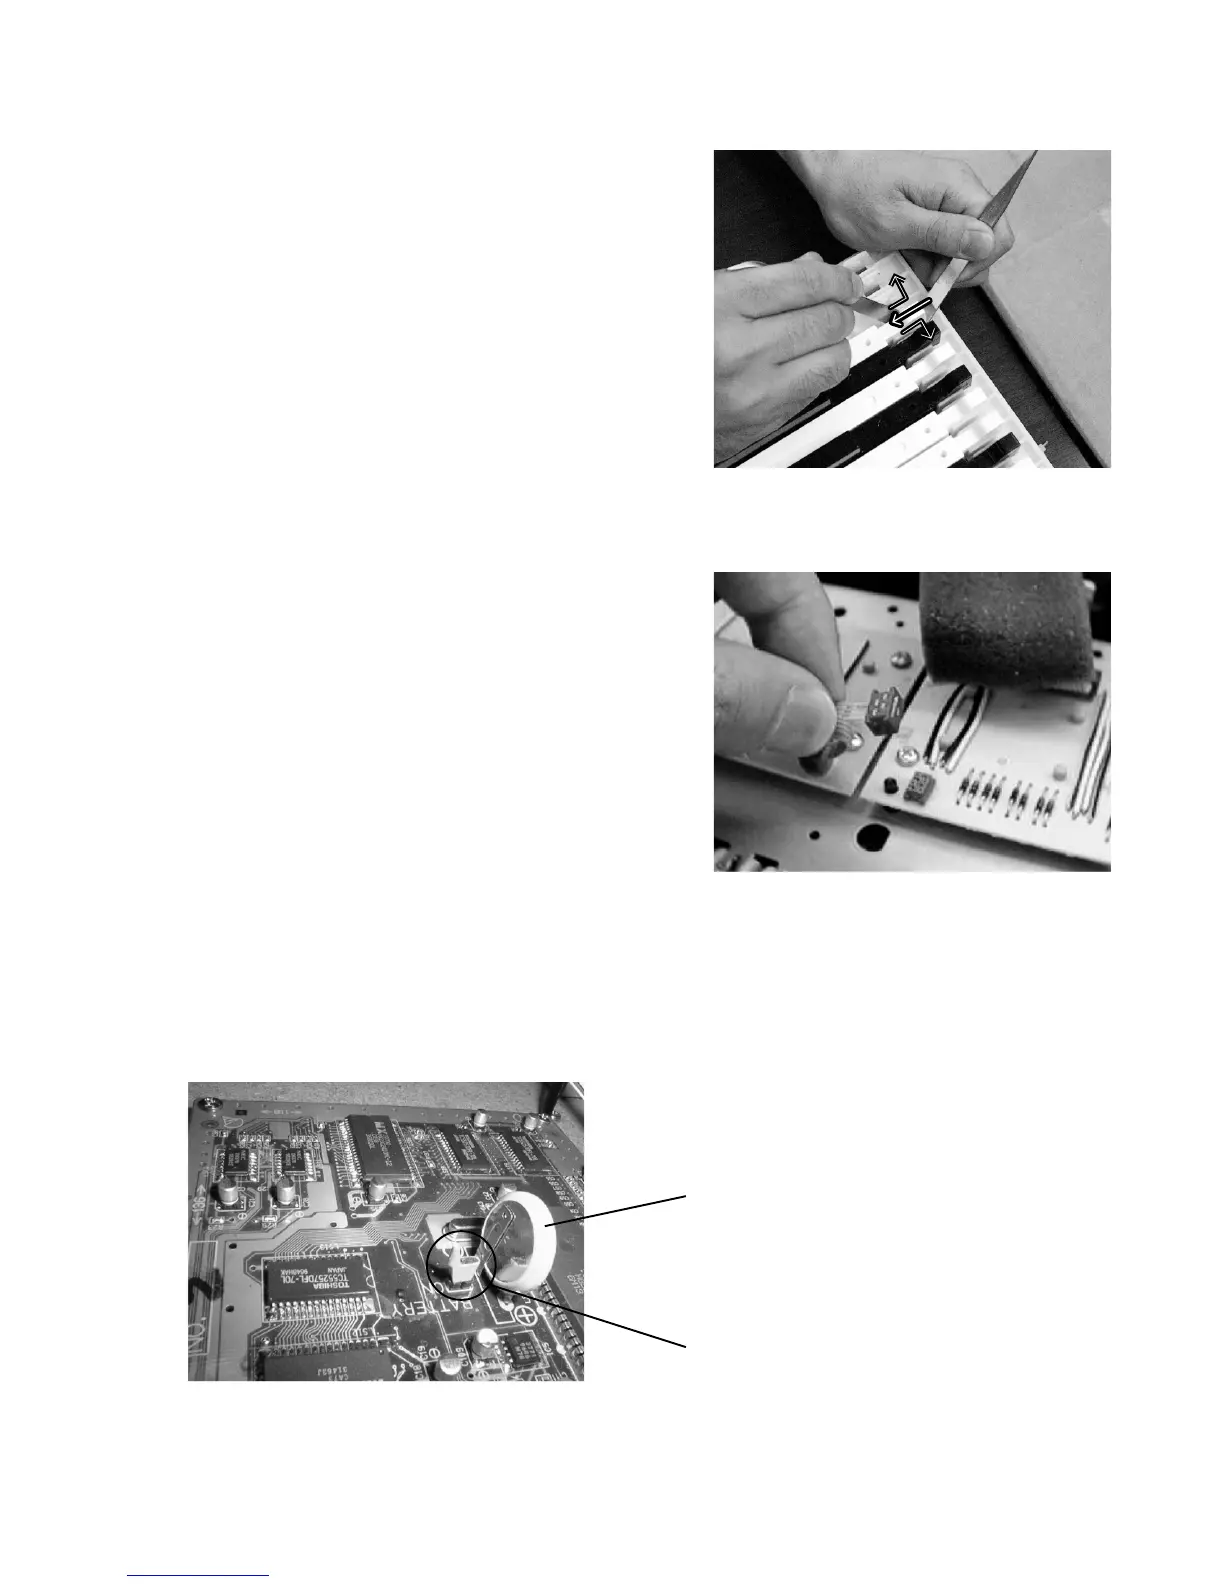
6-1. While plying the side partition plastics with tweezers, push
the edge of the key toward front.
7. Disassembling keyboard PCBs
7-1. Turn round the keyboard unit to face the PCB up.
7-2. Disconnect the connector at the middle of keyboard.
7-3. Remove screws on the keyboard PCBs.
8. Replacing the main PCB
Note: The main PCB contains a lithium battery for memory back-up. Please remove the jumper before replacing
the PCB. And make sure that the jumper is reset on new main PCB after replacing the PCB. Because no
jumper is set on a spare part of the main PCB.
Lithium battery
Jumper