3. Input the two digit number for the song you want to play.
_Q • Example: 18 "Stand By Me"
.oo.oo.
I
4. Press the START/STOP button to start play of the selected song.
_'_' * The song you select plays repeatedly, with the keyboard keys lighting
to indicate the melody notes.
5. To stop Song Bank tune play, press the START/STOP button again.
6. To exit the SONG Mode, press the SONG BANK button again.
• At this time the tone number or rhythm number appears on the dis-
play.
Notes
• Always enter two digits for the Song Bank number.
• You can input Song Bank tune numbers in the range of 00 to 39.
• You can input a Song Bank tune number even while another Song Bank tune is
playing.
• If you input the wrong first digit for a Song Bank tune number, you can return to
the previous setting by pressing the SONG BANK button.
• The RHYTHM button is disabled in the Song Bank Mode. If you want to play a
rhythm, press the SONG BANK button to return to the normal mode first.
Using the Three Step Lesson System with Song Bank Tunes
When you use a Song Bank Tune with melody guide, the Three Step Lesson System
teaches you which melody notes to play.
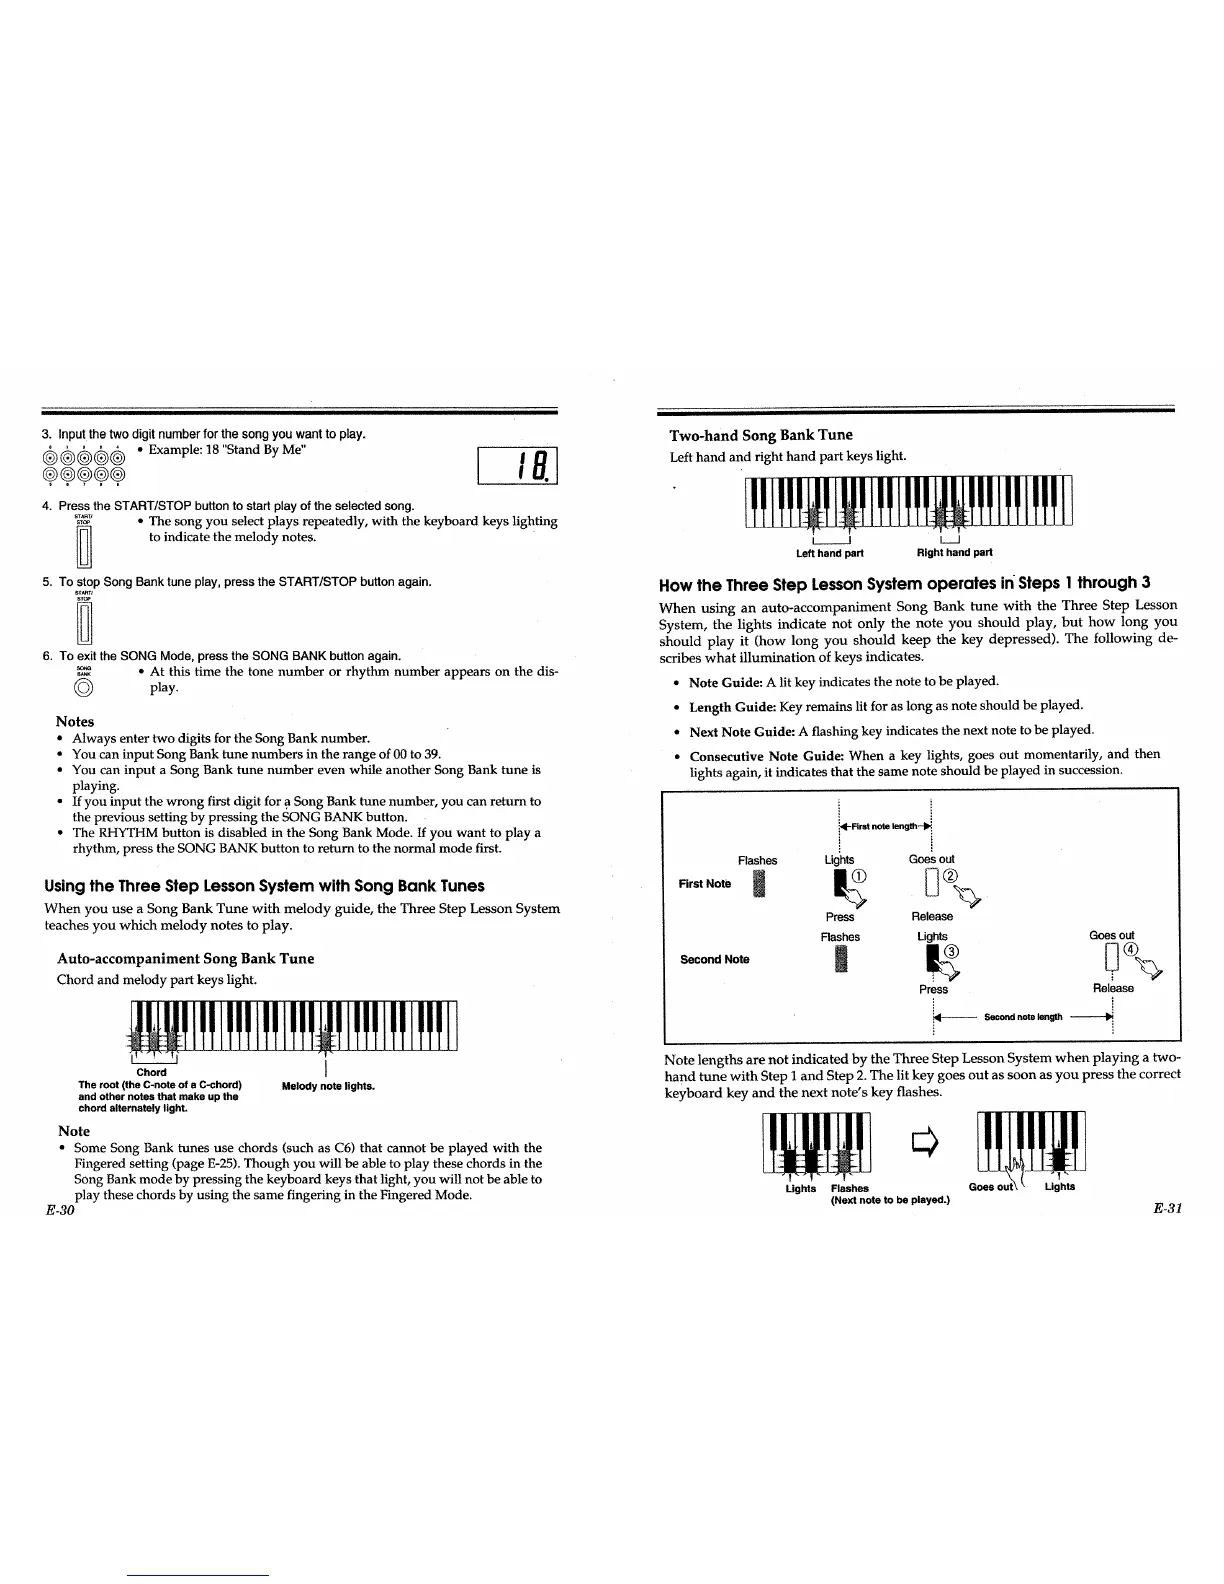
Auto-accompaniment Song Bank Tune
Chord and melody part keys light.
Chord I
The root (the C-note of a C-chord) Melody note lights.
and other notes that make up the
chord alternately light.
Note
• Some Song Bank tunes use chords (such as C6) that cannot be played with the
Fingered setting (page E-25). Though you will be able to play these chords in the
Song Bank mode by pressing the keyboard keys that light, you will not be able to
play these chords by using the same fingering in the Fingered Mode.
E-30
Two-hand Song Bank Tune
Left hand and right hand part keys light.
I__J L_J
Left hand part Right hand part
How the Three Step Lesson System operates in steps 1 through 3
When using an auto-accompaniment Song Bank tune with the Three Step Lesson
System, the lights indicate not only the note you should play, but how long you
should play it (how long you should keep the key depressed). The following de-
scribes what illumination of keys indicates.
• Note Guide: A lit key indicates the note to be played.
• Length Guide: Key remains lit for as long as note should be played.
• Next Note Guide: A flashing key indicates the next note to be played.
• Consecutive Note Guide: When a key lights, goes out momentarily, and then
lights again, it indicates that the same note should be played in succession.
Flashes
First Note
Second Note
idI-Rrst note length -_:
Lights Goesout
Press Release
Flashes Lights
Goes out
Press Release
i i
: i
Note lengths are not indicated by the Three Step Lesson System when playing a two-
hand tune with Step I and Step 2. The lit key goes out as soon as you press the correct
keyboard key and the next note's key flashes.
Lights Flashes
(Next note to be played.)
E-31