10
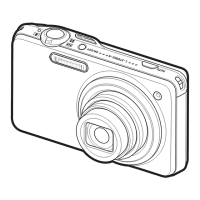
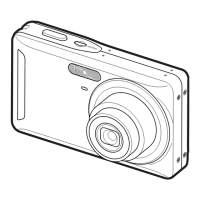
. Control Dial
In addition to using the up, down, left, and right buttons, you can also use the control
dial to perform operations.
• Depending on the function, certain operations cannot be performed using the
control dial.
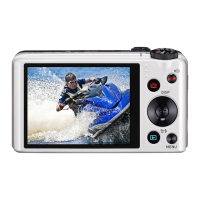
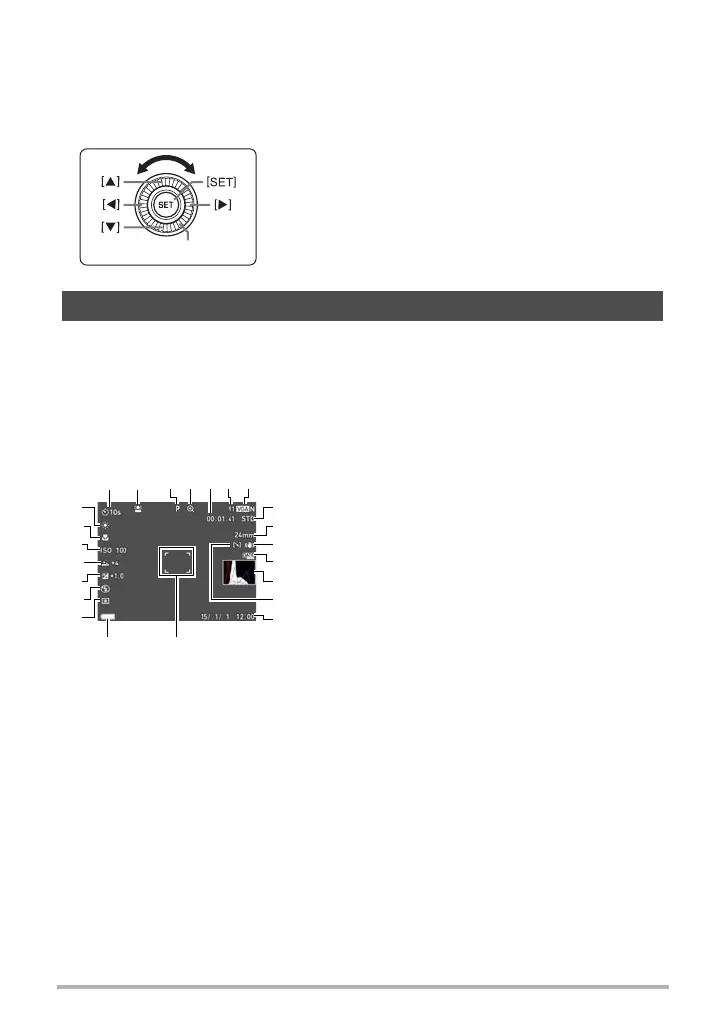
The monitor screen uses various indicators, icons, and values to keep you informed
of the camera’s status.
• The sample screens in this section are intended to show you the locations of all the
indicators and figures that can appear on the monitor screen in various modes.
They do not represent screens that actually appear on the camera.
. Snapshot Recording (1 Shot)
Monitor Screen Contents and How to Change Them
1
Self-timer mode (page 39)
2
Face Detection (page 102)
3
Recording mode (page 28)
4
Image deterioration indicator/
Zoom (SR) indicator (page 52)
5
Remaining movie memory
capacity (page 64)
6
Remaining snapshot memory capacity
(page 188)
7
Snapshot image size/Quality (pages 94, 96)
8
Movie quality (FHD/STD movie)
(pages 64, 67)/
Recording speed (high speed movie) (page 67)
9
Focal distance
(Converted to 35 mm film format.) (page 51)
bk
Anti Shake (page 100)
bl
Timestamp indicator (page 155)
bm
Histogram (page 179)
bn
AF Area (page 99)
bo
Date/Time (pages 21, 160)
bp
Focus frame (pages 29, 99)
bq
Battery level indicator (page 21)
br
Metering mode (page 49)
bs
Flash (page 47)
bt
Exposure compensation (page 46)
ck
Make-up level (page 45)
cl
ISO sensitivity (page 44)
cm
Focus mode (page 42)
cn
White balance (page 40)
[8] [2] [4] [6] : Press the applicable button (up, down, left, right).
Control dial
8
9
bk
bo
bl
bm
13567
bq
ck
bs
br
bt
cm
cn
cl
2
4
bn
bp
 Loading...