LK-127
– 11 –
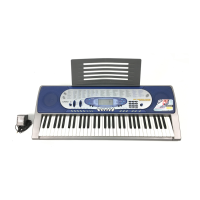
<Notes on Assembly>
• To install the MDA1 PCB, tighten the screws for the LCD part in the order shown in the right.
If not tighten correctly, it may cause the LCD display errors.
4
3
2
1
5
6
MDA1 PCB
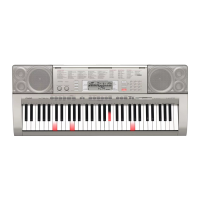
C. Remove the PCB UNIT/POWER & AMP
C-1. Unsolder two lead wires and one ribbon cable from the MDA1 PCB.
Lead wire (White)
Lead wire (Blue)
Ribbon cable (PSA1 PCB)
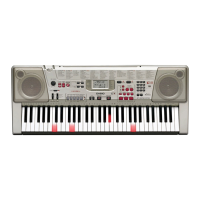
C-2. Unsolder two lead wires from the left speaker.
Lead wire (Blue)
Lead wire (White)

 Loading...